Search by Keyword
Product Categories
Site Map
 If you are allergic to cigarette smoke, you need not worry about one of our dresses smelling like cigarette smoke
|

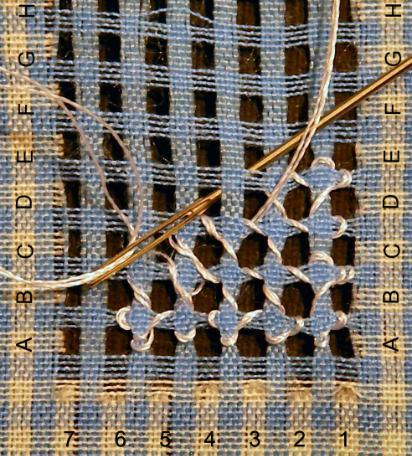
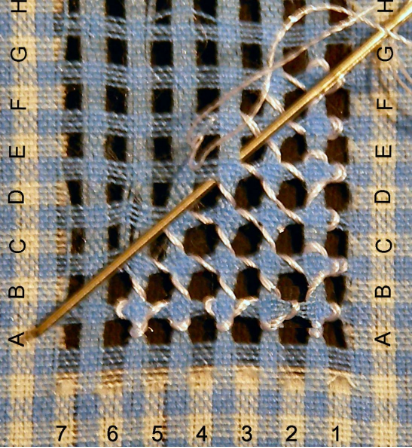
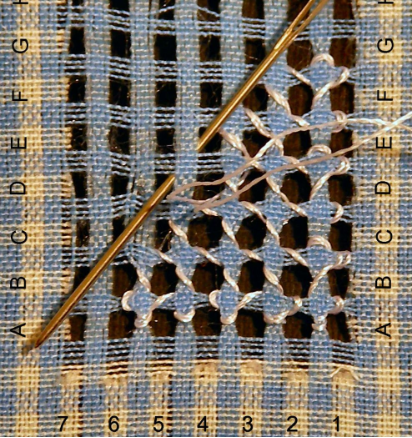
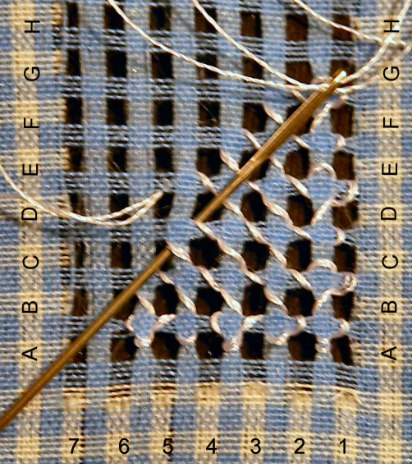
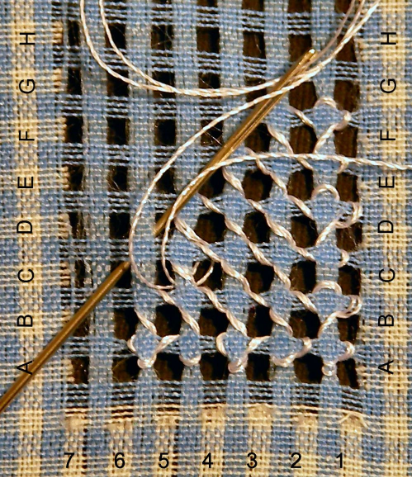
Step by step Drawn Work Lace tutorial

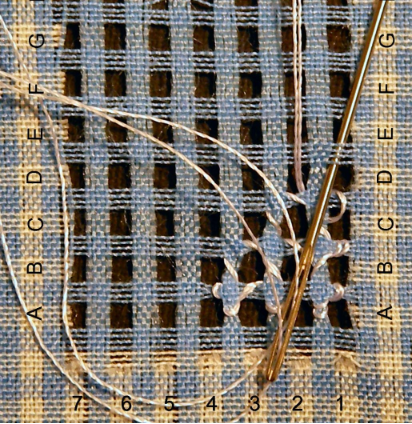
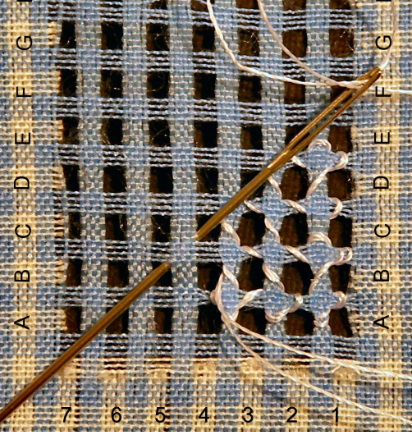
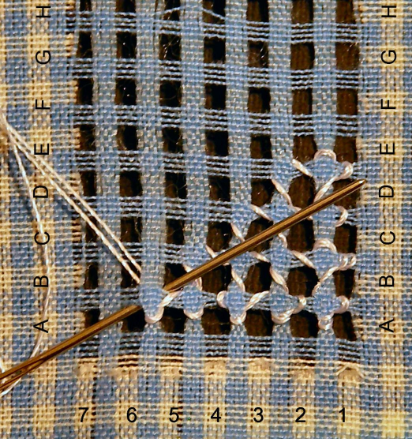
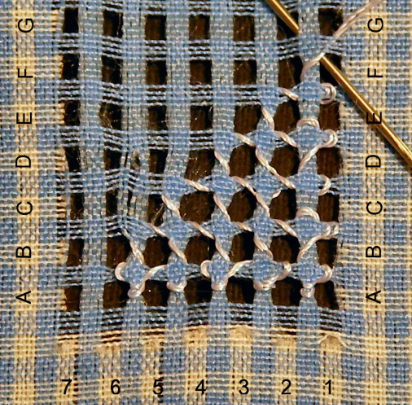
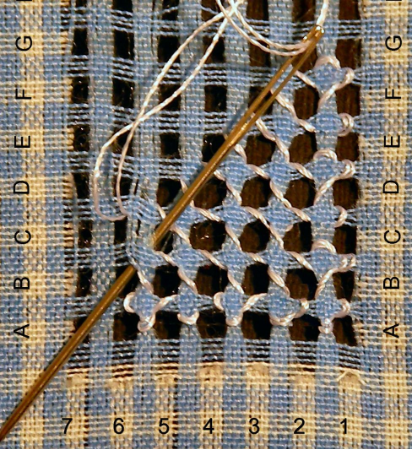
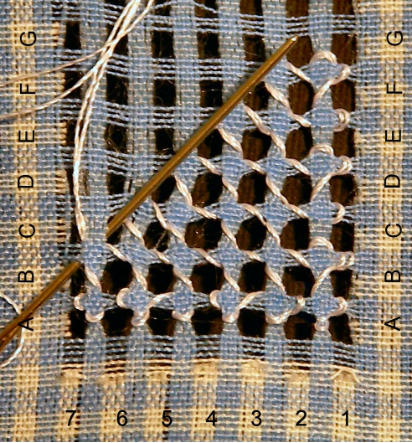
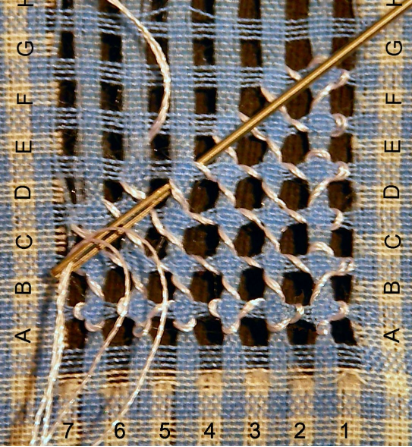
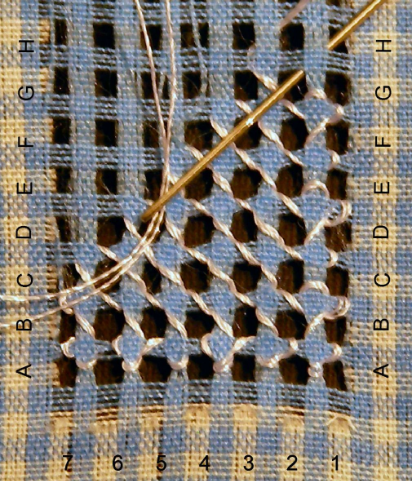
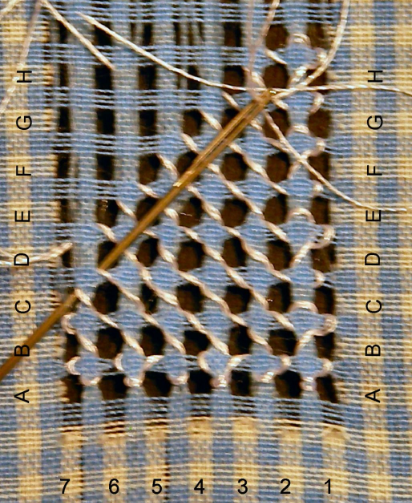
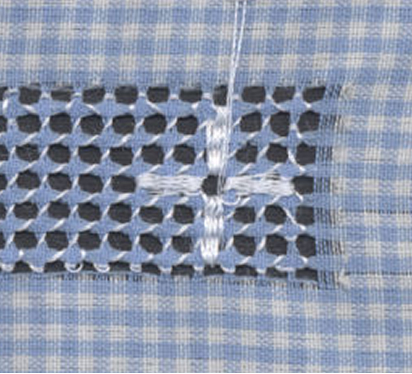
This example shows drawn work on a rectangle of polyester/cotton blend gingham fabric of 16 checks per inch. The rectangle is to be used as a yoke for a little girls dress. Click on each image to see the details.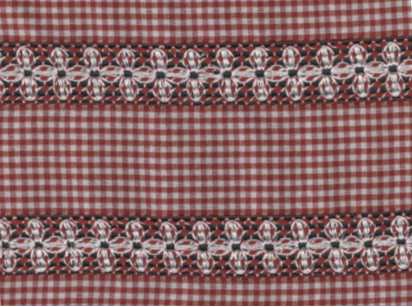
The open spaces that give drawn thread work its characteristic lacy appearance are formed by removing some of the woven threads that make up the fabric. For the each band of lace work, the design uses 13 rows of checks. After laying out the lace foundation or background; the band is decorated with a regular pattern such as the flowers in this example.
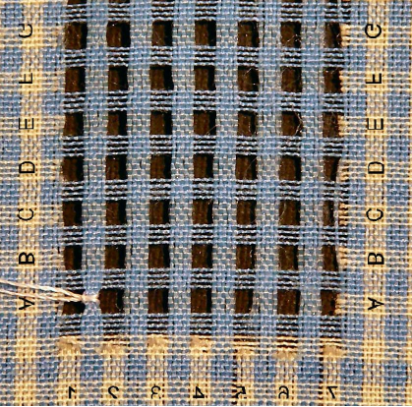
Using sharp, small scissors, such as 3.5" Dovo, start by cutting a slit right at the white over white square corner and about six (6) rows of checks up on the rectangle. This slit is to be cut only at the white on white check four (4) corners of the 13 rows band. Fold the fabric over the blade of the scissors to facilitate the view of the white horizontal threads. The other than white threads (in this example blue threads) are not to be cut for any reason. With this weave, it is relatively easy to draw out the horizontal white threads. Use a pair of tweezers and take the white threads out. The 13 rows band is now missing two (2) horizontal white rows, one at the top and one at the bottom. Carefully cut every white threads on every white over white square row and remove the vertical threads using the pair of tweezers. Now pull the short vertical white threads on the 13 rows band. This leaves a net of blue over blue squares of thread. This thread pulling takes some time.
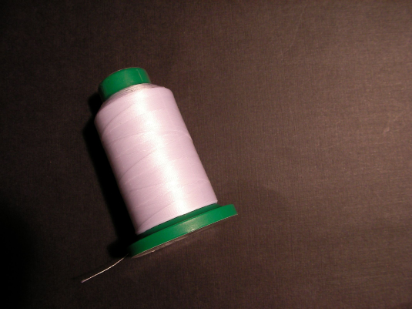 In this example we used white weight 40 polyester thread. If the sheen of the polyester thread is not desirable DMC white #5 white perle cotton is a good choice. Other suitable threads for this cut-work are coton a broder, perle cotton #8 and # 12, cordonnet, cebelia, floche, Mountmellick, and some silks such as soie 100/3, soie perlee, soie gobelin, and soie d'alger.Working in hand with no hoop or frame (such as a Q-snap frame or a Evertite stretcher bar frame) is optional although the use of a hoop adds a little bit of tension and it makes a difference as the stitches are more uniform specially when using polyester thread. The lace work may be worked in hand, without a hoop or frame, in particular, when using cotton thread.
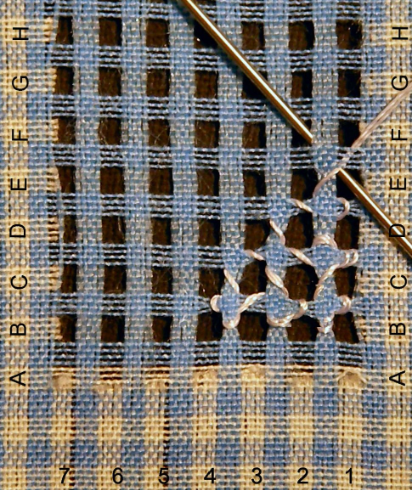
The direction of the work shown here is from right to left and from bottom to top.
There are many different types of needles to use when stitching the lace. Quality and size vary greatly, so try several different needles to find which one you are most comfortable using. This drawn work does not need a particular type of needle as the type of needle is not essential. We have chosen to use a cross-stitch needle as this needle is blunt.
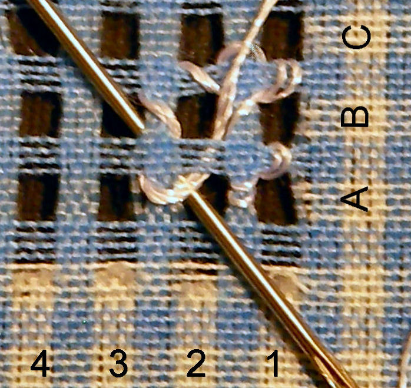
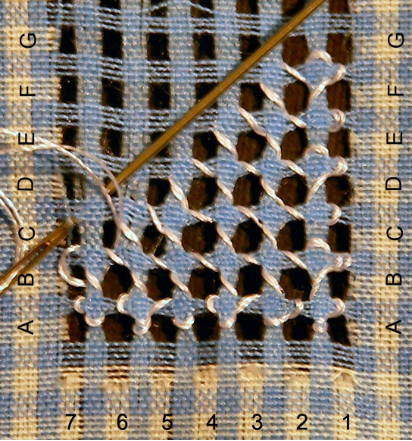
 Match the two (2) ends of a length of thread of about 28 inches and thread the needle using the two (2) ends so that the thread makes a loop at the other end. With the wrong side of the fabric facing, anchor the thread on the first group of threads by inserting the needle in 2A and bringing it up in 1A. Then slide the eye of the needle through the loop. Pull the thread a little bit to place a little tension. Use this procedure each time a new thread length is needed. The lace foundation is going to be embroidered using double thread.
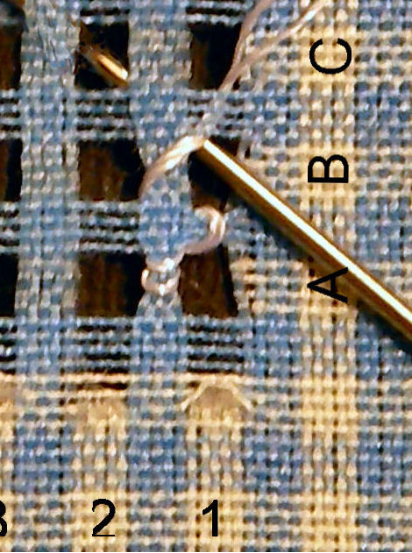
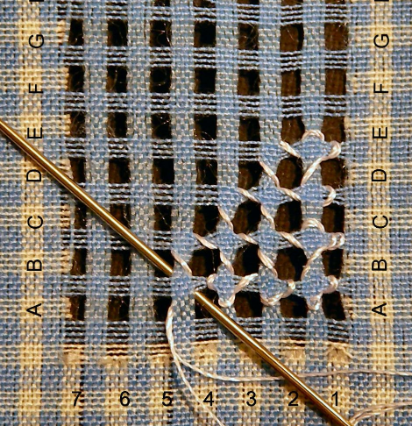
With the right side of the fabric facing, bring the lacing thread out at B1. 
Take the needle down at A1, then upward at B2. 
Take the needle down at B1, then upward at C1. 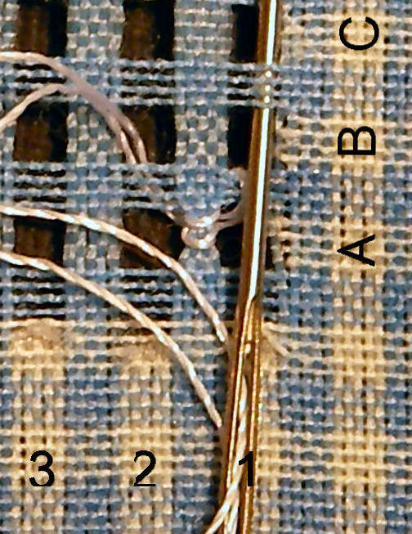
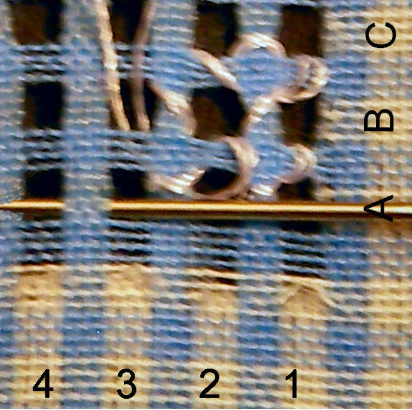
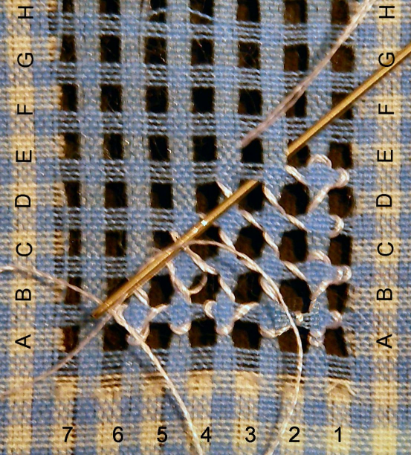
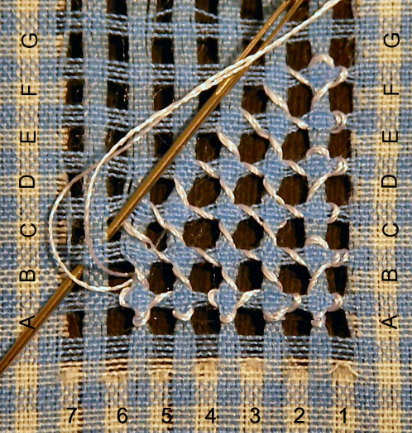
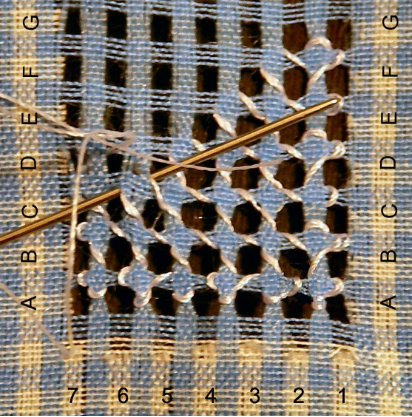
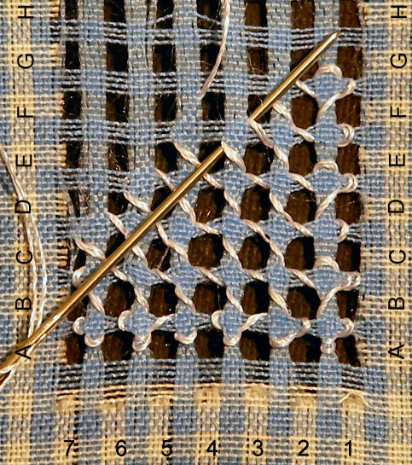
After this follow the sequence described in the following table.
|
IN |
OUT |
|
|
B1 |
C2 |
 |
|
C1 |
B2 |
 |
|
C2 |
B3 |
 |
|
B2 |
A3 |
 |
|
A2 |
B2 |
 |
|
A2 |
B3 |
 |
|
A3 |
A4 |
 |
|
A3 |
B4 |
 |
|
A4 |
B3 |
 |
|
B4 |
C3 |
 |
|
B3 |
C2 |
 |
|
C3 |
D2 |
 |
|
C2 |
D1 |
 |
|
C1 |
D2 |
 |
|
D1 |
E1 |
 |
|
D1 |
E2 |
 |
|
E1 |
D2 |
 |
|
E2 |
D3 |
 |
|
D2 |
C3 |
 |
|
D3 |
C4 |
 |
|
C3 |
B4 |
 |
|
C4 |
B5 |
 |
|
B4 |
A5 |
 |
|
A4 |
B5 |
 |
|
A5 |
A6 |
 |
|
A5 |
B6 |
 |
|
A6 |
B5 |
 |
|
B6 |
C5 |
 |
|
B5 |
C4 |
 |
|
C5 |
D4 |
 |
|
C4 |
D3 |
 |
|
D4 |
E3 |
 |
|
D3 |
E2 |
 |
|
E3 |
F2 |
 |
|
E2 |
F1 |
 |
|
E1 |
F2 |
 |
|
F1 |
G1 |
 |
|
F1 |
G2 |
 |
|
G1 |
F2 |
 |
|
G2 |
F3 |
 |
|
F2 |
E3 |
 |
|
F3 |
E4 |
 |
|
E3 |
D4 |
 |
|
E4 |
D5 |
 |
|
D4 |
C5 |
 |
|
D5 |
C6 |
 |
|
C5 |
B6 |
 |
|
C6 |
B7 |
 |
|
B6 |
A7 |
 |
|
A6 |
B7 |
 |
|
A7 |
|
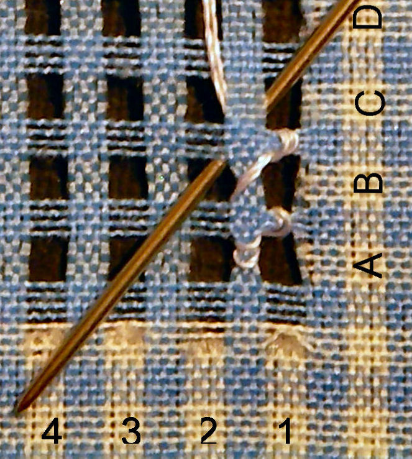
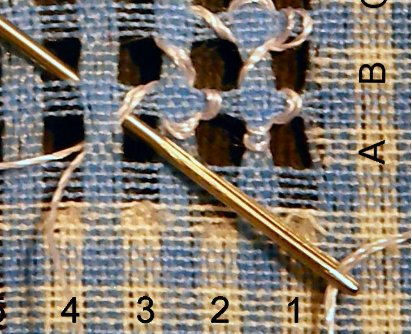
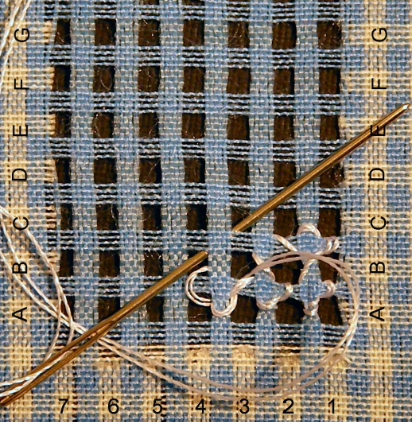
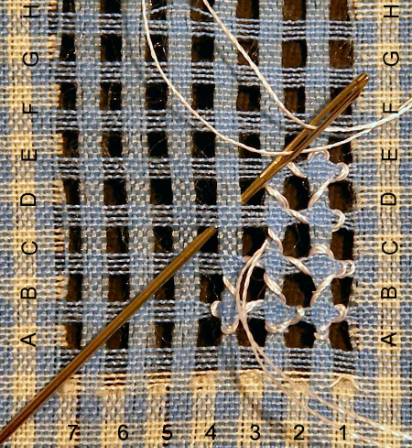
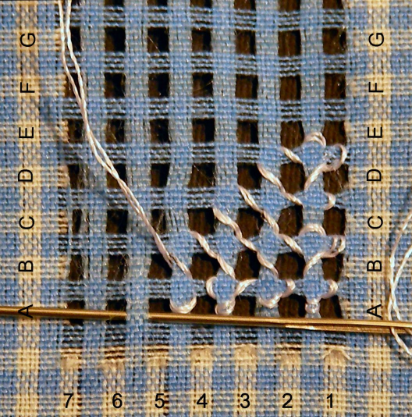
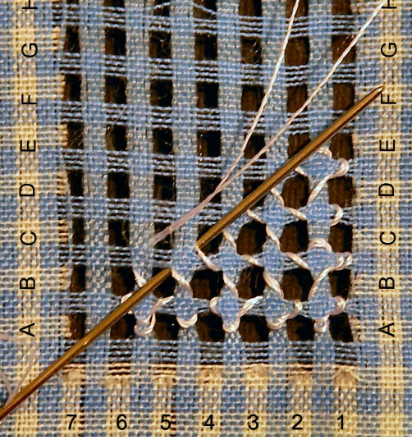
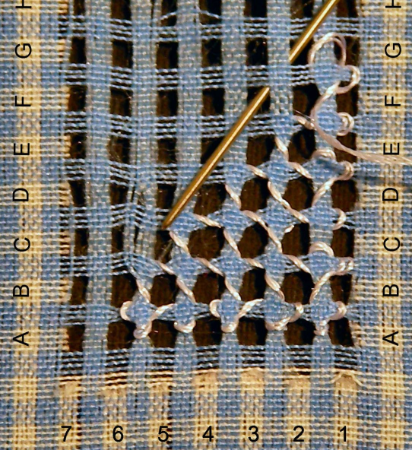
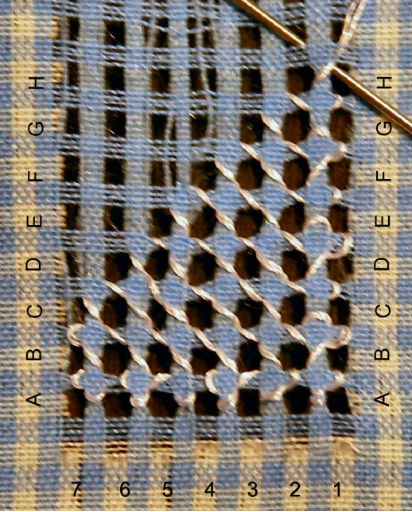
 Turn the fabric to the wrong side. Wrap the thread over and under the needle from left to right. Insert the needle under the stitch on the right side, that is, the stitch done entering the needle at B6 and out at B7. Bring the needle out at C7. This will bring the needle from A7 to C7.
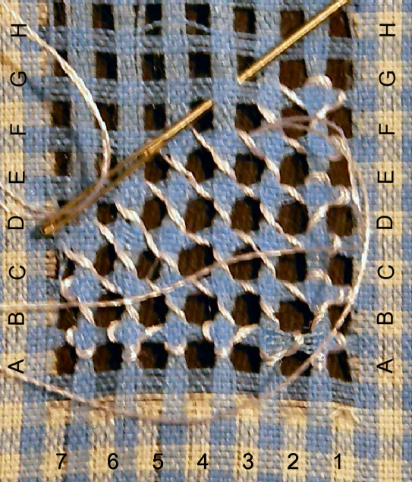
This is done to hide the white thread from view, otherwise the lace thread will show across the hole left when the white threads were removed from the fabric. With the right side of the fabric facing do the following sequence.
|
IN |
OUT |
|
|
|
C7 |
|
|
B7 |
C6 |
 |
|
C7 |
D6 |
 |
|
C6 |
D5 |
 |
|
D6 |
E5 |
 |
|
D5 |
E4 |
 |
|
E5 |
F4 |
 |
|
E4 |
F3 |
 |
|
F4 |
G3 |
 |
|
F3 |
G2 |
 |
|
G3 |
H2 |
 |
|
G2 |
H1 |
 |
|
G1 |
H2 |
 |
|
H1 |
I1 |
|
|
H1 |
I2 |
 |
|
I1 |
H2 |
 |
|
I2 |
H3 |
|
|
H2 |
G3 |
|
|
H3 |
G4 |
|
|
G3 |
F4 |
|
|
G4 |
F5 |
|
|
F4 |
E5 |
|
|
F5 |
E6 |
|
|
E5 |
D6 |
|
|
E6 |
D7 |
 |
|
D6 |
C7 |
 |
|
D7 |
|
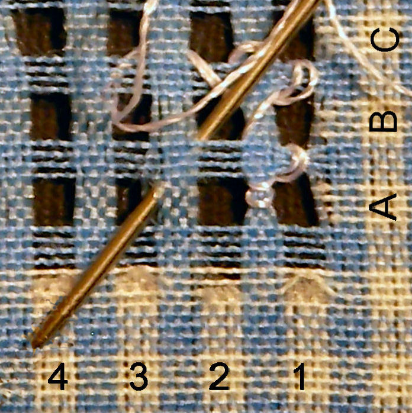
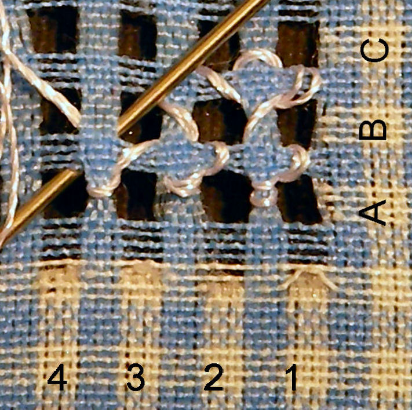
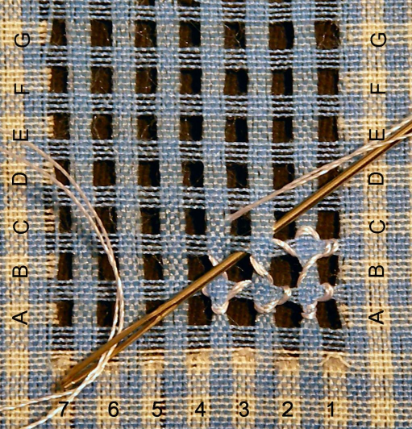
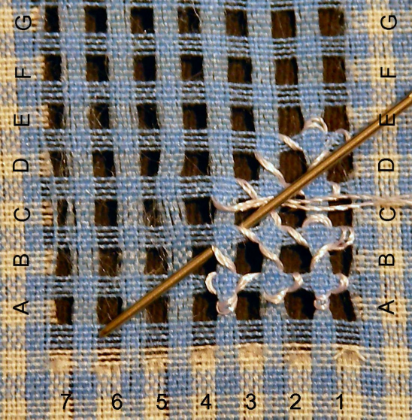
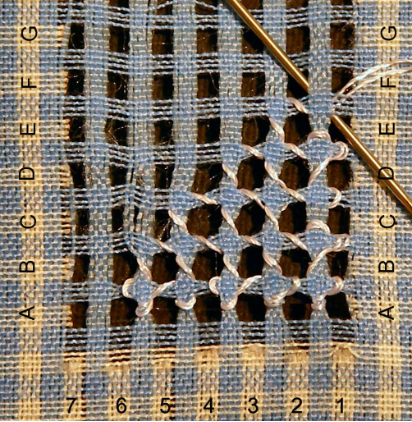
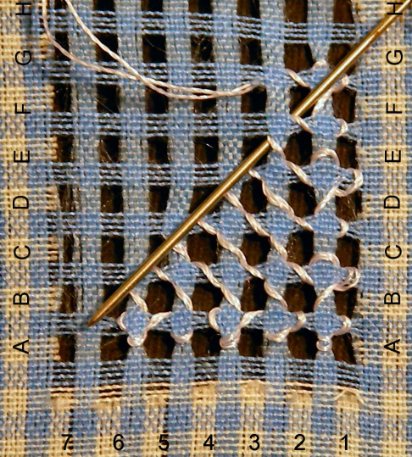
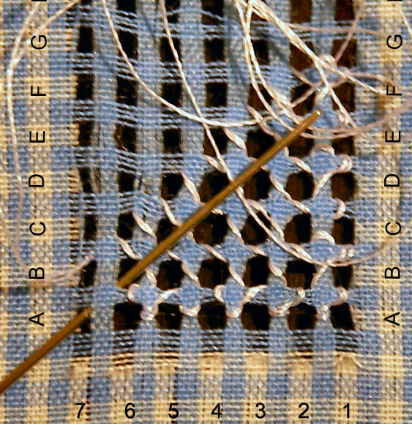
Turn the fabric to the wrong side. Wrap the thread over and under the needle from left to right. Insert the needle under the stitch on the right side, that is, the stitch done entering the needle at C6 and out at D7.  Bring the needle out at E7. This will bring the needle from D7 to E7.
Later the same sequence of stitches will bring the thread from F7 to G7, From H7 to I7 and so on.
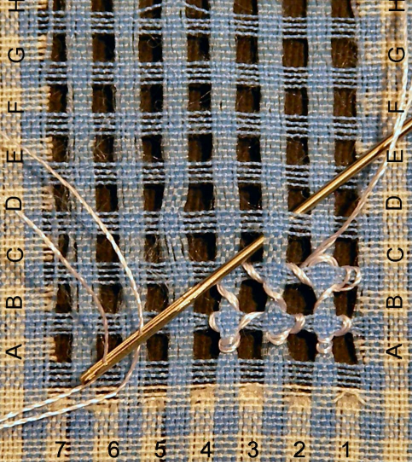
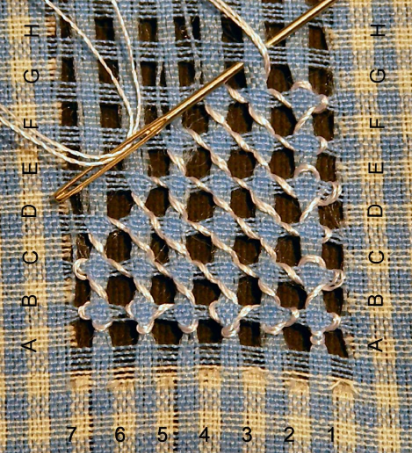
Continue waving the thread under and over in the same way to complete.
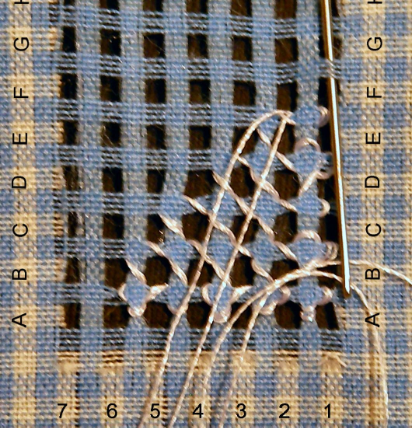
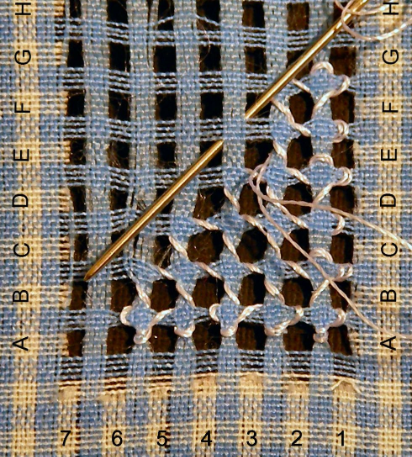
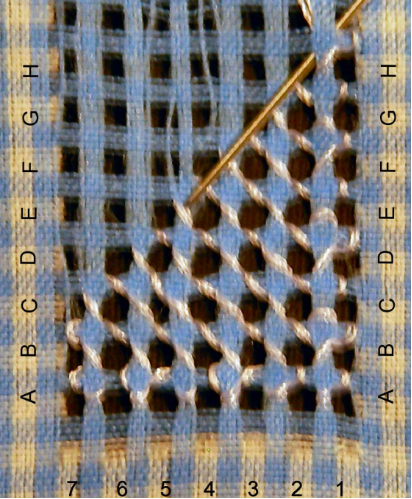
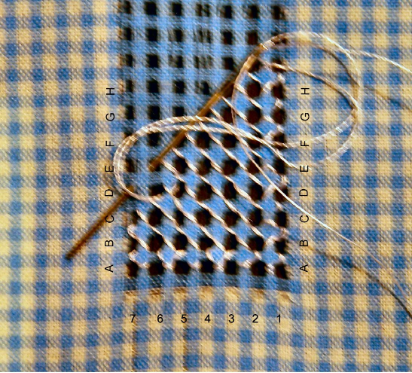
To fasten off the thread take the needle through to the wrong side of the fabric and turn the work over. Pass the needle under the loops at the back of the final few stitches for a length of about one (1) inch, then clip the end of the thread close to the fabric surface.
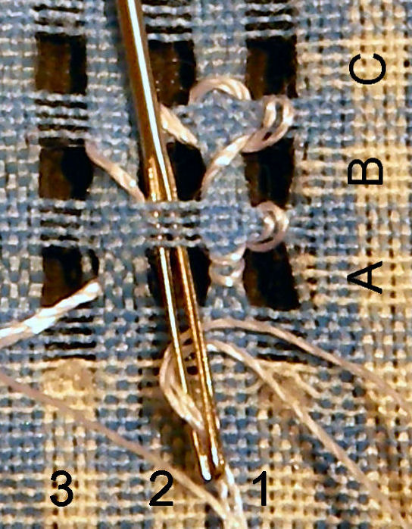
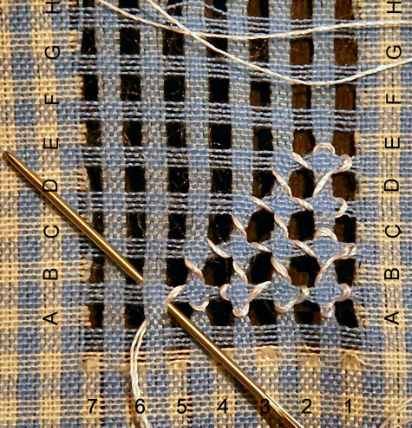
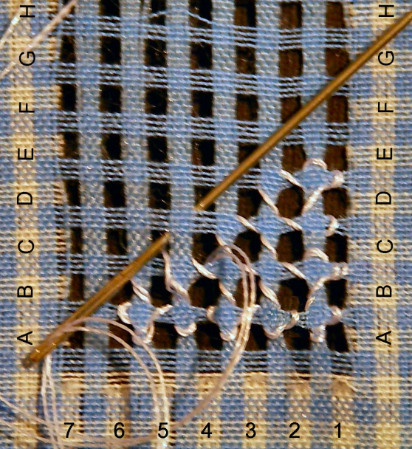
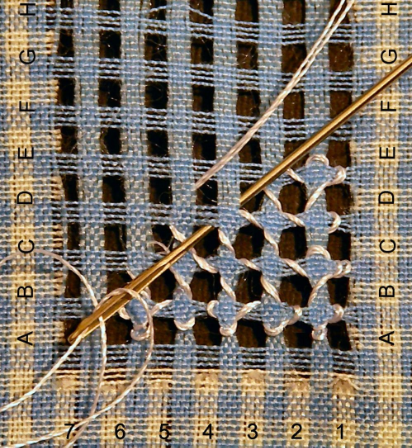
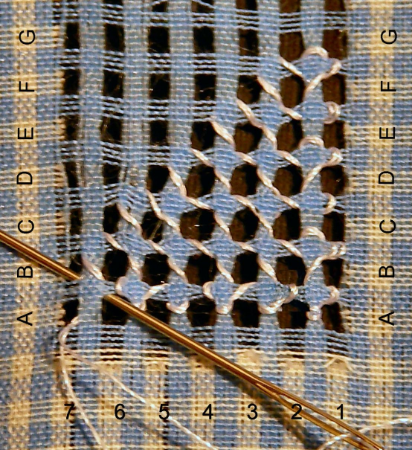
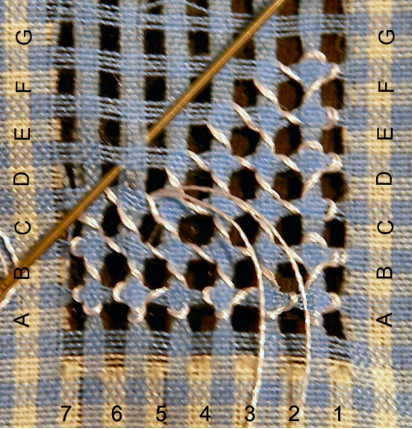
Flowers: Using the same method as before, anchor the thread in the center D4 and do the following sequence.
|
IN |
OUT |
|
D3 |
D2 |
|
D1 |
D2 |
|
D3 |
D4 |
Repeat the previous sequence three (3) more times. Then do the following sequence.
|
IN |
OUT |
|
F4 |
G4 |
|
H4 |
G4 |
|
F4 |
D4 |
Repeat the previous sequence three (3) more times. Then do the following sequence.
|
IN |
OUT |
|
D5 |
D6 |
|
D7 |
D6 |
|
D5 |
D4 |
Repeat the previous sequence three (3) more times. Then do the following sequence.
|
IN |
OUT |
|
C4 |
B4 |
|
A4 |
B4 |
|
C4 |
D4 |
Stitch around the previous cross doing the following sequence.
|
IN |
OUT |
|
|
C5 |
C6 |
|
|
D7 |
E7 |
|
|
E6 |
E5 |
 |
|
D4 |
E5 |
|
|
F5 |
G5 |
|
|
G4 |
F3 |
|
|
E3 |
D4 |
|
|
E3 |
E2 |
|
|
E1 |
D1 |
|
|
C2 |
C3 |
|
|
D4 |
C3 |
|
|
B3 |
A4 |
|
|
A5 |
B5 |
|
|
C5 |
D4 |
|
|
C5 |
C6 |
|
|
D7 |
E7 |
|
|
E6 |
E5 |
|
|
D4 |
Go around once more alternating stitches.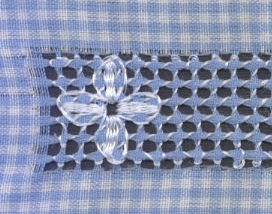
Shopping Basket
| Items: | 0 |
| Subtotal: | $0.00 |
Specials
Your Pictures Wanted
of your child wearing an item sold
by Bumba Bella and allow us to use
the picture on our web site, we will
give you a REFUND of 25% credited
on the credit card you used to
purchase the item.
CLICK HERE FOR UPLOAD FORM