Search by Keyword
Product Categories
Site Map
 If you are allergic to cigarette smoke, you need not worry about one of our dresses smelling like cigarette smoke
|

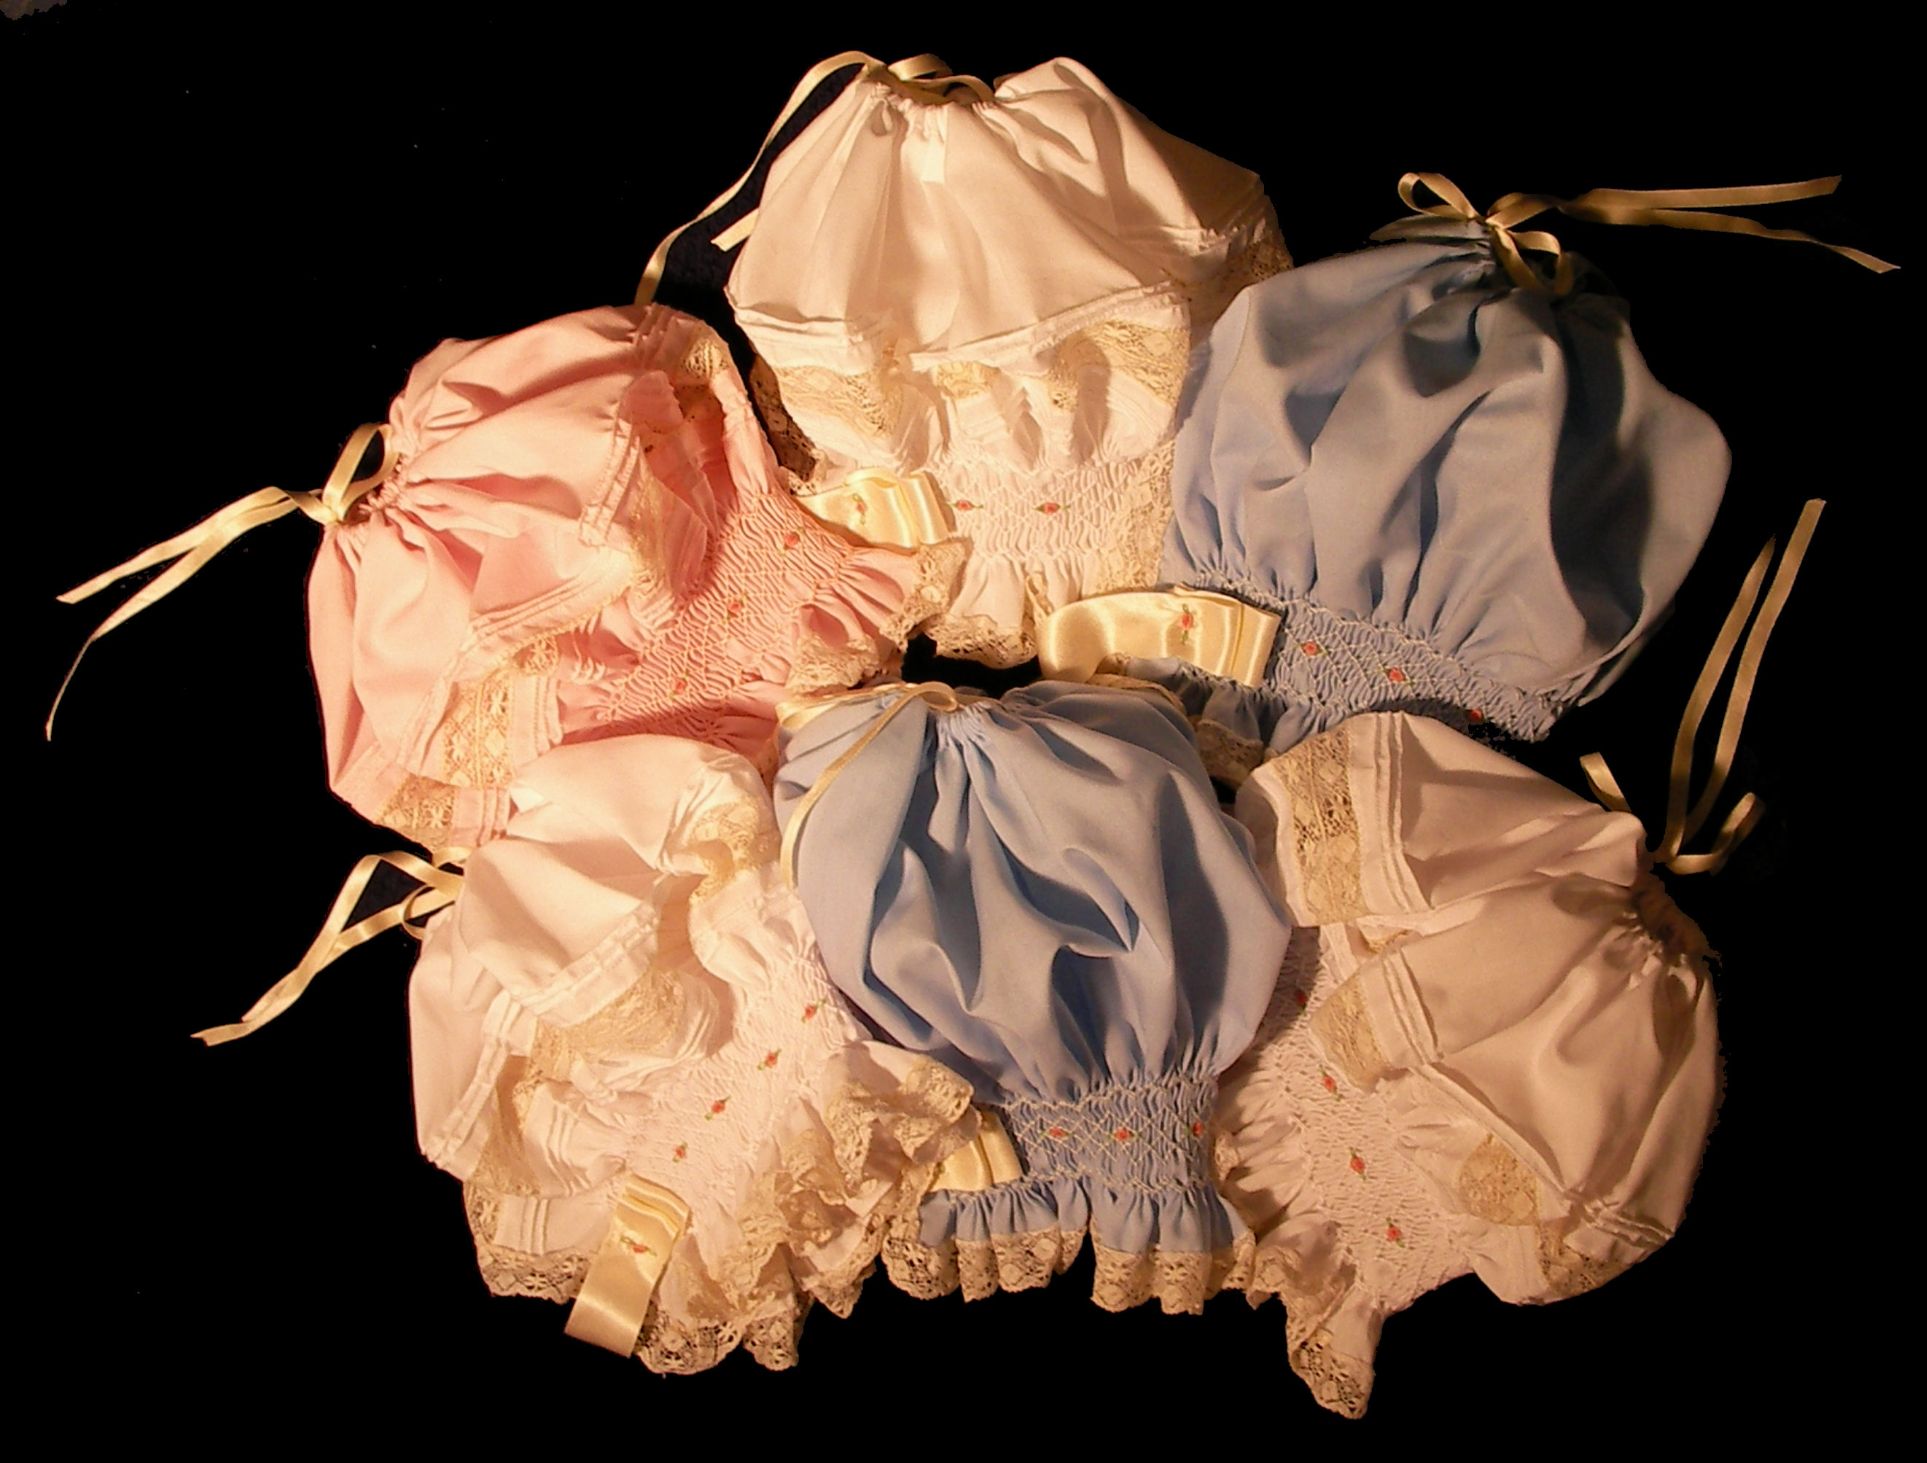
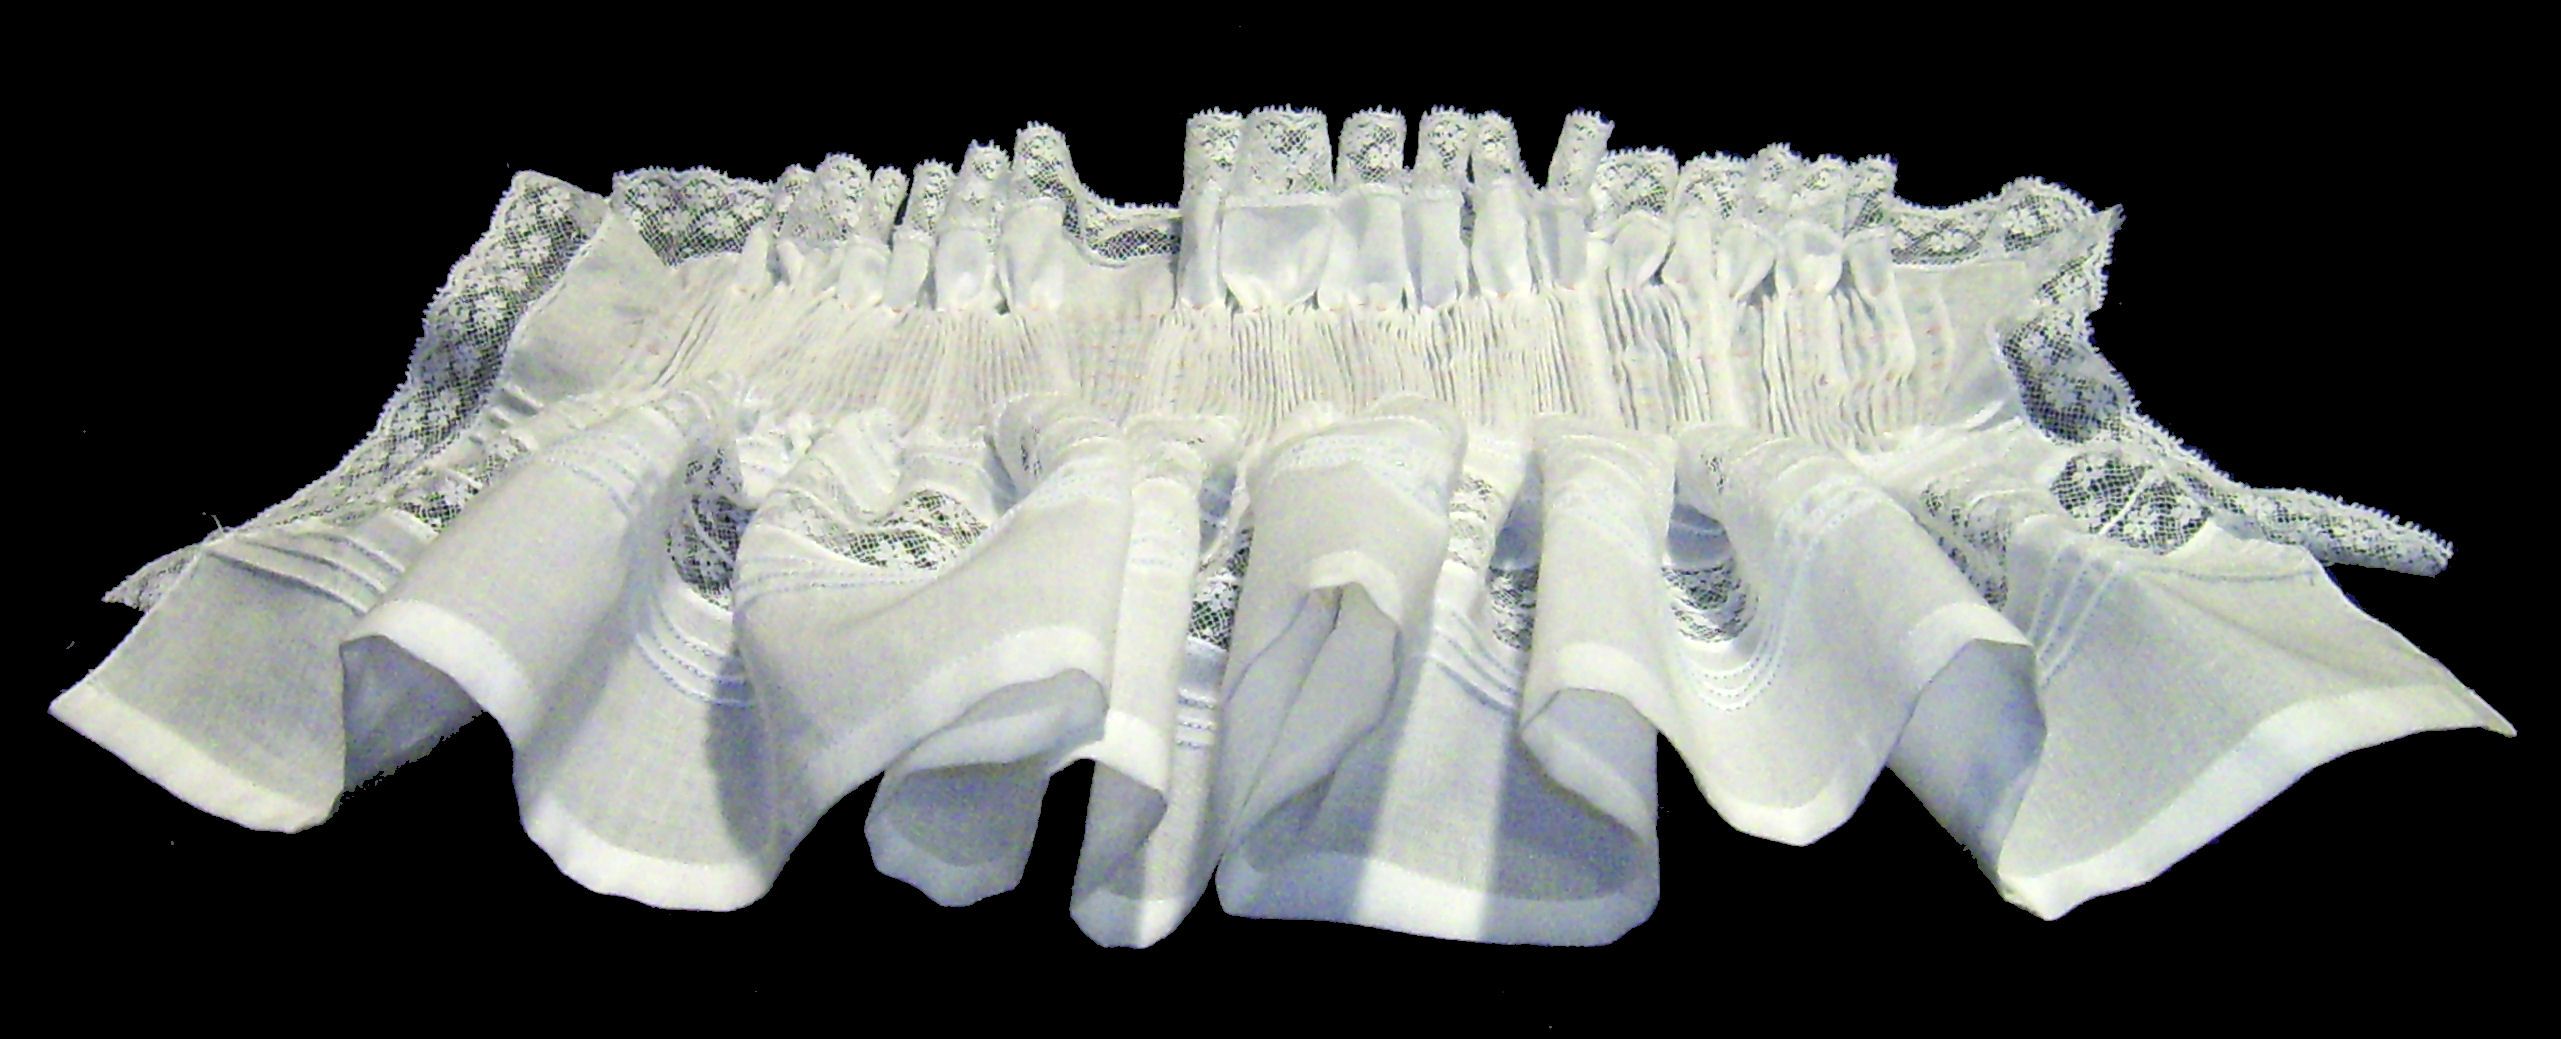
Instructions for making a hand smocked baby's bonnet
 How
To Make a Hand Smocked Baby's Bonnet
How
To Make a Hand Smocked Baby's Bonnet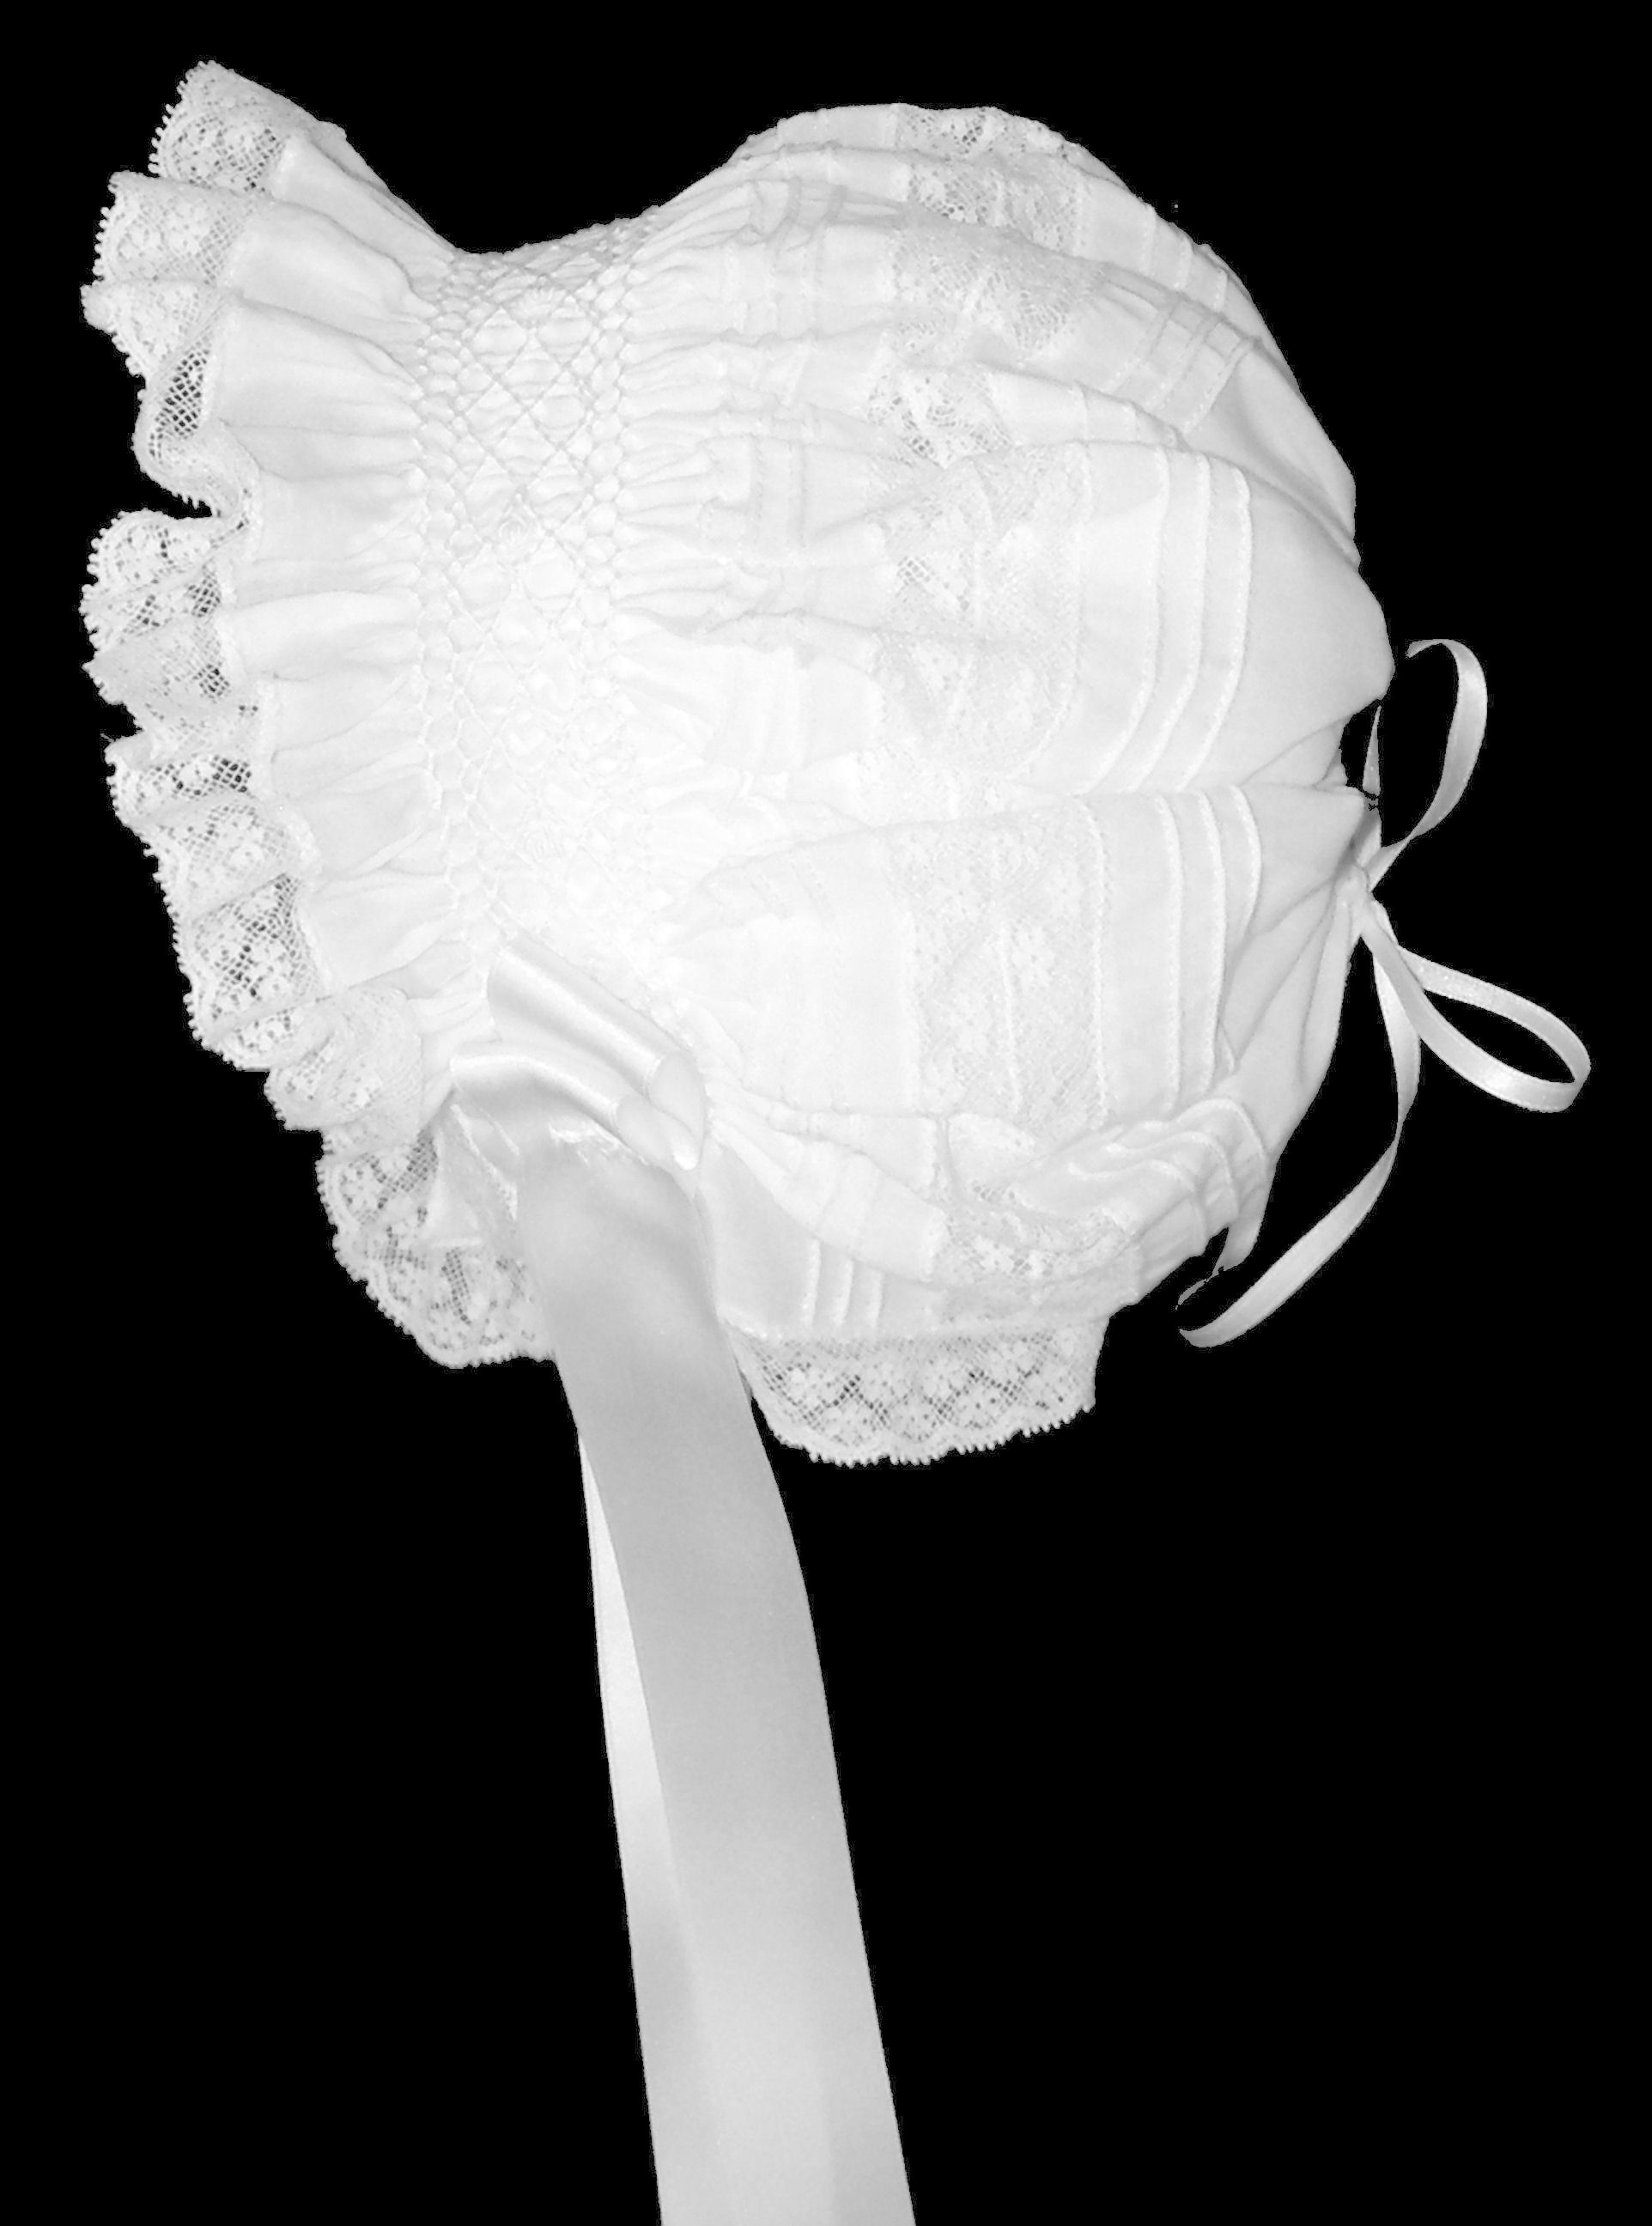
These instructions apply to the baby bonnet sizes shown in the following table. For these sizes, the best results are obtained using fabric of approximately 44” (112 cm) wide, from selvage to selvage.
|
Size |
Description |
Length (inches) |
Length (cm) |
Blocking length (inches) |
Blocking length (cm) |
|
Extra extra small |
Preemie |
7 |
18 |
10 |
25 |
|
Extra small |
New born |
7 ½ |
19 |
10 ½ |
27 |
|
Small |
6 months |
8 |
20 |
11 |
28 |
|
Medium |
12 months |
8 ½ |
22 |
11 ½ |
29 |
|
Large |
18 months |
9 |
23 |
12 |
30 |
|
Extra large |
2 Toddler |
9 ½ |
24 |
12 ½ |
32 |
|
Extra extra large |
3 Toddler |
10 |
25 |
13 |
33 |
Note: The different lengths of the baby bonnets vary in ½” increments from size to size. The preceding table also shows the approximate length of the smocked area's blocking length as measured from ear lobe to ear lobe over the top of the head. This length differs also in ½” increments from size to size. Add ½” for larger or subtract ½” for smaller size.
 What
is Needed
What
is Needed
44” (112 cm) wide fabric (the length depending on
the size
shown in the preceding table)
1 ¾ yds (152 cm) 1” (2.5 cm) wide edging lace
1 ¼ yds (114 cm) 1” (2.5 cm) wide
insertion lace
1 1/8 yds (103 cm) 1” (2.5 cm) wide double sided pure silk
satin
ribbon
¾ yd (61 cm) 1/8” (3 mm) wide double sided pure silk satin ribbon
3.5” (9 cm) piece of entredusx
Hand quilting thread in two (2) contrasting
colors such as orange and blue.
Smocking pattern of choice
Cotton darner needles for the hand smocking
Water soluble marker
Scissors
Measuring tape
Ruler (optional)
Rotary cutter (optional)
Milliner needles (for bullion knots stitches, recommended)
Sewing machine, Sewing machine needles (suggested universal
70/10), Zigzag foot
Double (twin) needles (2/80 for pintucks, optional)
Pintucks cord (for pintucks, optional)
Fine machine thread
Fine machine embroidery thread (100 % cotton recommended for
the pintucks)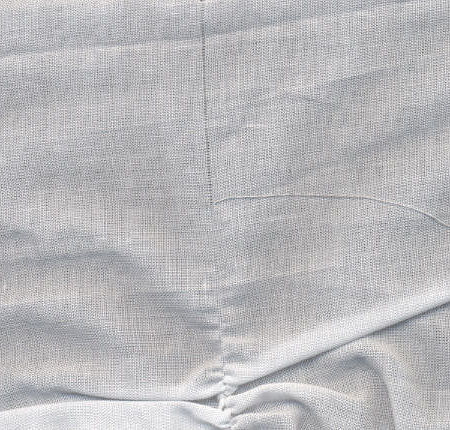
DMC floss (for the smocking pattern and smocking embroidered enhancement)
Preparing the Fabric
Straighten the edge of the fabric by pulling a thread along the width and then cutting along the line marked by the pulled thread.
You want a rectangle that is the width of the fabric (usually 44” [112 cm]) by the "length" as shown in the third column of the preceding table.
In these instructions the 44” width is used although the Superfina fabric is 38” wide and the Nelona fabric is 55” wide.
The following instructions will not change with the different sizes of bonnet.
The edge that is going to be pleated is one (1) of the 44” long edges. The other 44” long side is the crown edge.
The narrow edges of the rectangle are to be part of the bonnet's neckline.
In addition, the pleating is going to occupy approximately 2” (5 cm) and the pleating is going to be done about 1” (2.5 cm) from the long edge.
Spray the piece with heavy starch in
preparation for pleating. While the cloth dries prepare the threads for
pleating. The piece may be also dried by pressing.
CLICK ON ANY OF THE FOLLOWING PICTURES TO SEE A 'CLOSE UP VIEW'.
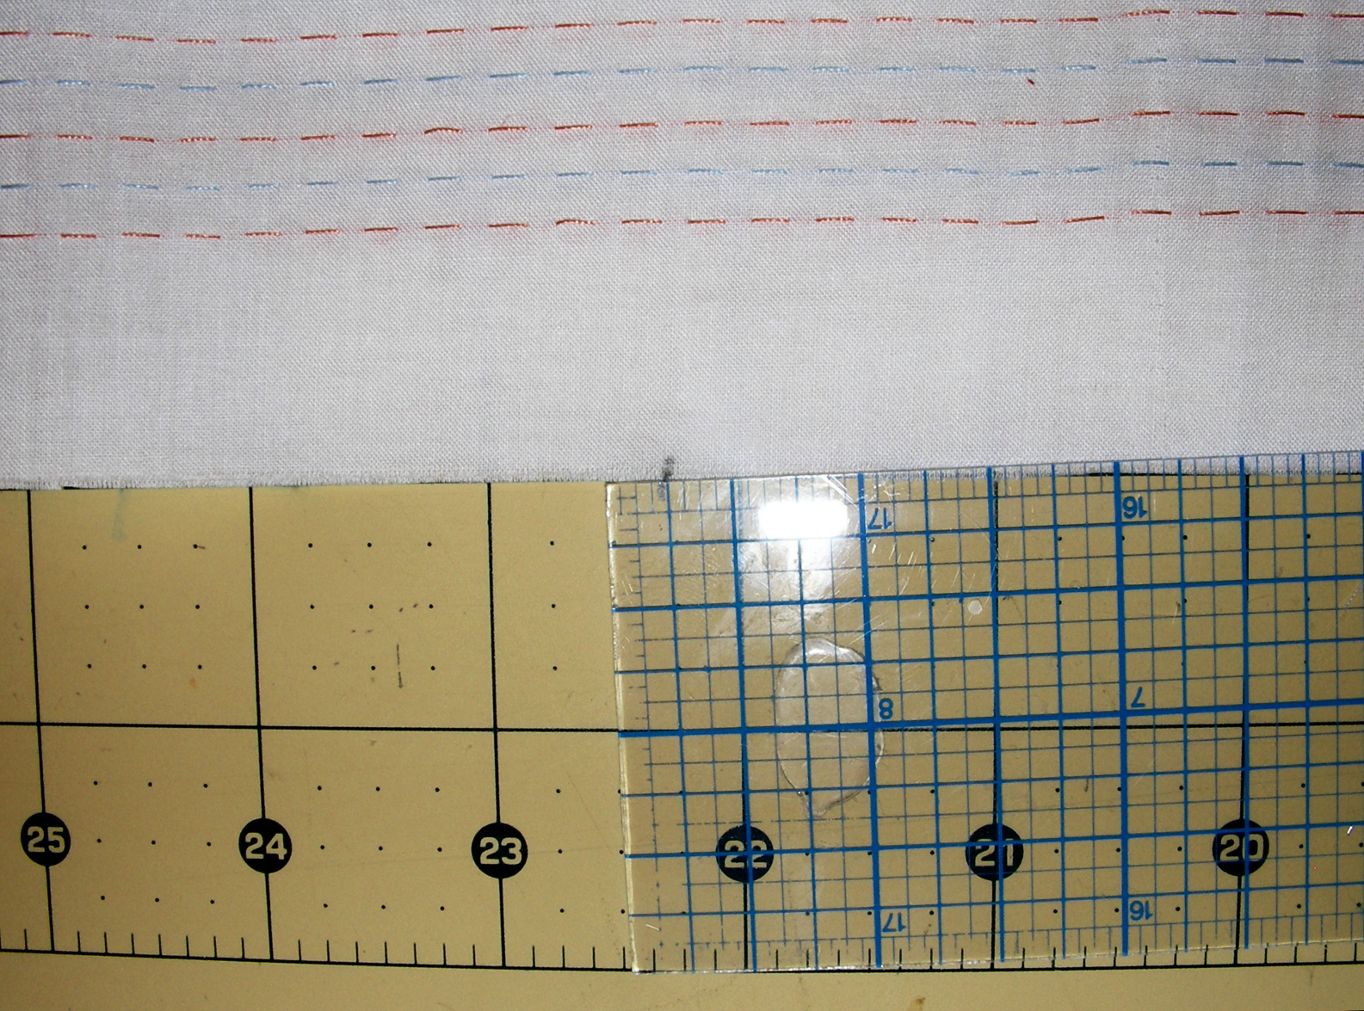
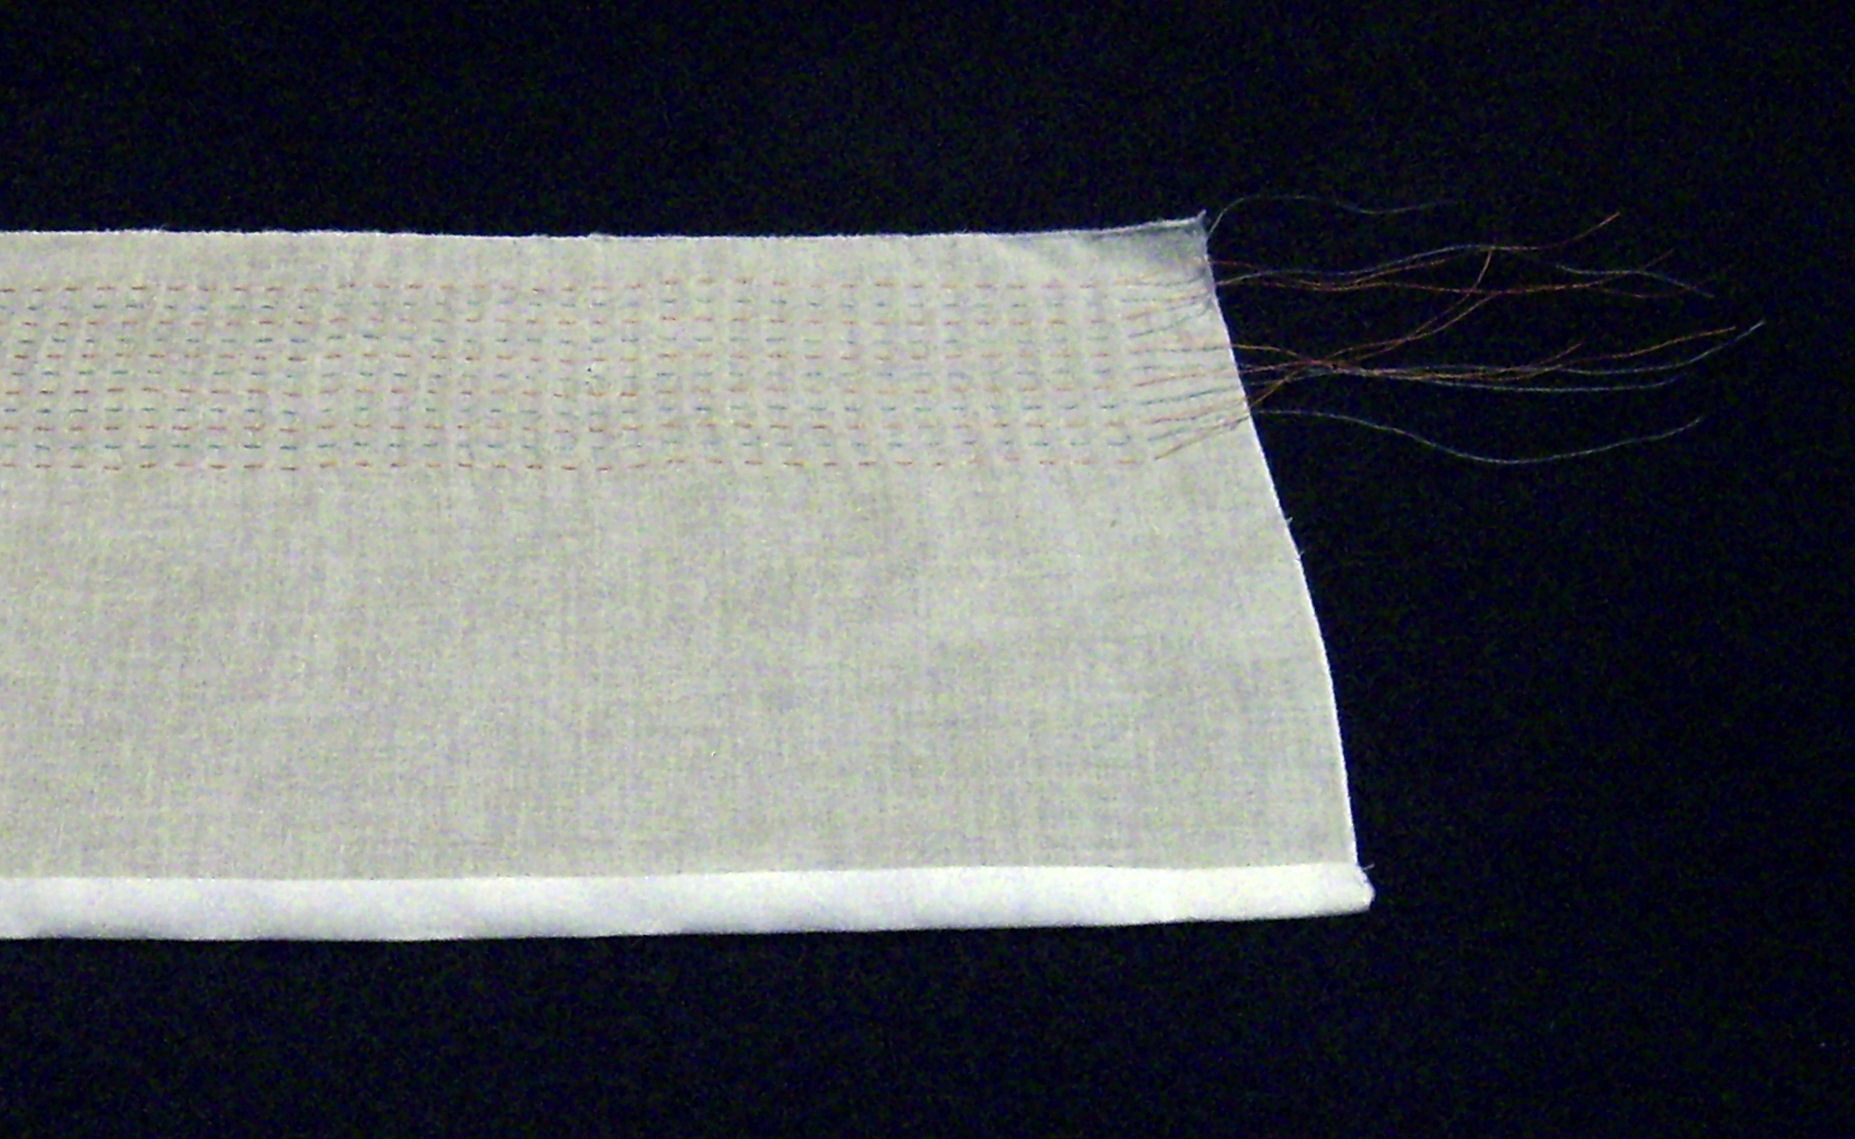
 Cut
hand sewing
quilting thread in two different colors (I use orange and blue) at
least one (1) inch longer than the width of the fabric. In this
example, the fabric is 44” from selvage to selvage, the
pleating threads are to be a minimum of 45” (114
cm) long. We cut six (6) orange threads and five (5) blue threads.
This length of the pleating threads is important because you
must be able
to flatten the piece after pleating to
allow adding lace to the edge and
adding other enhancements such as pintucks, tucks, and lace in the body
of the
bonnet.
Cut
hand sewing
quilting thread in two different colors (I use orange and blue) at
least one (1) inch longer than the width of the fabric. In this
example, the fabric is 44” from selvage to selvage, the
pleating threads are to be a minimum of 45” (114
cm) long. We cut six (6) orange threads and five (5) blue threads.
This length of the pleating threads is important because you
must be able
to flatten the piece after pleating to
allow adding lace to the edge and
adding other enhancements such as pintucks, tucks, and lace in the body
of the
bonnet.
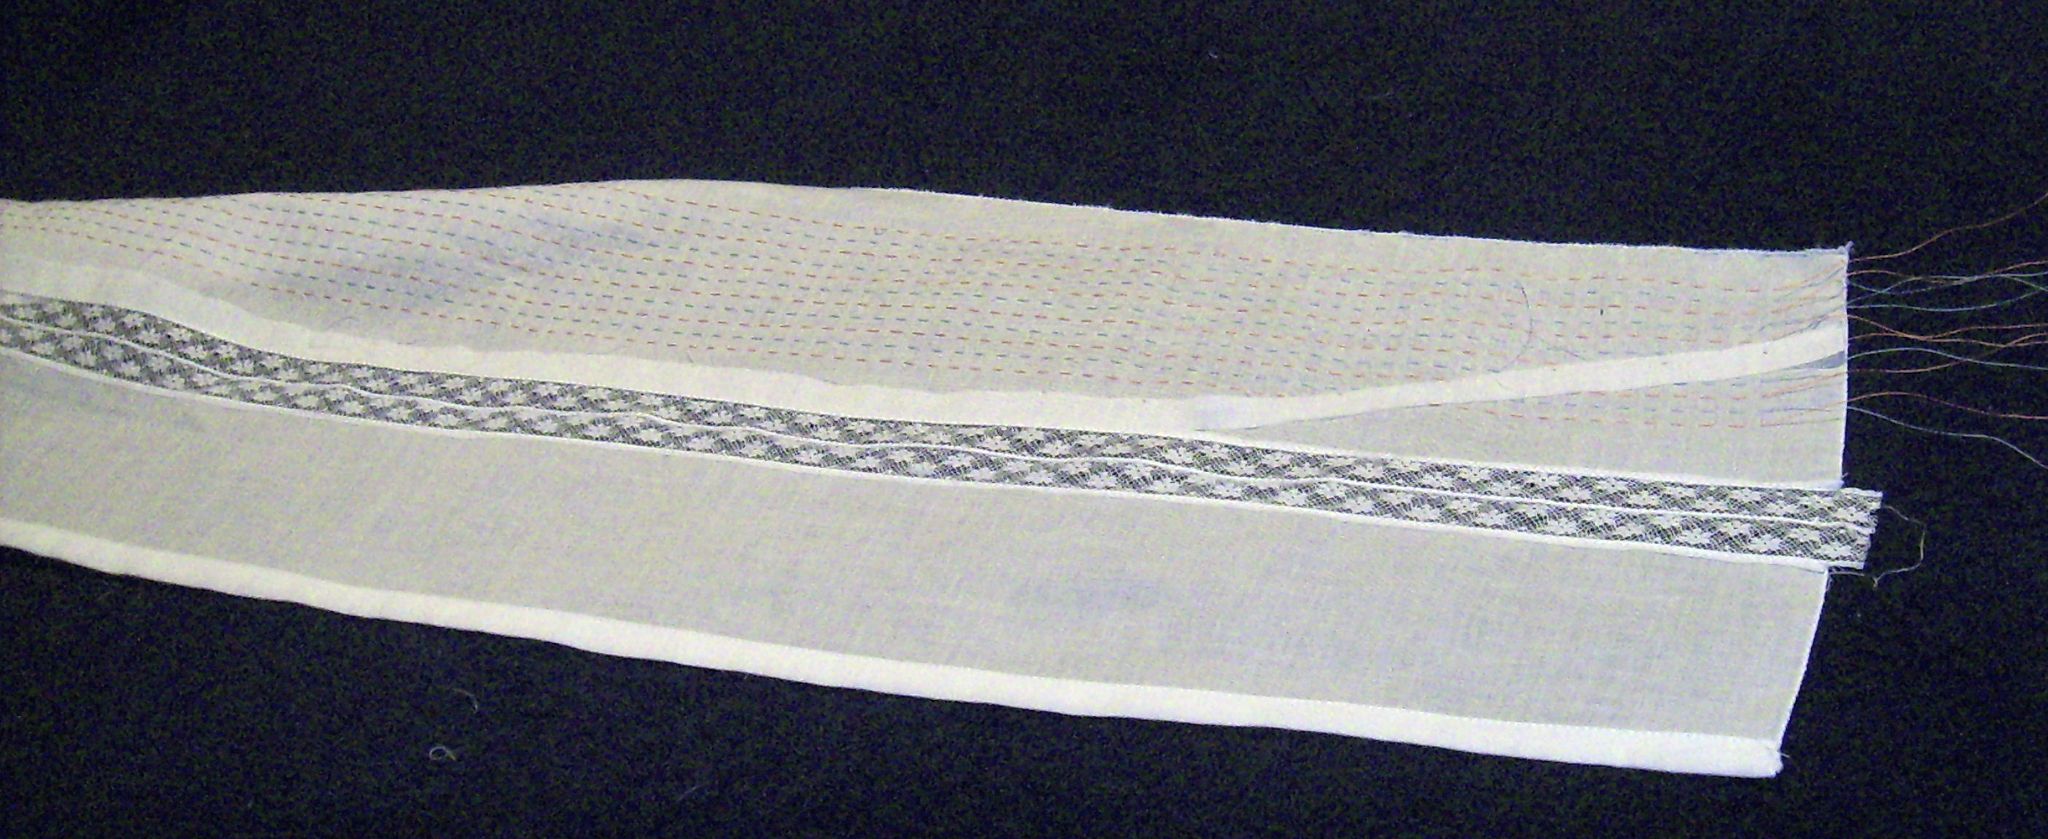
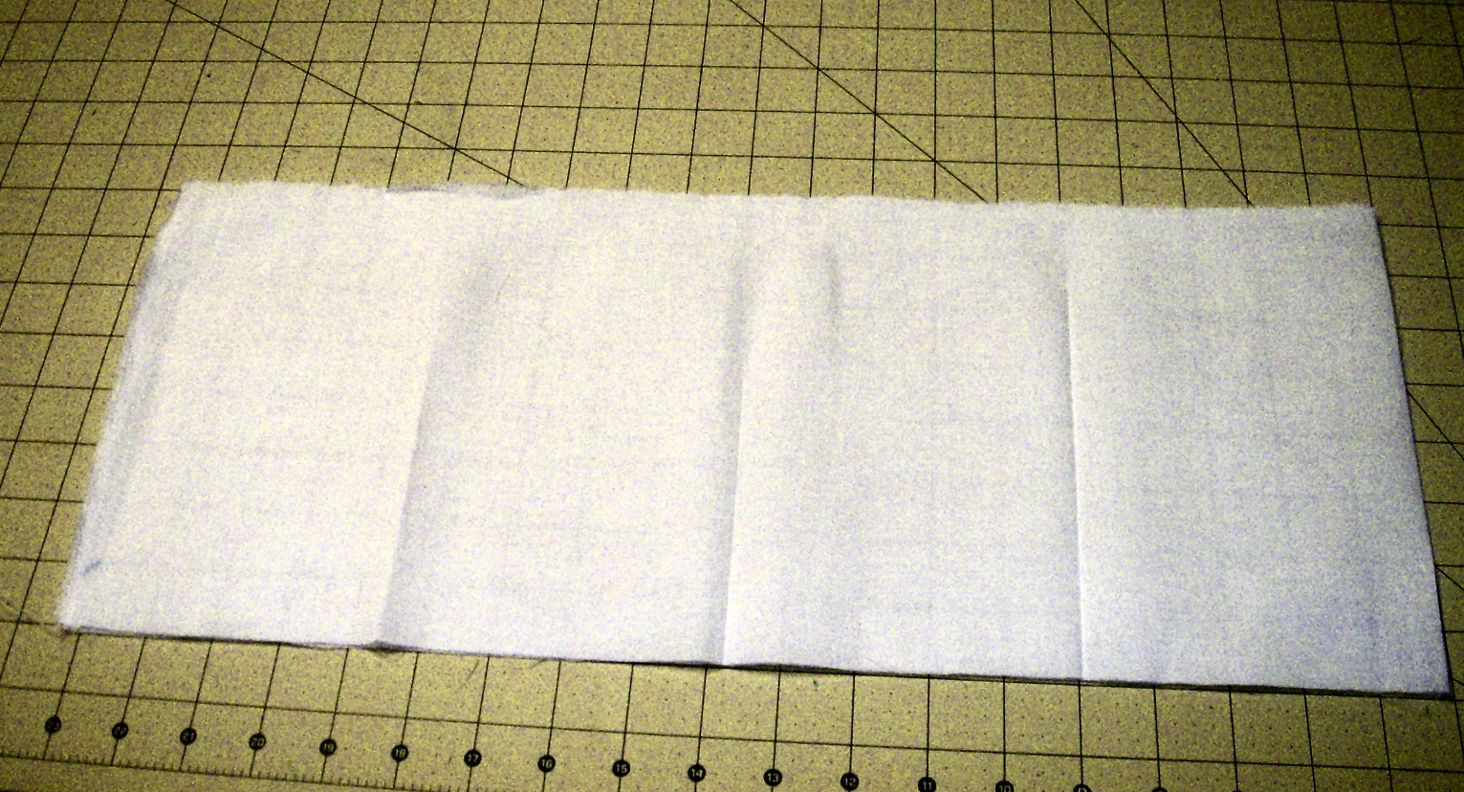 Fold
and press a crease with a warm iron with the 'wrong sides' of the
fabric
together. Mark the half (1/2), fourth (1/4), and the eighths(1/8)
of the fabric. The picture shows the fabric folded in half and
creased every 1/8th of the long
dimension.
Fold
and press a crease with a warm iron with the 'wrong sides' of the
fabric
together. Mark the half (1/2), fourth (1/4), and the eighths(1/8)
of the fabric. The picture shows the fabric folded in half and
creased every 1/8th of the long
dimension.
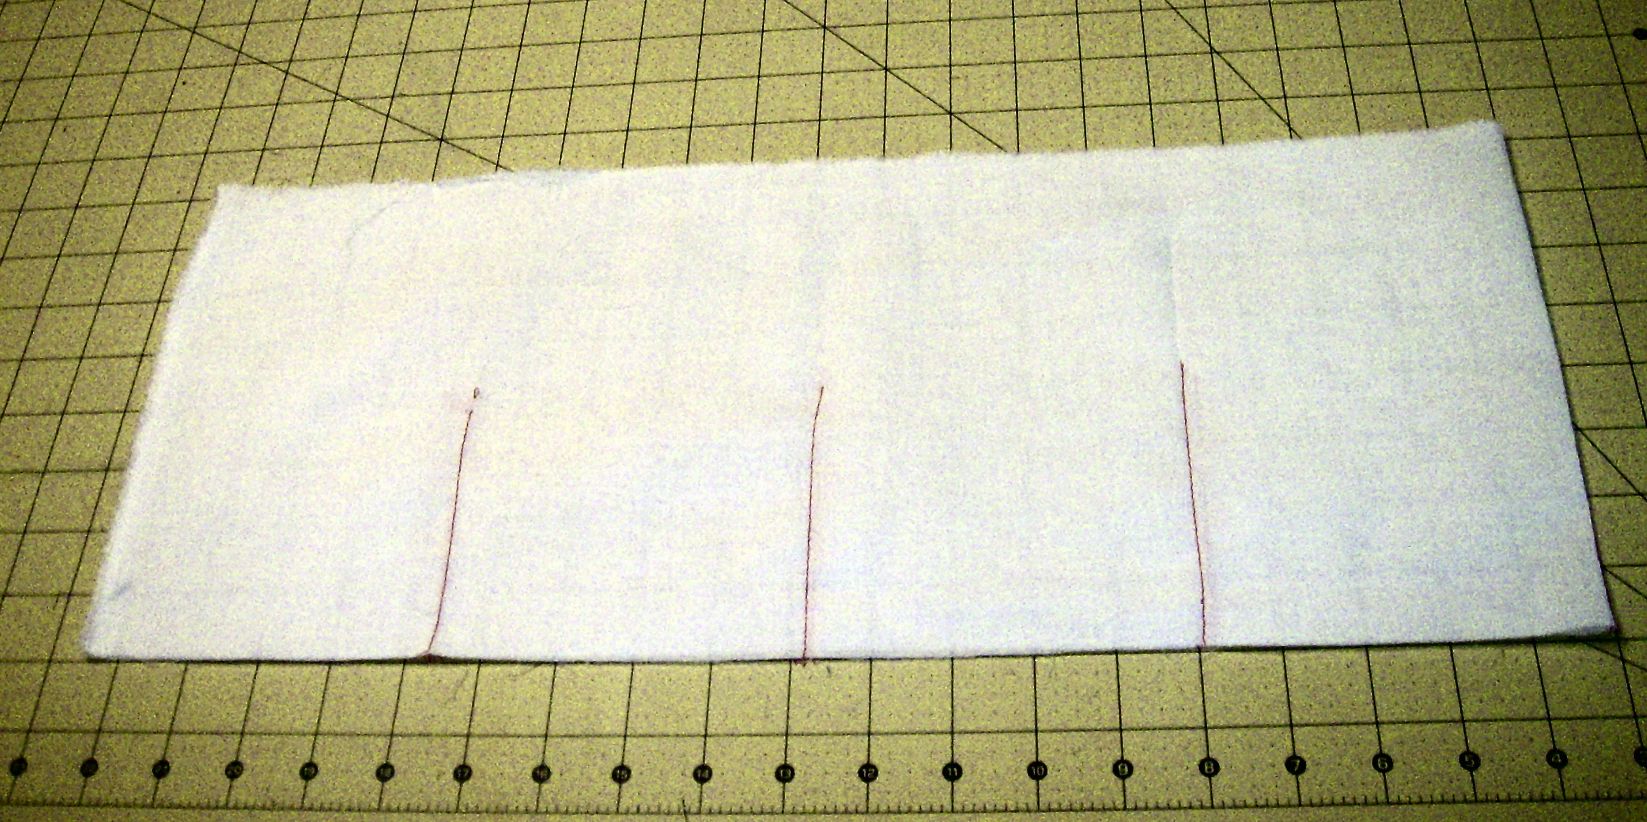 Using
a
contrasting thread color, and the sewing machine make a temporary
basting seam along
each of these folds. For a bonnet these seams are about 4”
(10 cm) length. These
basting seams are guides and are temporary.
Using
a
contrasting thread color, and the sewing machine make a temporary
basting seam along
each of these folds. For a bonnet these seams are about 4”
(10 cm) length. These
basting seams are guides and are temporary.
Pleating the Fabric
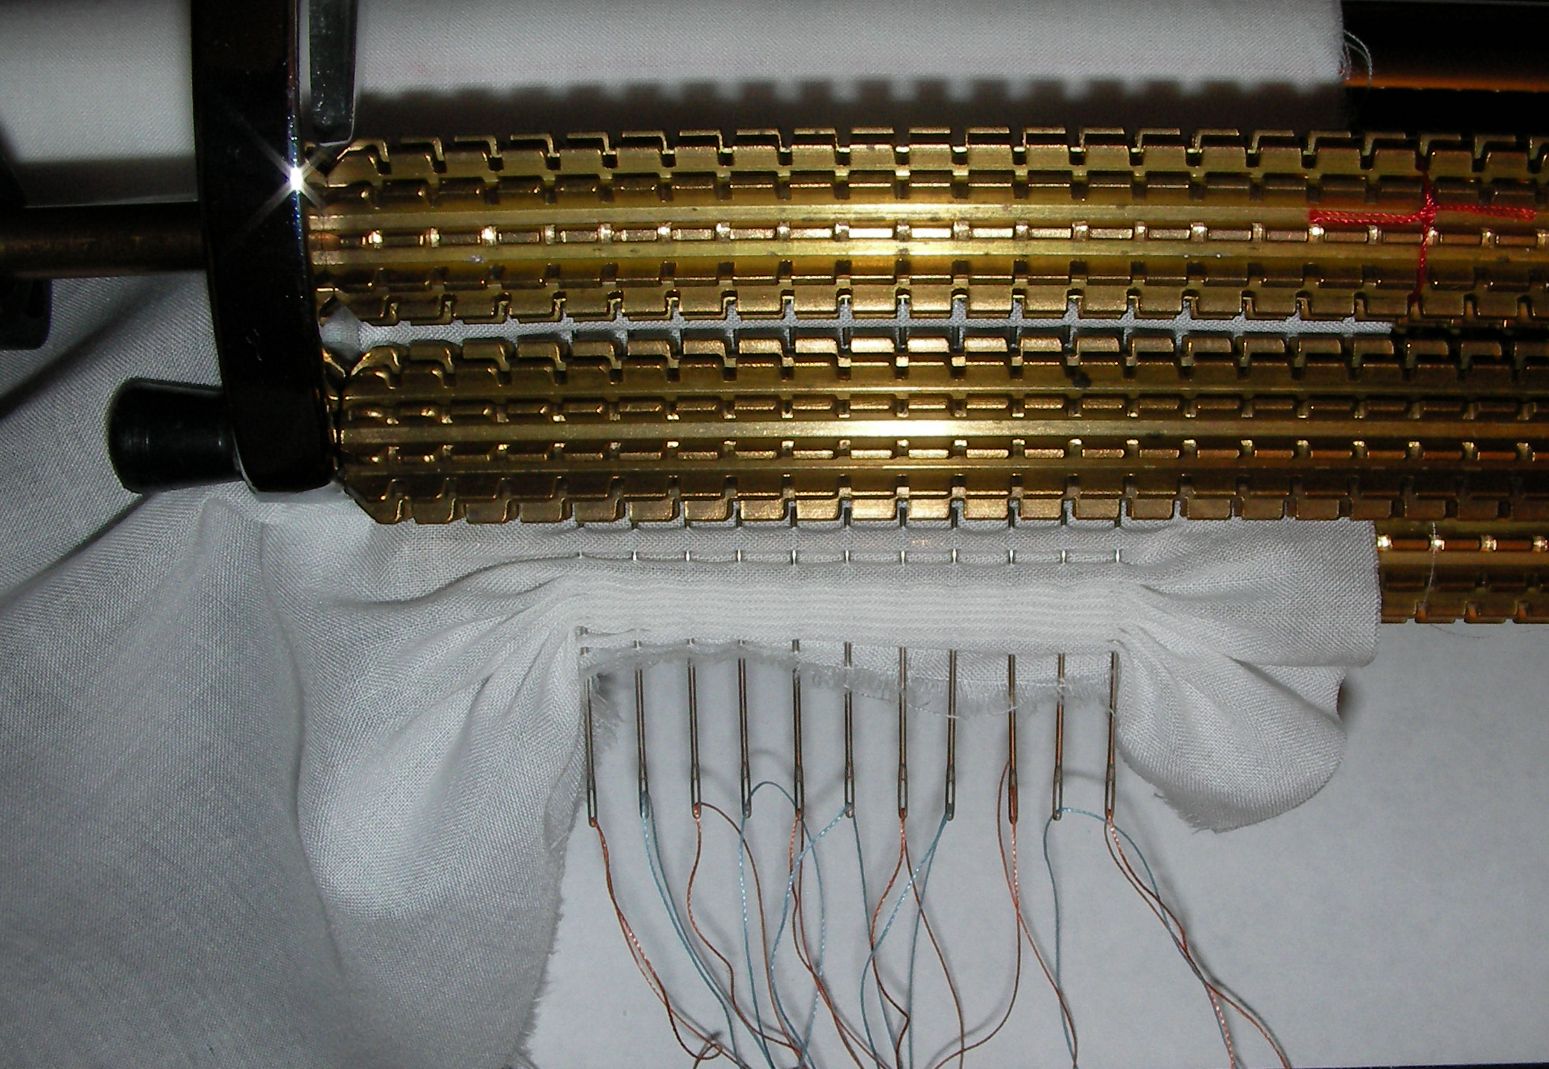
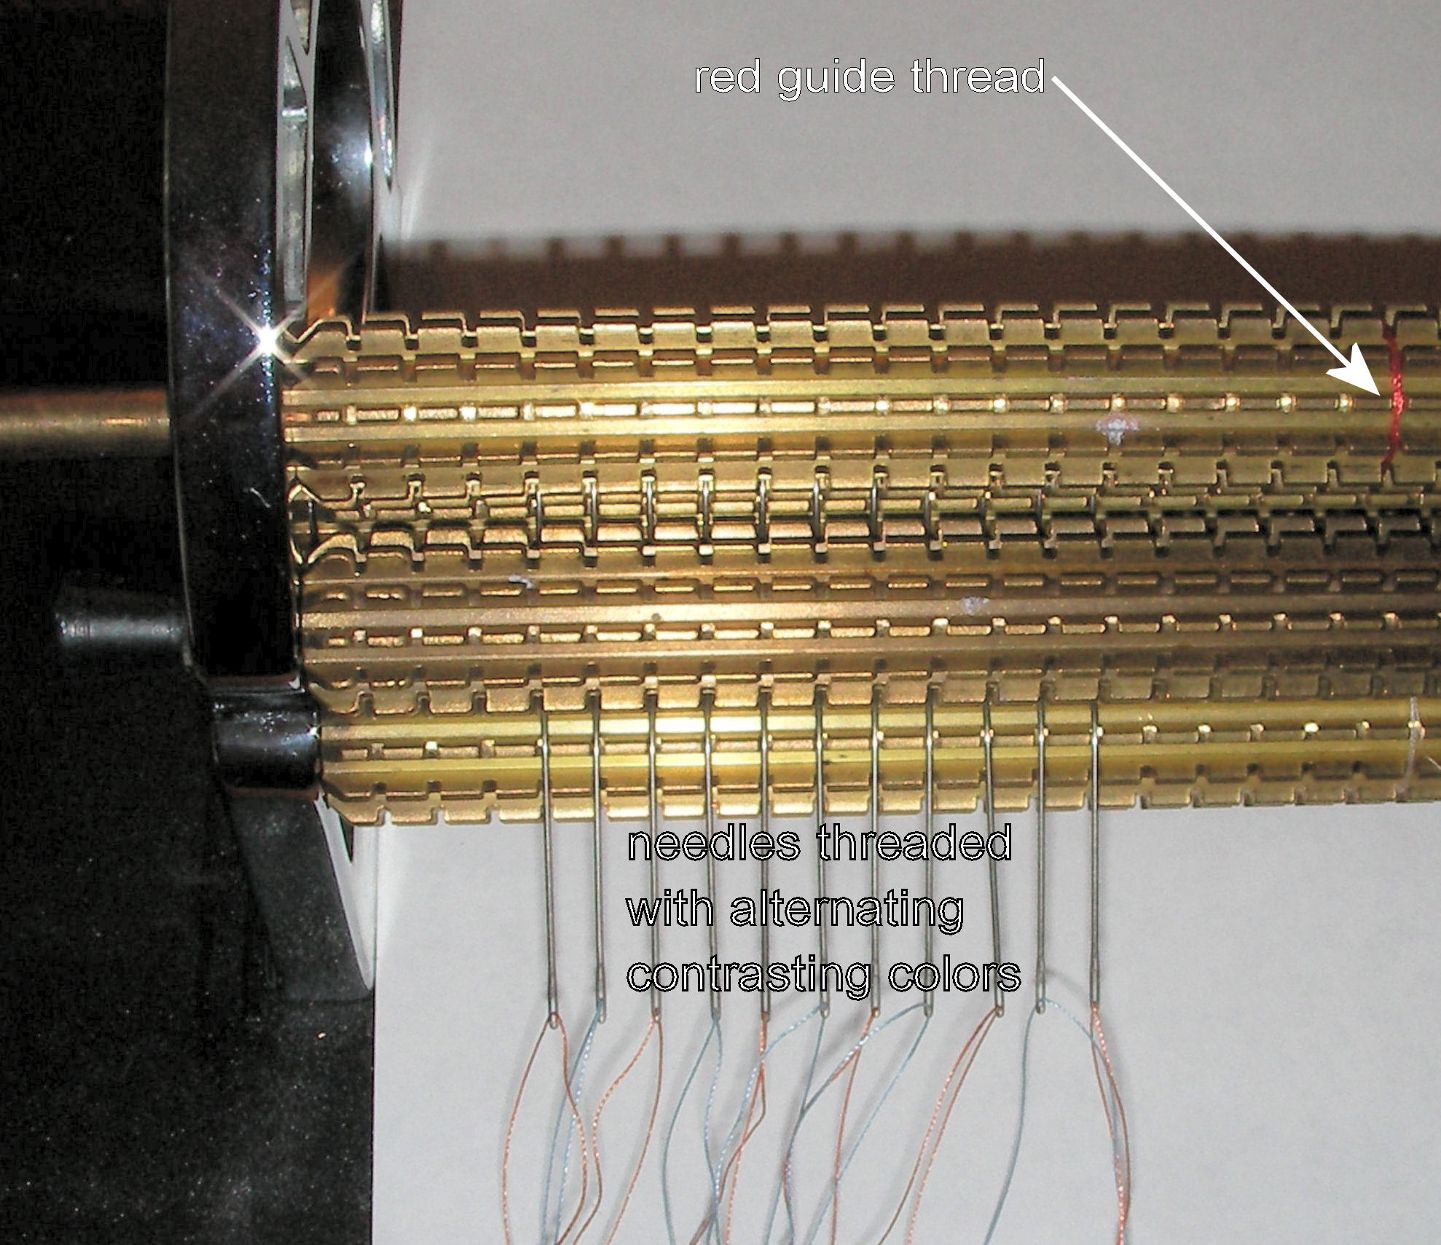 Depending
on the
smocking pattern, place 9 to 11 pleating needles into 9 to
11 half
rows of the
pleater. The pleating is to be done at about 1” from
the edge. This
procedure makes a bonnet brim of 1”. To guide the fabric, I
tie a short
piece of red thread around the pleating cylinder. Thread the needles
with alternating colors of thread.
Depending
on the
smocking pattern, place 9 to 11 pleating needles into 9 to
11 half
rows of the
pleater. The pleating is to be done at about 1” from
the edge. This
procedure makes a bonnet brim of 1”. To guide the fabric, I
tie a short
piece of red thread around the pleating cylinder. Thread the needles
with alternating colors of thread.
It is best to keep the 'short tail' on the needle thread on the same side of all needles. Make the tail a length of 3 to 4 inches.
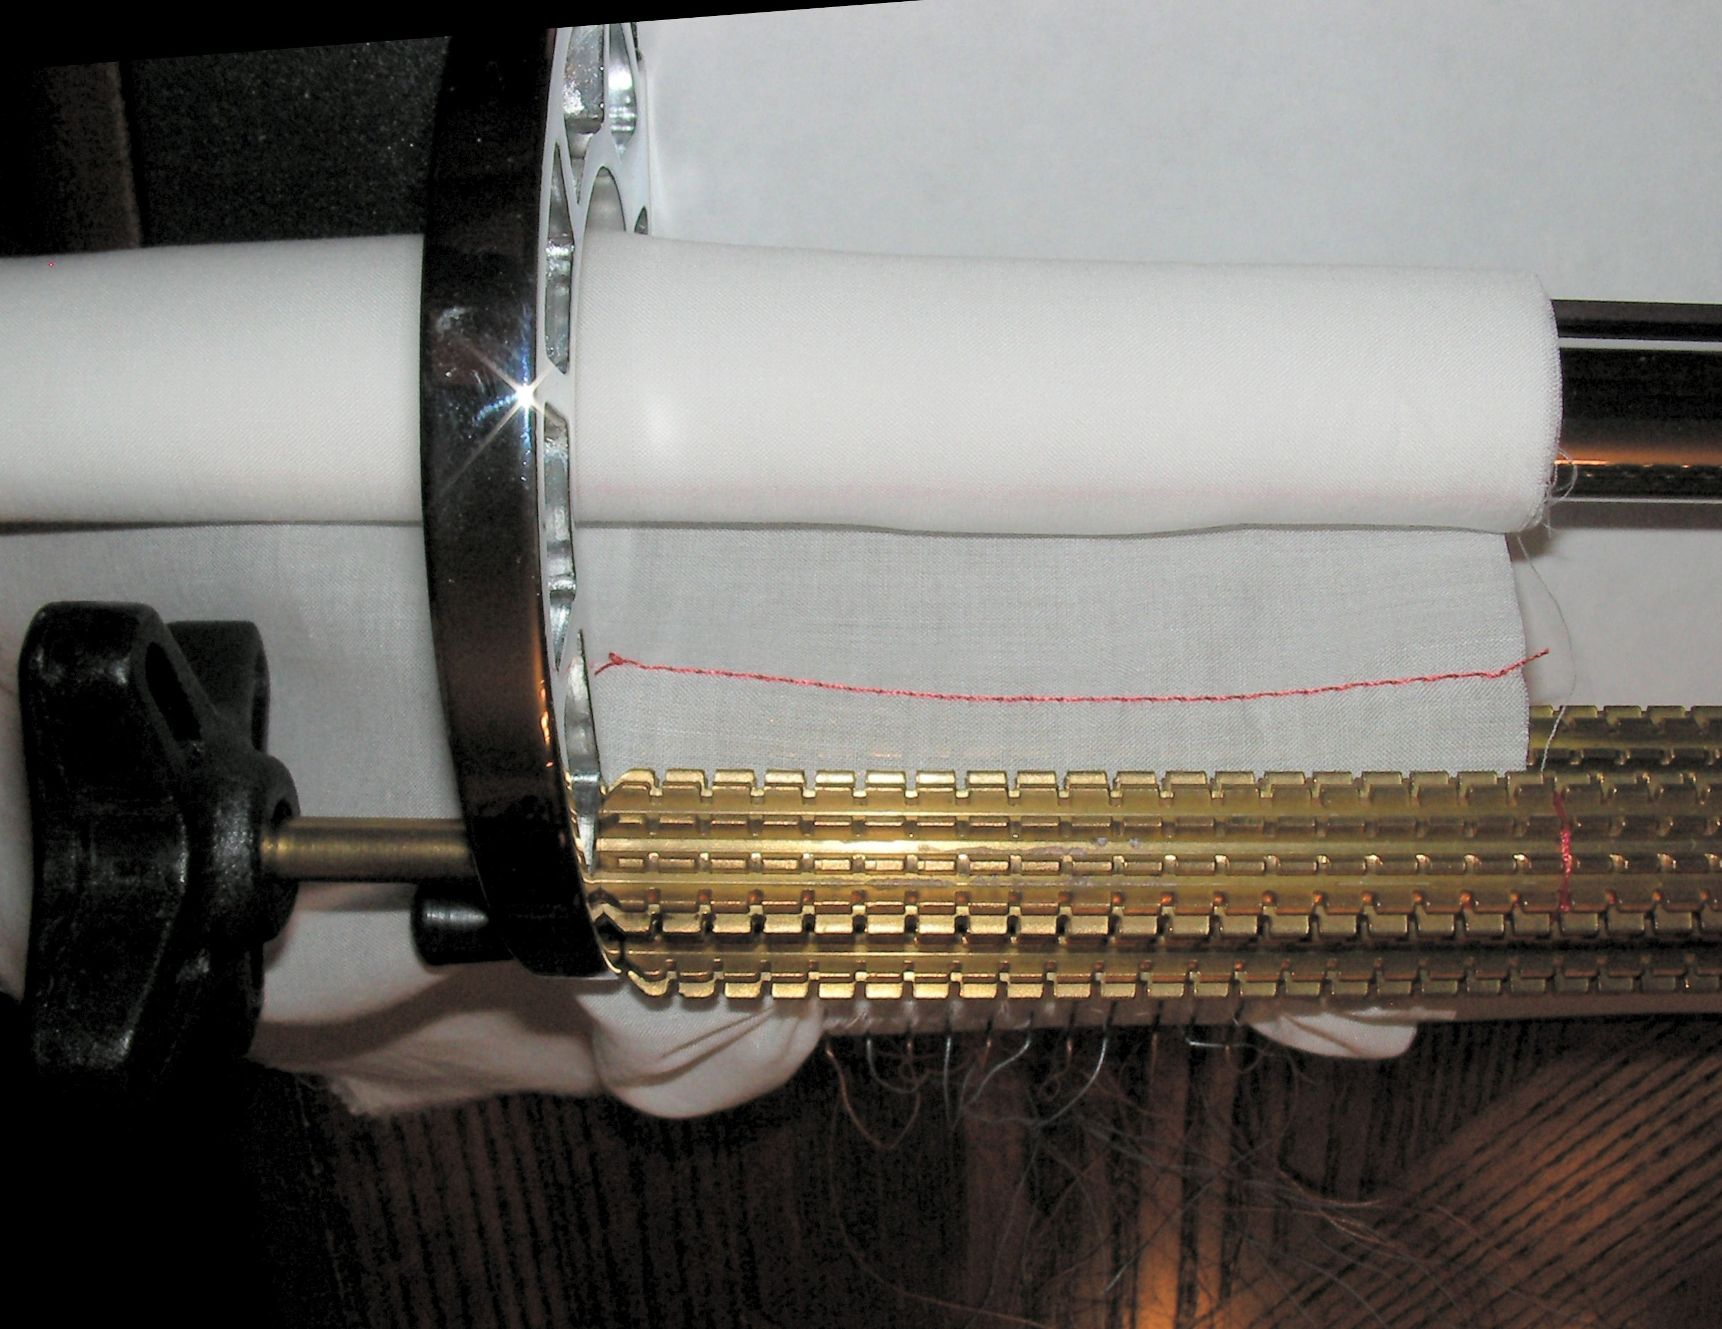
 When
feeding the fabric into
the pleater, watch for the marked seams. These
seams will aid in controling the feed.
When
feeding the fabric into
the pleater, watch for the marked seams. These
seams will aid in controling the feed.
For the best results during pleating, make sure each of these seams is straight and parallel to the rollers. This shows that the fabric is feeding with constant tension.
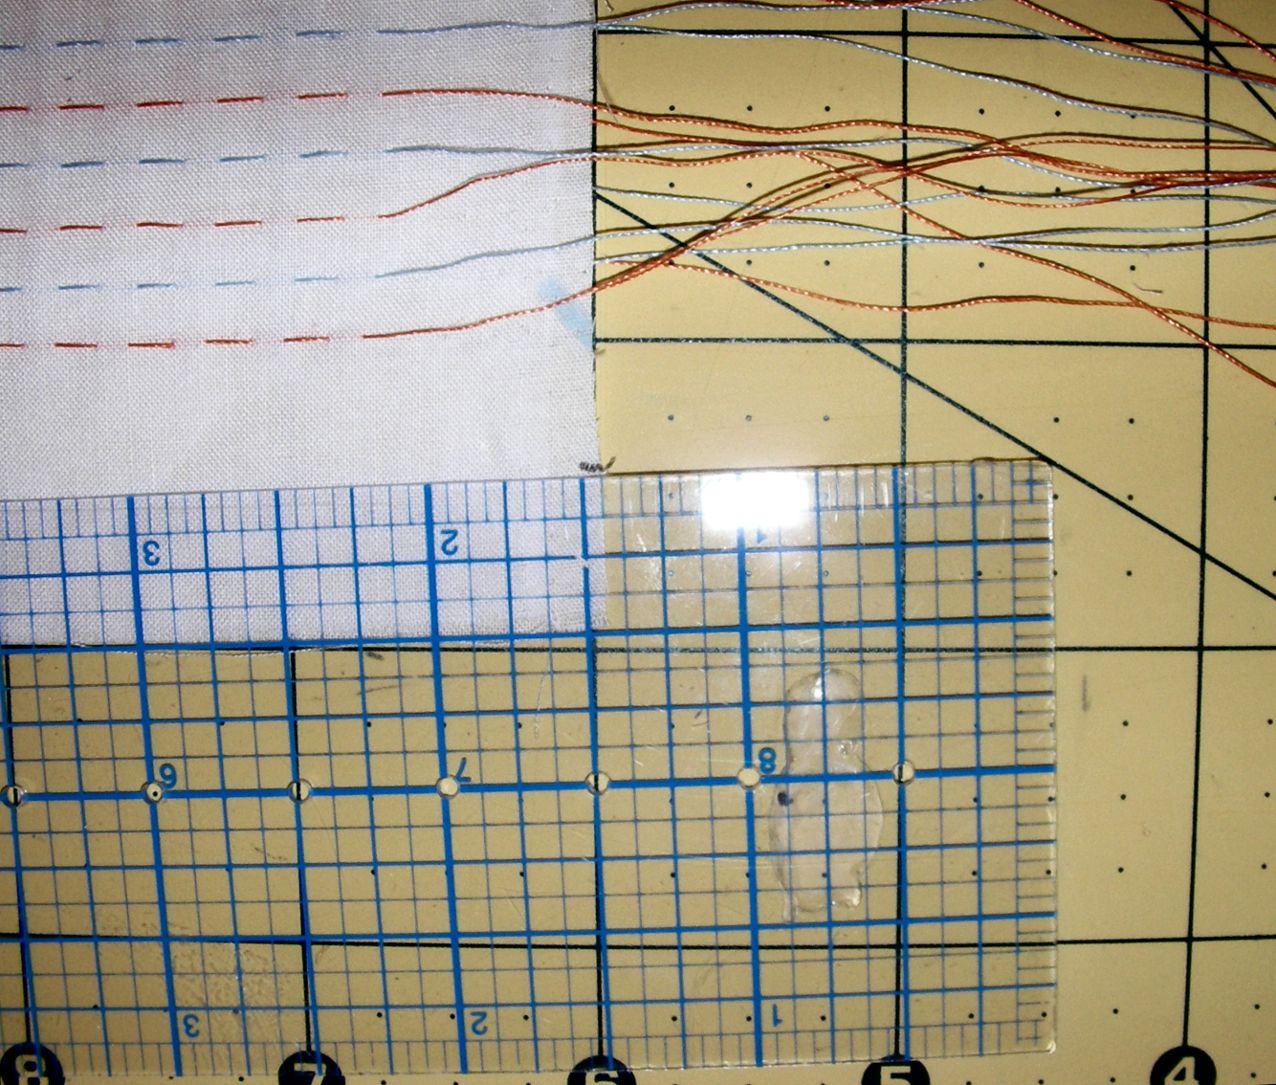
When the pleating is done, carefully remove the basting seams. Some of the pleating threads may have caught the thread in the basting seams.

As you feed cloth into the pleater, go slowly and release the
forward pressure on the feed knob frequently. 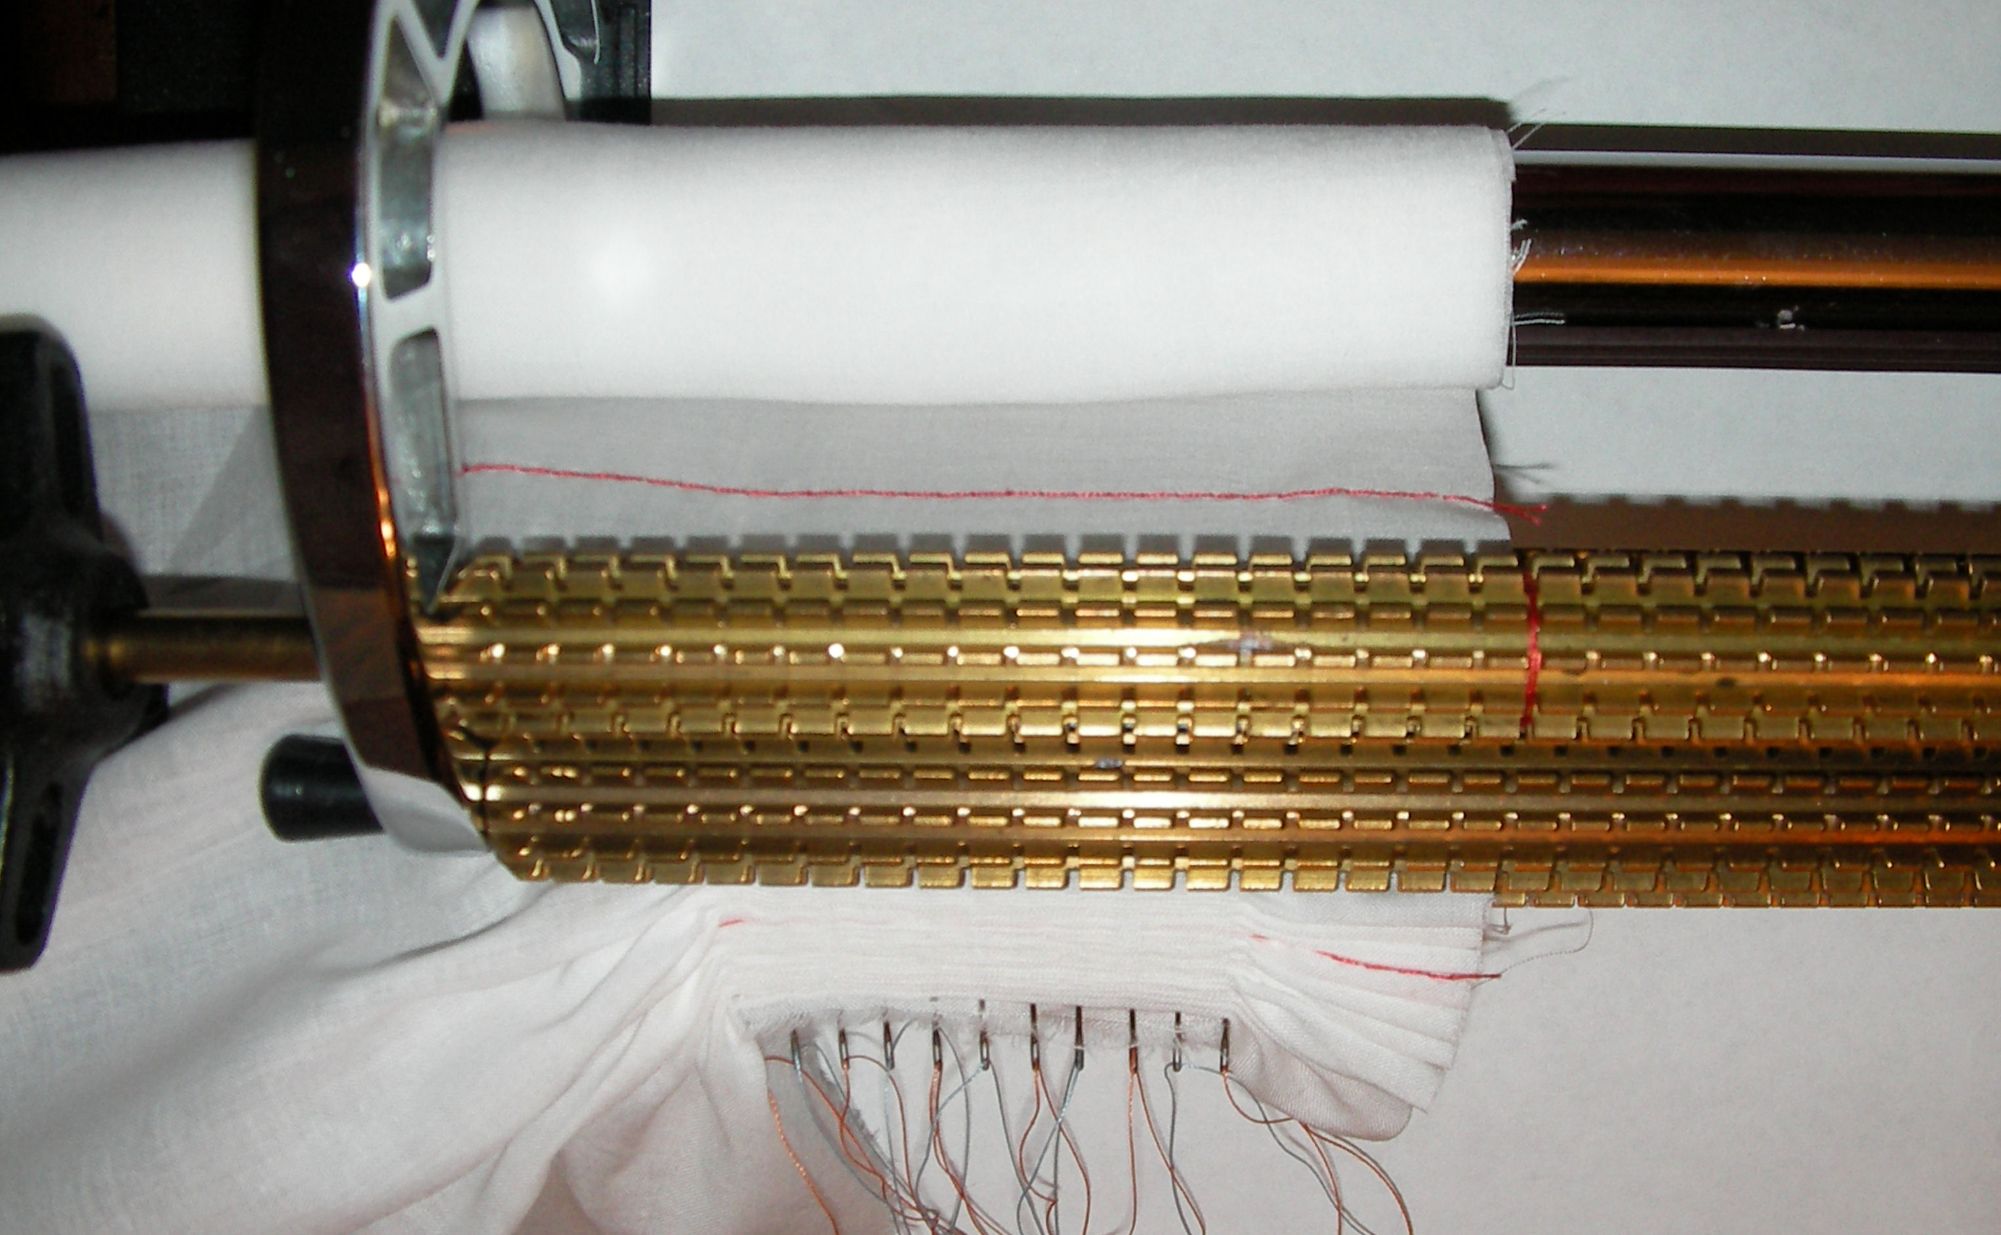
Do not allow too much pleated fabric to build upon the needles as the pressure from the new pleats, together with the friction from the older pleats, will break needles. You will notice that it becomes more difficult to turn the drive knob as the fabric build up. Pay close attention to changes in the resistance of this knob.
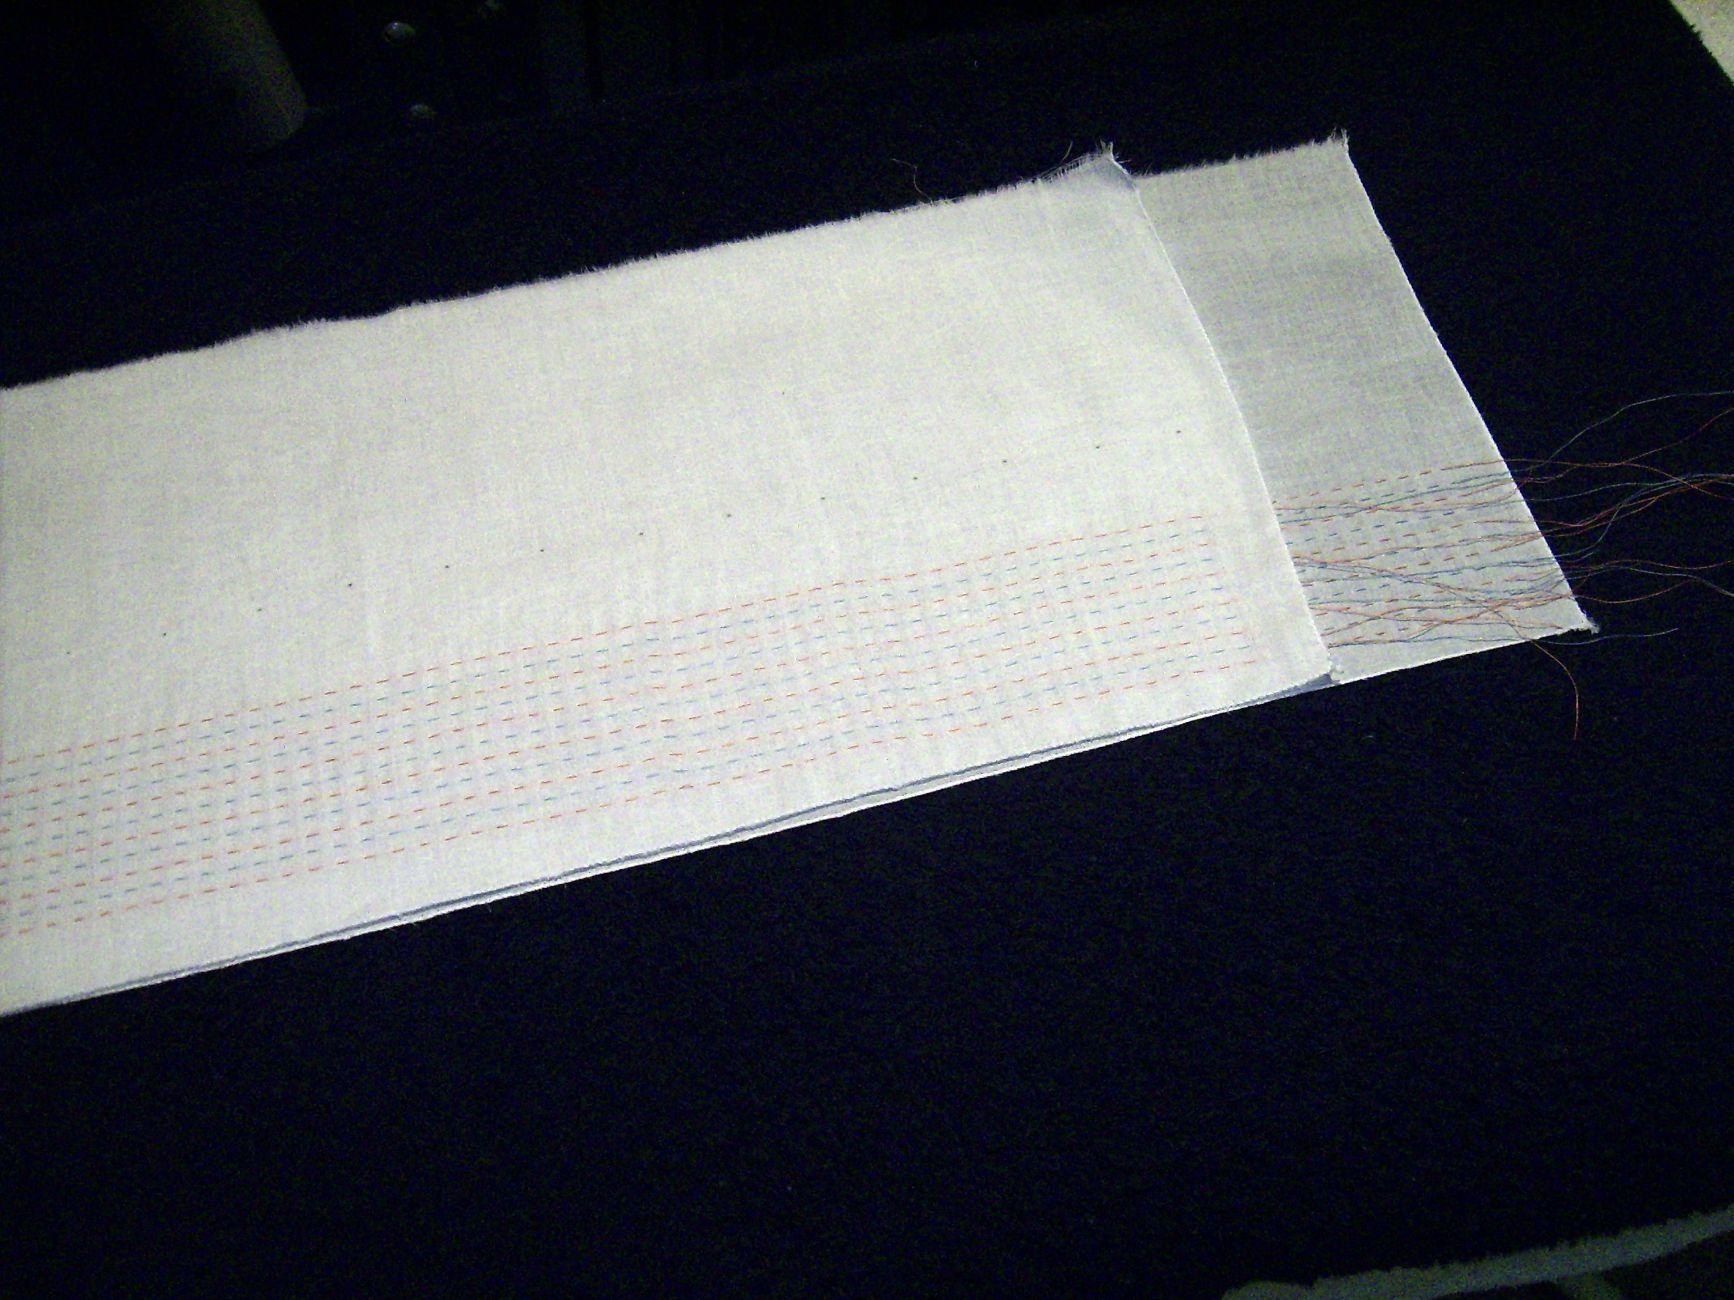
Take care when removing the fabric from the pleater to avoid pulling any of the pleating threads out of the pleated fabric. It may be a good idea to tie the ends of the threads together at each end so that none of the pleating threads get pulled loose at either end.
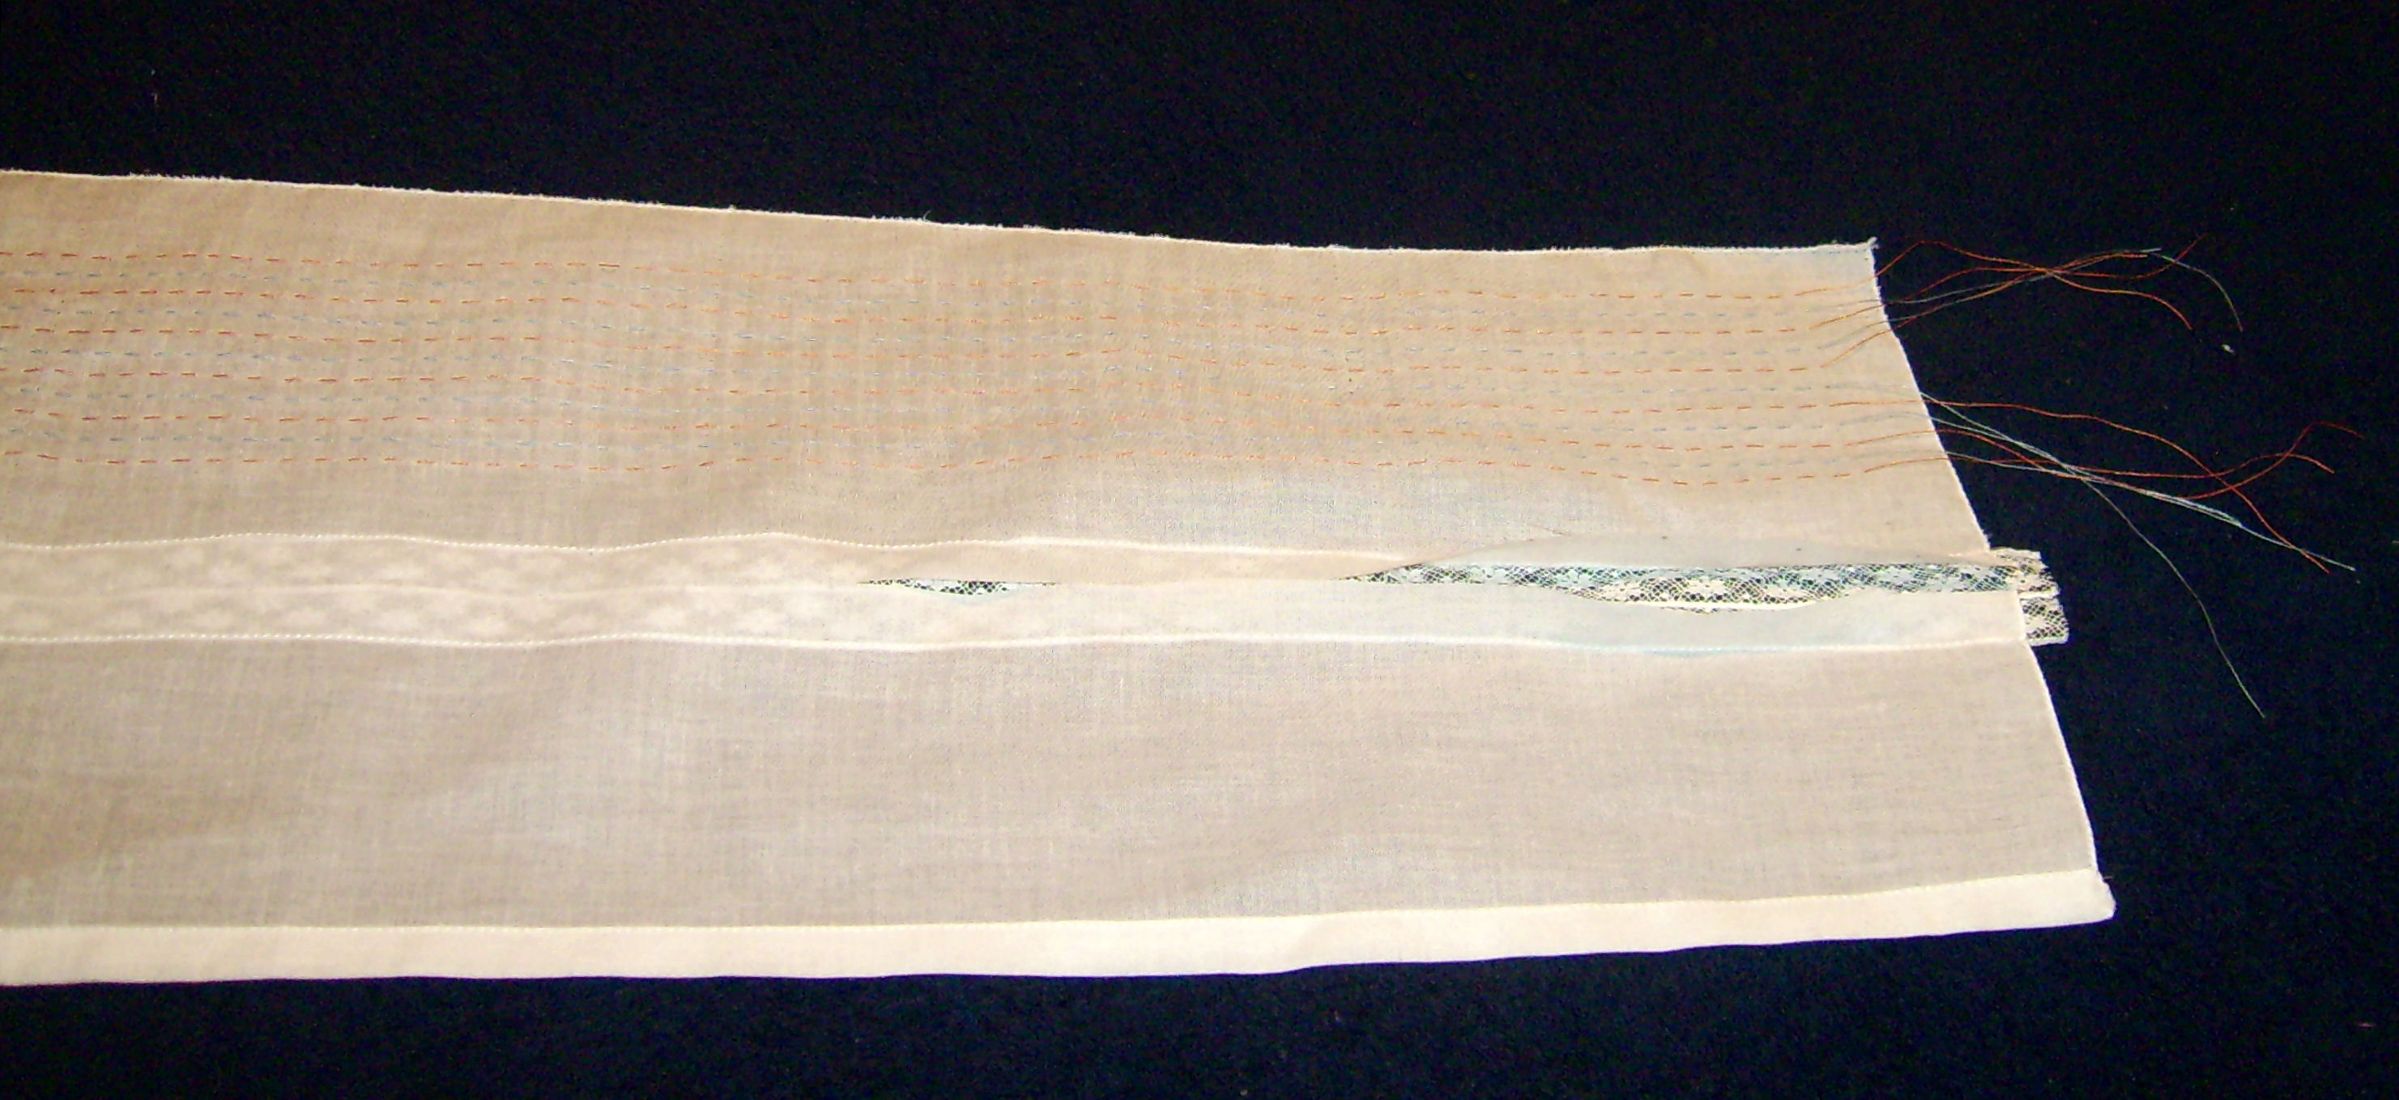
Preparing for the Placement of the Insertion Lace
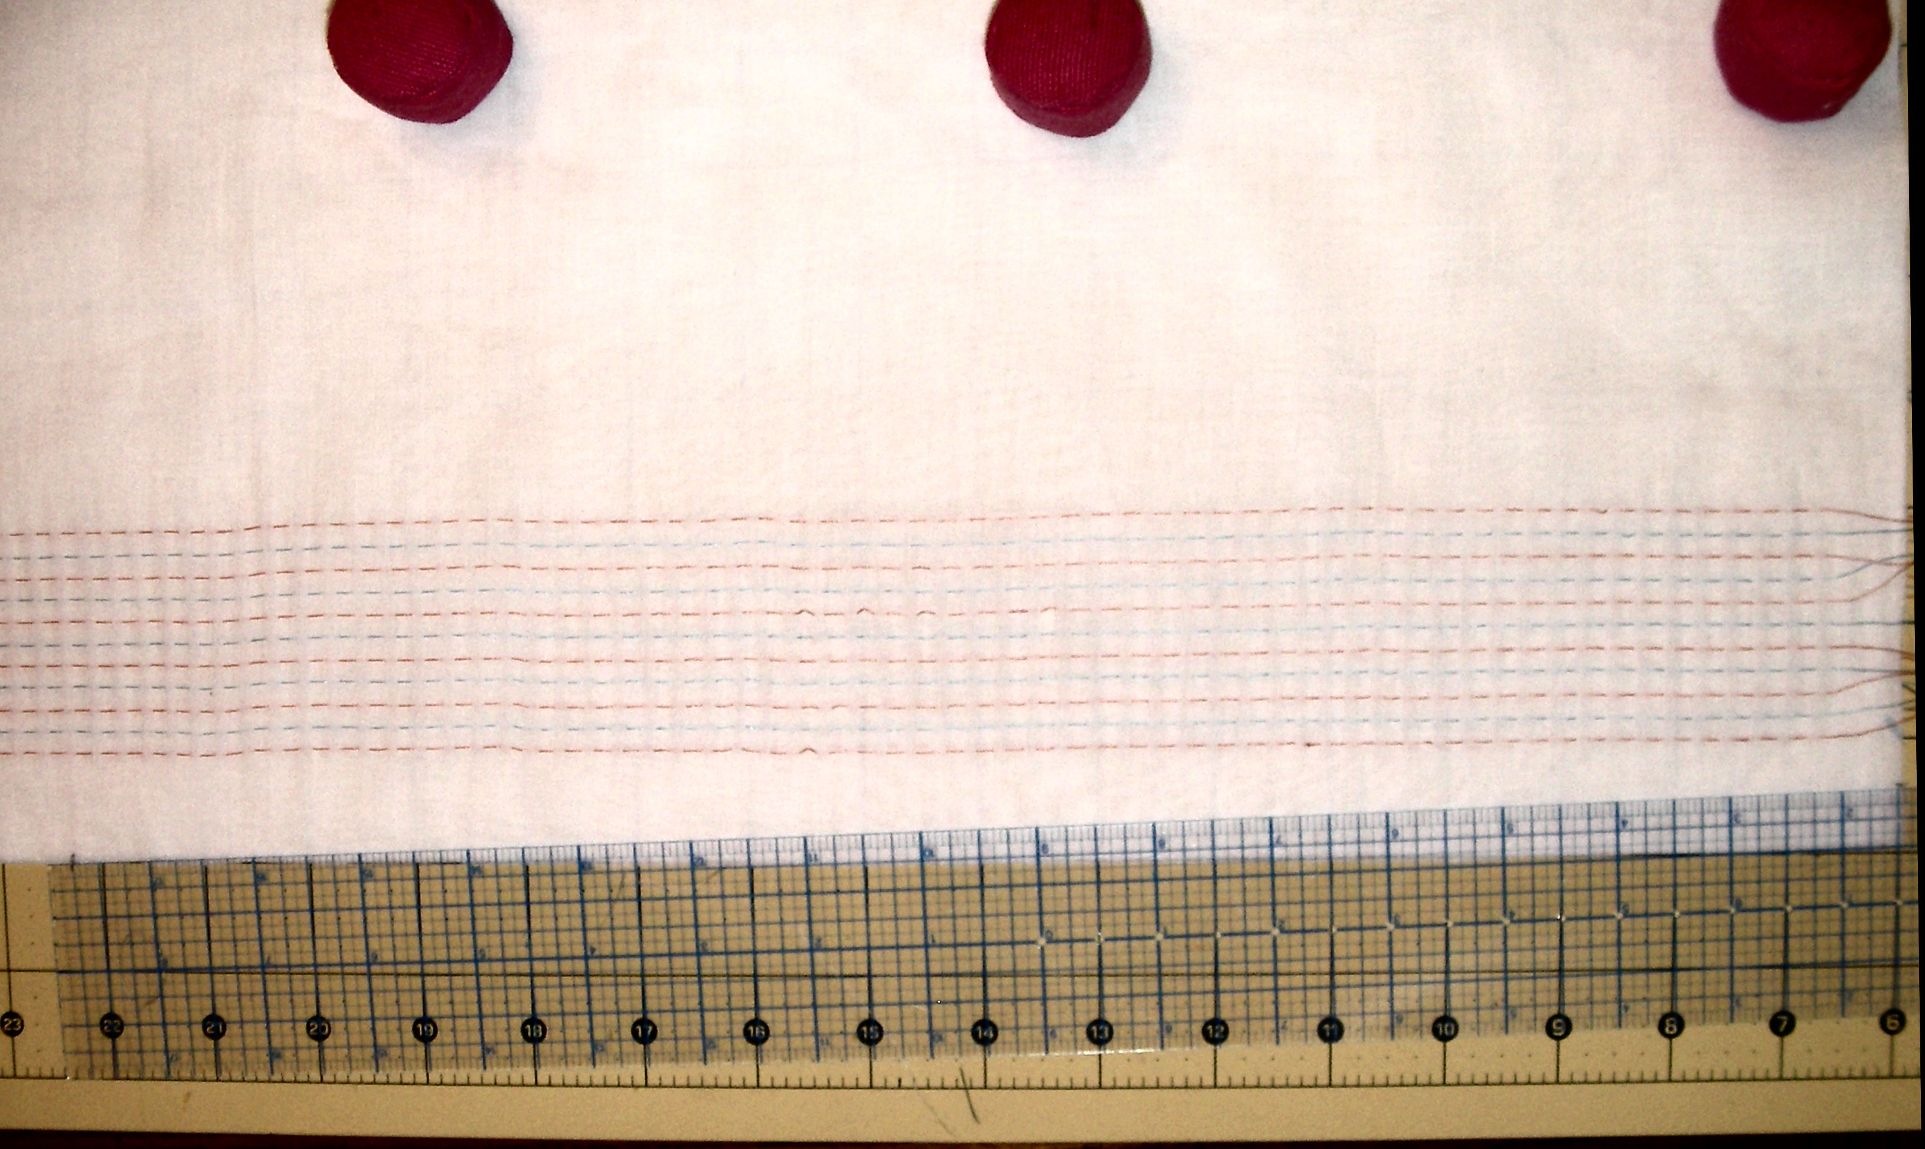
After pleating, stretch out the fabric along the pleating threads to flatten the fabric. Press.

 A
band of insertion lace is to be placed across the bonnet,
from neckline to neckline. On the right side of the fabric, mark the
position
of the insertion lace, using a water soluble marker to draw a series
of points about 1" apart along a straight line parallel to
'front' raw
edge of the fabric. This line of points is to be drawn at about 4
¾” (12 cm)
from the front edge and parallel to it. The insertion lace will be
placed AFTER the taper is cut.
A
band of insertion lace is to be placed across the bonnet,
from neckline to neckline. On the right side of the fabric, mark the
position
of the insertion lace, using a water soluble marker to draw a series
of points about 1" apart along a straight line parallel to
'front' raw
edge of the fabric. This line of points is to be drawn at about 4
¾” (12 cm)
from the front edge and parallel to it. The insertion lace will be
placed AFTER the taper is cut.
Note: To have this straight line of points, it is important to mark this line before cutting the taper. This straight line of points may be also measured from the opposite edge of the rectangle, that is, from the crown edge. However, the distance between the opposite edge and the place of the insertion line will vary with the sizes.
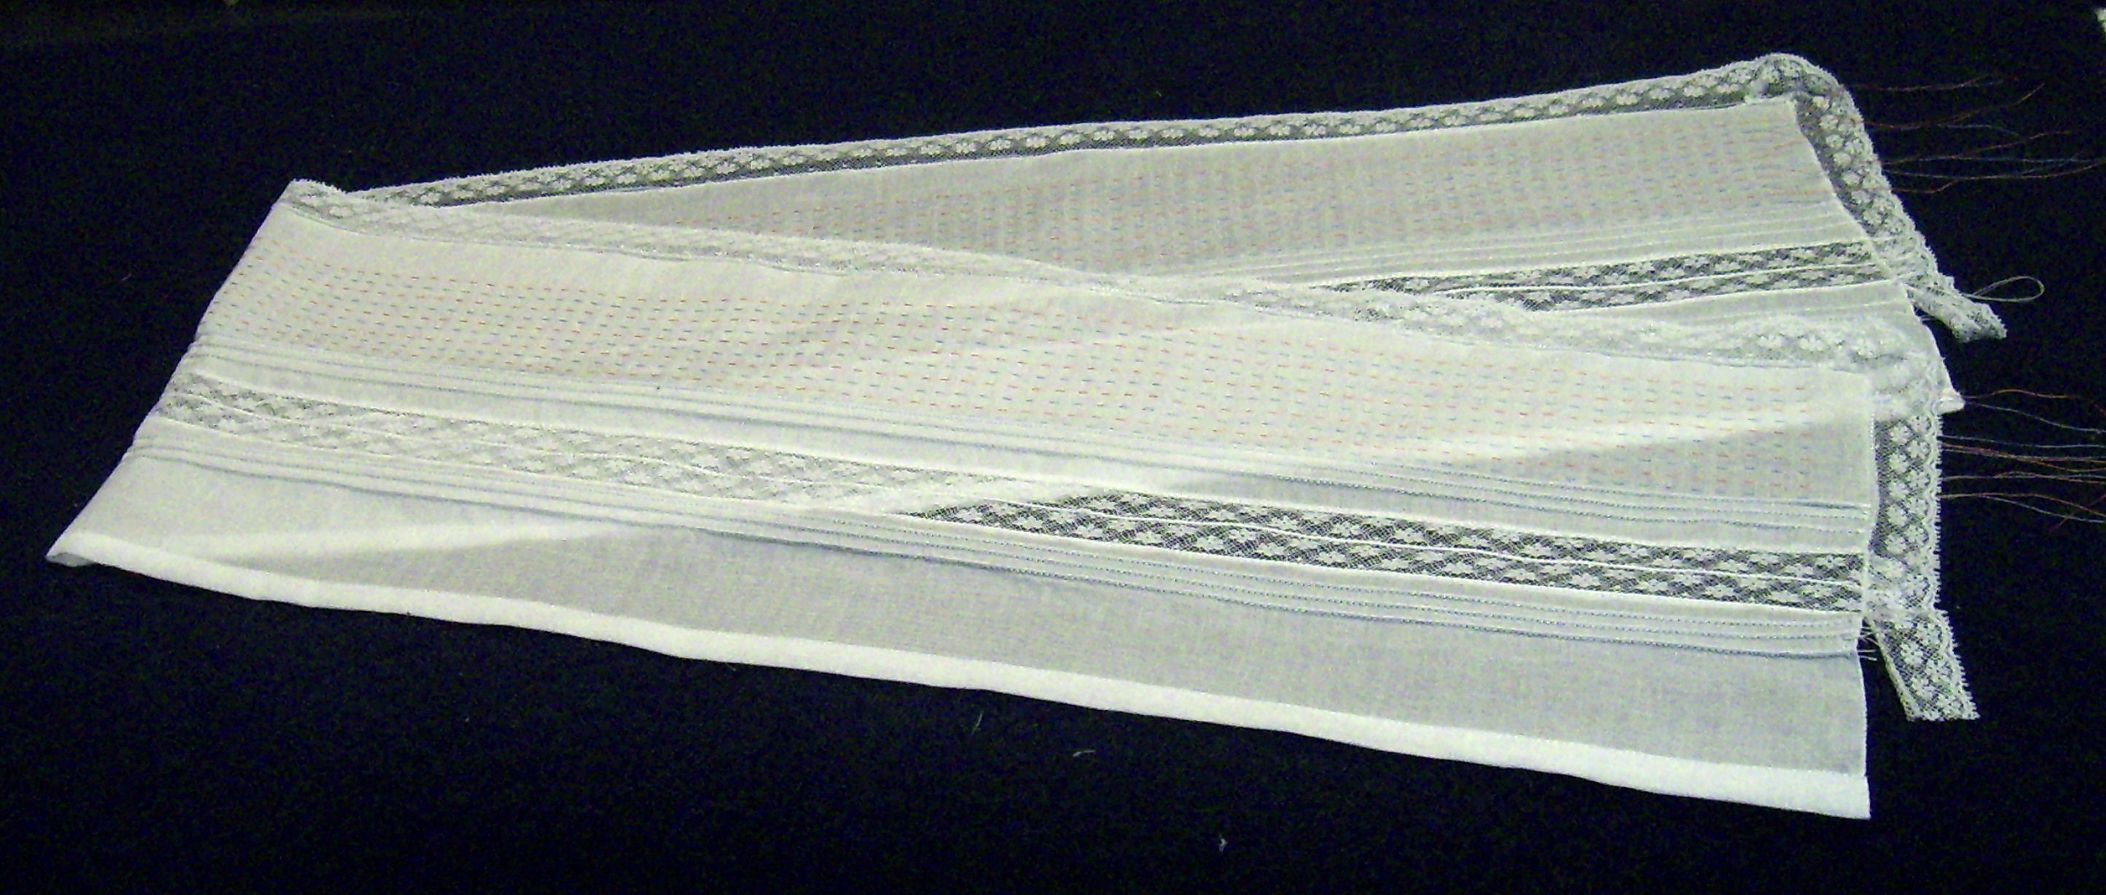
Cutting the Taper
With right sides together and matching raw edges, fold the rectangle in half. On the brim edge, and using a water soluble marker, mark a point measured 3” (8 cm) from the center of the piece toward the selvage. At the selvage and from the bonnet neckline edge, mark a point measured ½” (13 mm) towards the crown edge. Use a ruler and a rotary cutter to cut the fabric by joining these two points.
Whipping and Rolling
 On the wrong side of
the rectangle, unpleat approximately 1” by
unthreading the pleating threads
from each of the neckline sides of the fabric.
On the wrong side of
the rectangle, unpleat approximately 1” by
unthreading the pleating threads
from each of the neckline sides of the fabric.
Cut
out the selvage without cutting
the pleating threads. Using the sewing machine whip and roll the two
short
edges and the brim edge of the fabric. To do this use zigzag stitch
such that
the sewing machine needle zigs in the fabric and zags just outside,
rolling the
fabric.
Making the Crown Case
 With
the wrong side of
the fabric up fold under ¼” (6 mm) and press.
Repeat this procedure and make a
second fold this time fold under 3/8” (1 cm) and press. Using
the sewing
machine and a short stitch, stitch close to the edge of the fold and
along the
crown edge to finish the crown case.
With
the wrong side of
the fabric up fold under ¼” (6 mm) and press.
Repeat this procedure and make a
second fold this time fold under 3/8” (1 cm) and press. Using
the sewing
machine and a short stitch, stitch close to the edge of the fold and
along the
crown edge to finish the crown case.
Attaching the Insertion Lace
 Cut
a piece of 1” (2.5
cm) wide insertion lace of approximately 47’ (119 cm). Center
the insertion
lace over the straight line of points already drawn and pin the
insertion lace in
place.
Cut
a piece of 1” (2.5
cm) wide insertion lace of approximately 47’ (119 cm). Center
the insertion
lace over the straight line of points already drawn and pin the
insertion lace in
place.
 Straight
stitch along each side of the header lace. On the wrong side of
the fabric carefully cut along the straight line. Do not cut the fabric
or the
lace.
Straight
stitch along each side of the header lace. On the wrong side of
the fabric carefully cut along the straight line. Do not cut the fabric
or the
lace.
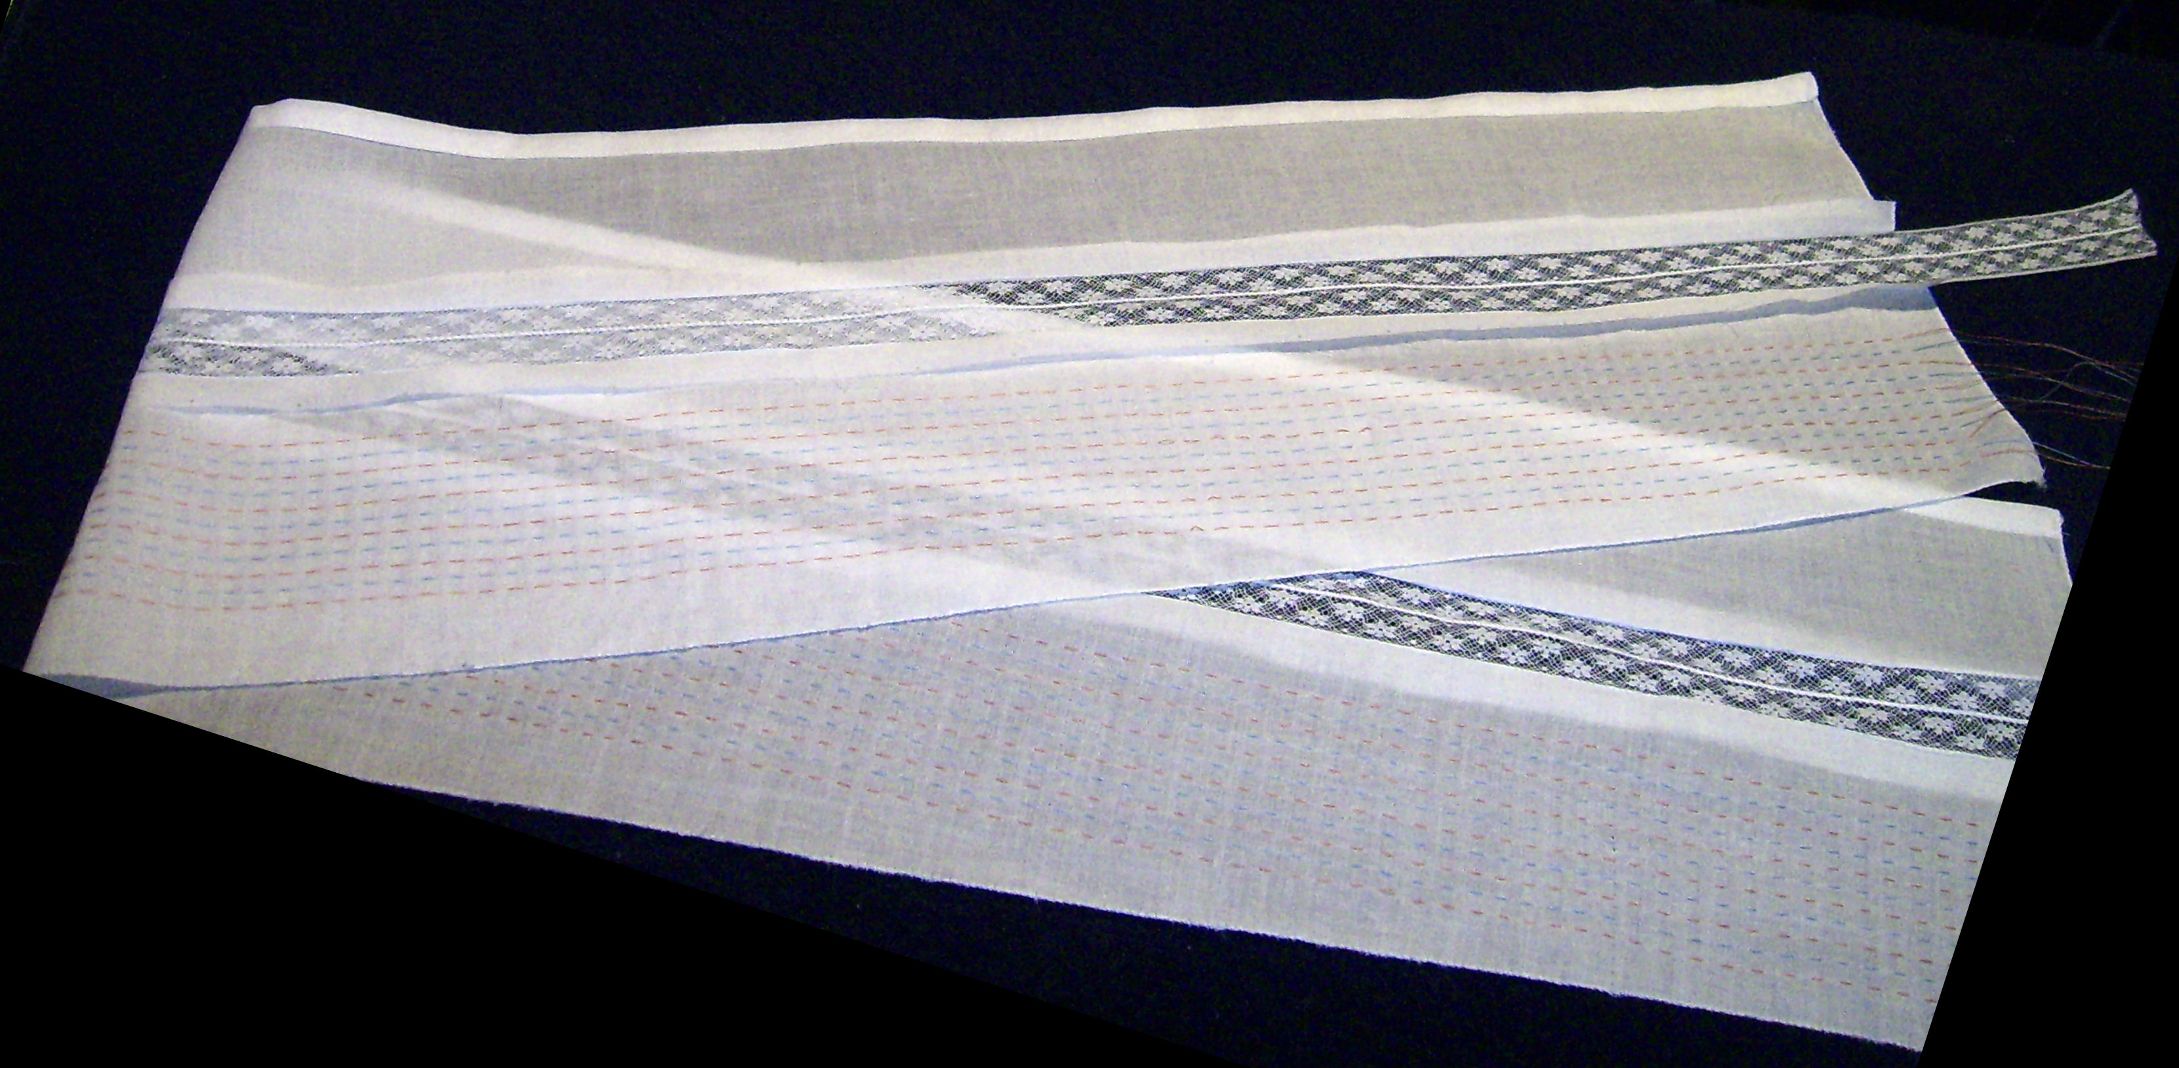
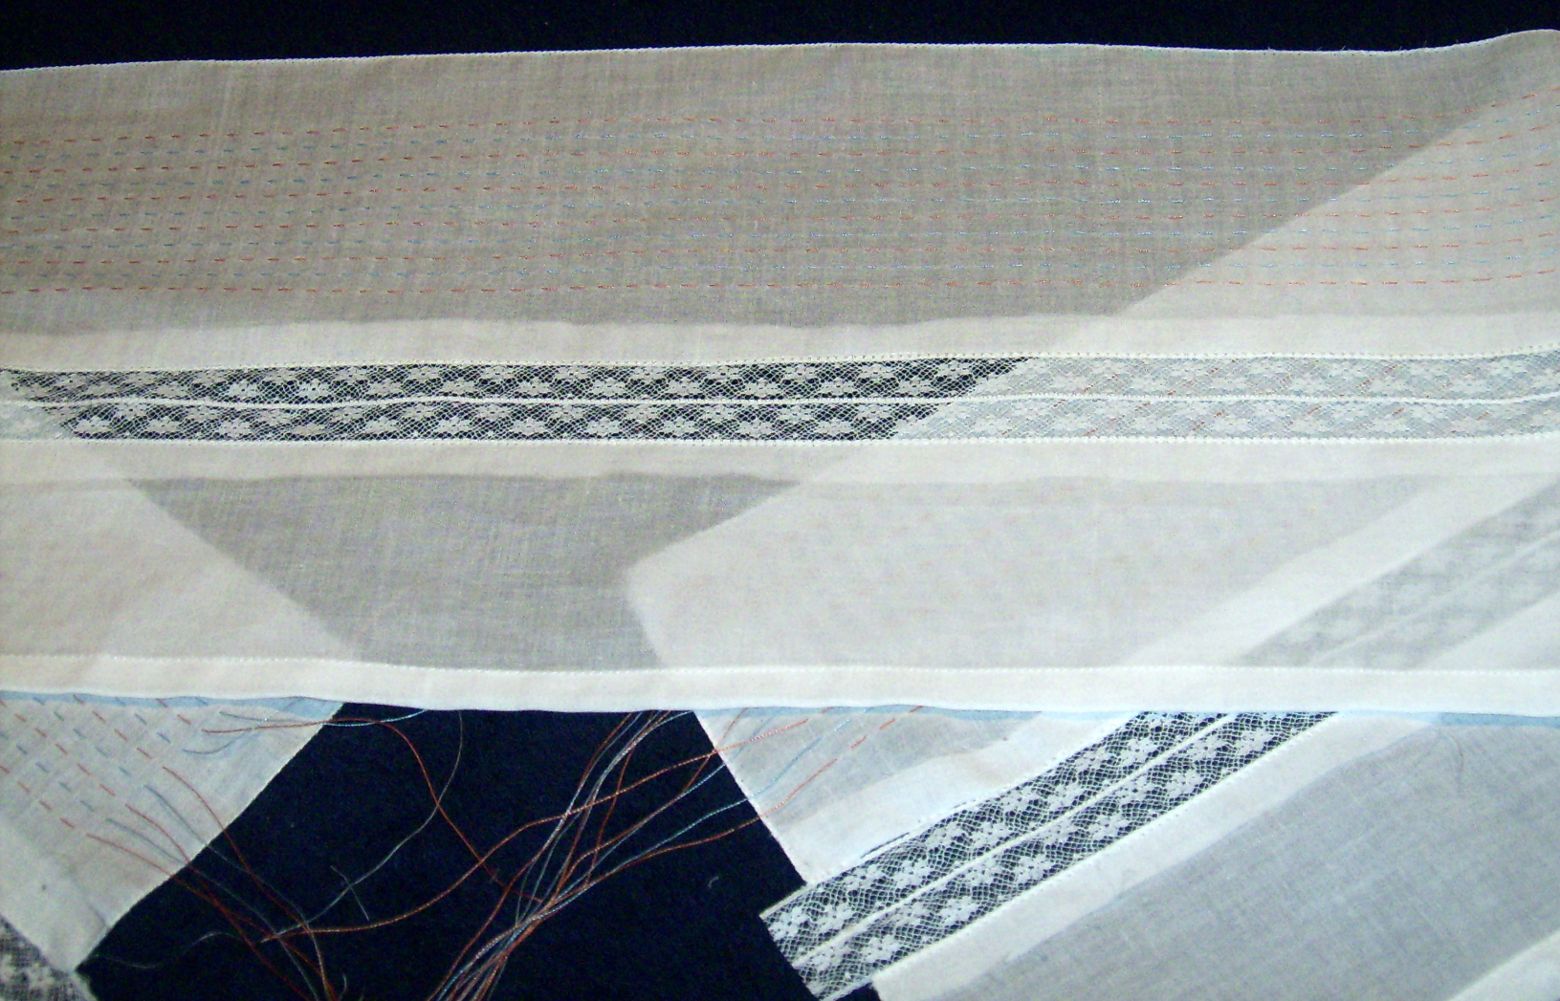
Press open. On the right side of the fabric, use zigzag or pin stitch stitch again along each side of the insertion lace header. Press.
 On the wrong
side of the fabric, trim the excess fabric along insertion lace edge
approximately 1/8” (3 mm) from the seam. Do not cut the lace,
the bonnet, or
the stitches. Press. An alternative to this enhancement is the use two
(2)
lengths of ½” (13 mm) wide insertion lace attached
to each side of a band of ¼”
(7 mm) wide double sided pure silk ribbon.
On the wrong
side of the fabric, trim the excess fabric along insertion lace edge
approximately 1/8” (3 mm) from the seam. Do not cut the lace,
the bonnet, or
the stitches. Press. An alternative to this enhancement is the use two
(2)
lengths of ½” (13 mm) wide insertion lace attached
to each side of a band of ¼”
(7 mm) wide double sided pure silk ribbon.
Sewing the Pintucks
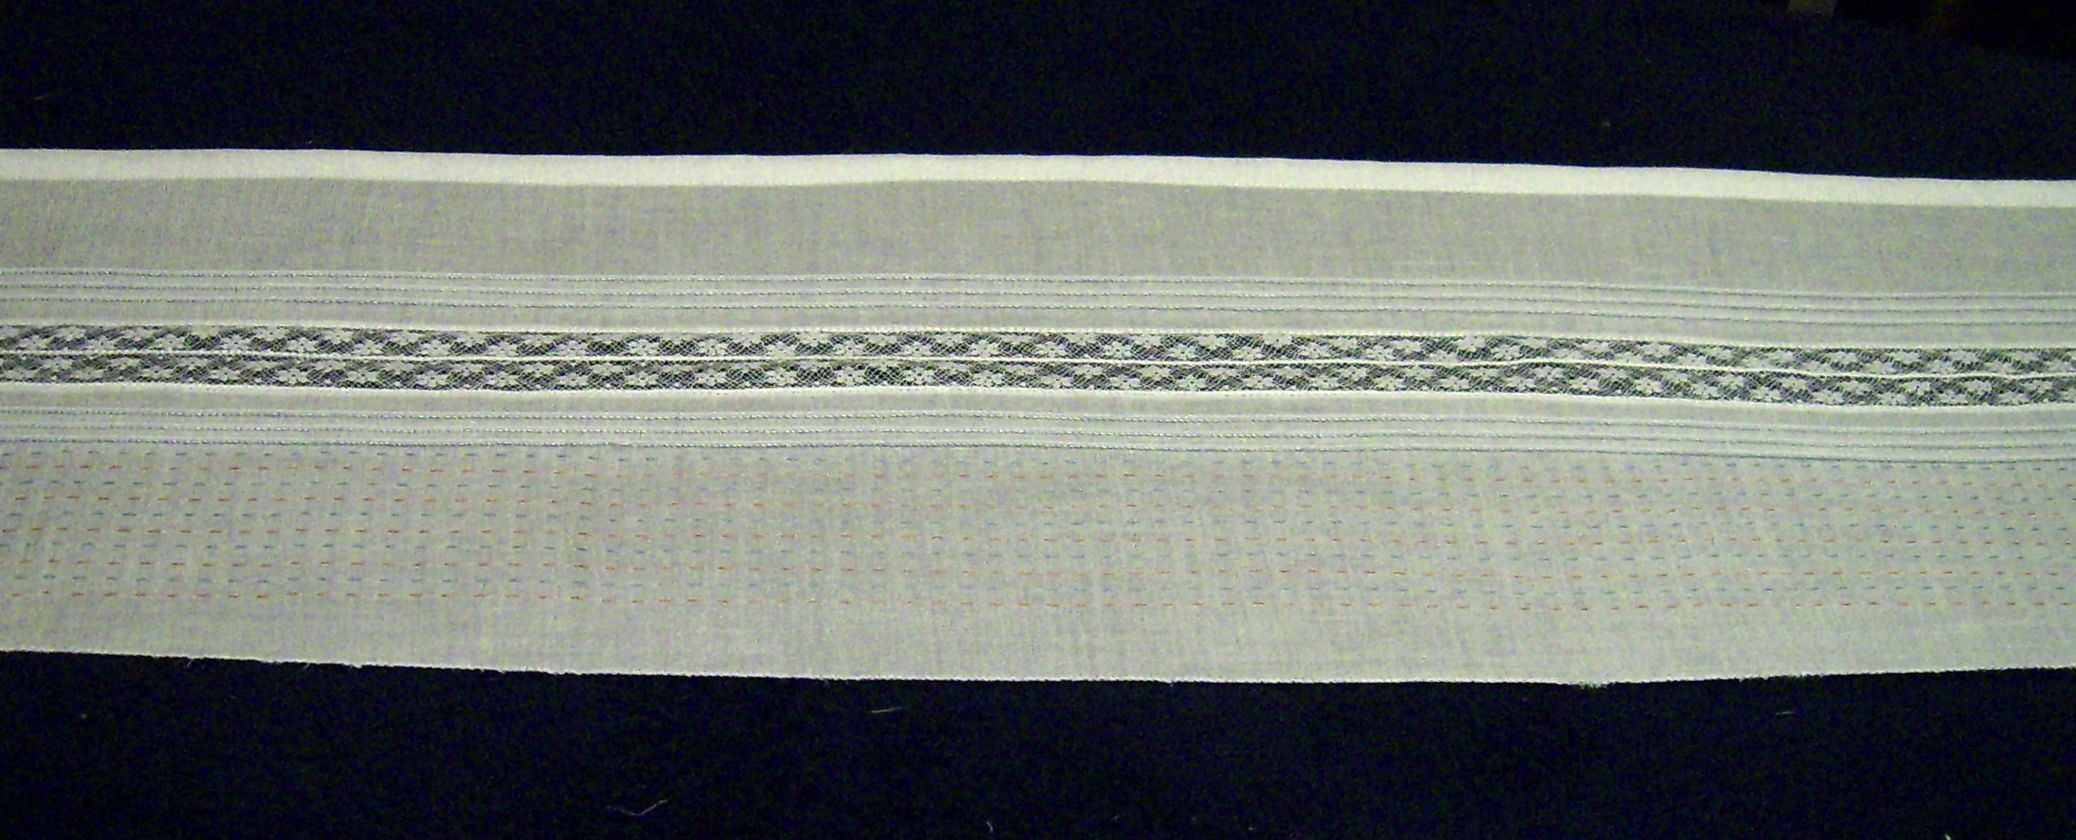 Using
the short
straight stitch and double (or twin) needles stitch three (3) rows of
corded
pintucks on each side of the insertion lace. Start by sewing the
pintuck
closest to the insertion lace. Position this pintuck approximately
½” (13 mm)
from the lace header. Click here to see ‘How to Sew Corded
Pintucks’.
Using
the short
straight stitch and double (or twin) needles stitch three (3) rows of
corded
pintucks on each side of the insertion lace. Start by sewing the
pintuck
closest to the insertion lace. Position this pintuck approximately
½” (13 mm)
from the lace header. Click here to see ‘How to Sew Corded
Pintucks’.
Attaching the Edging Lace
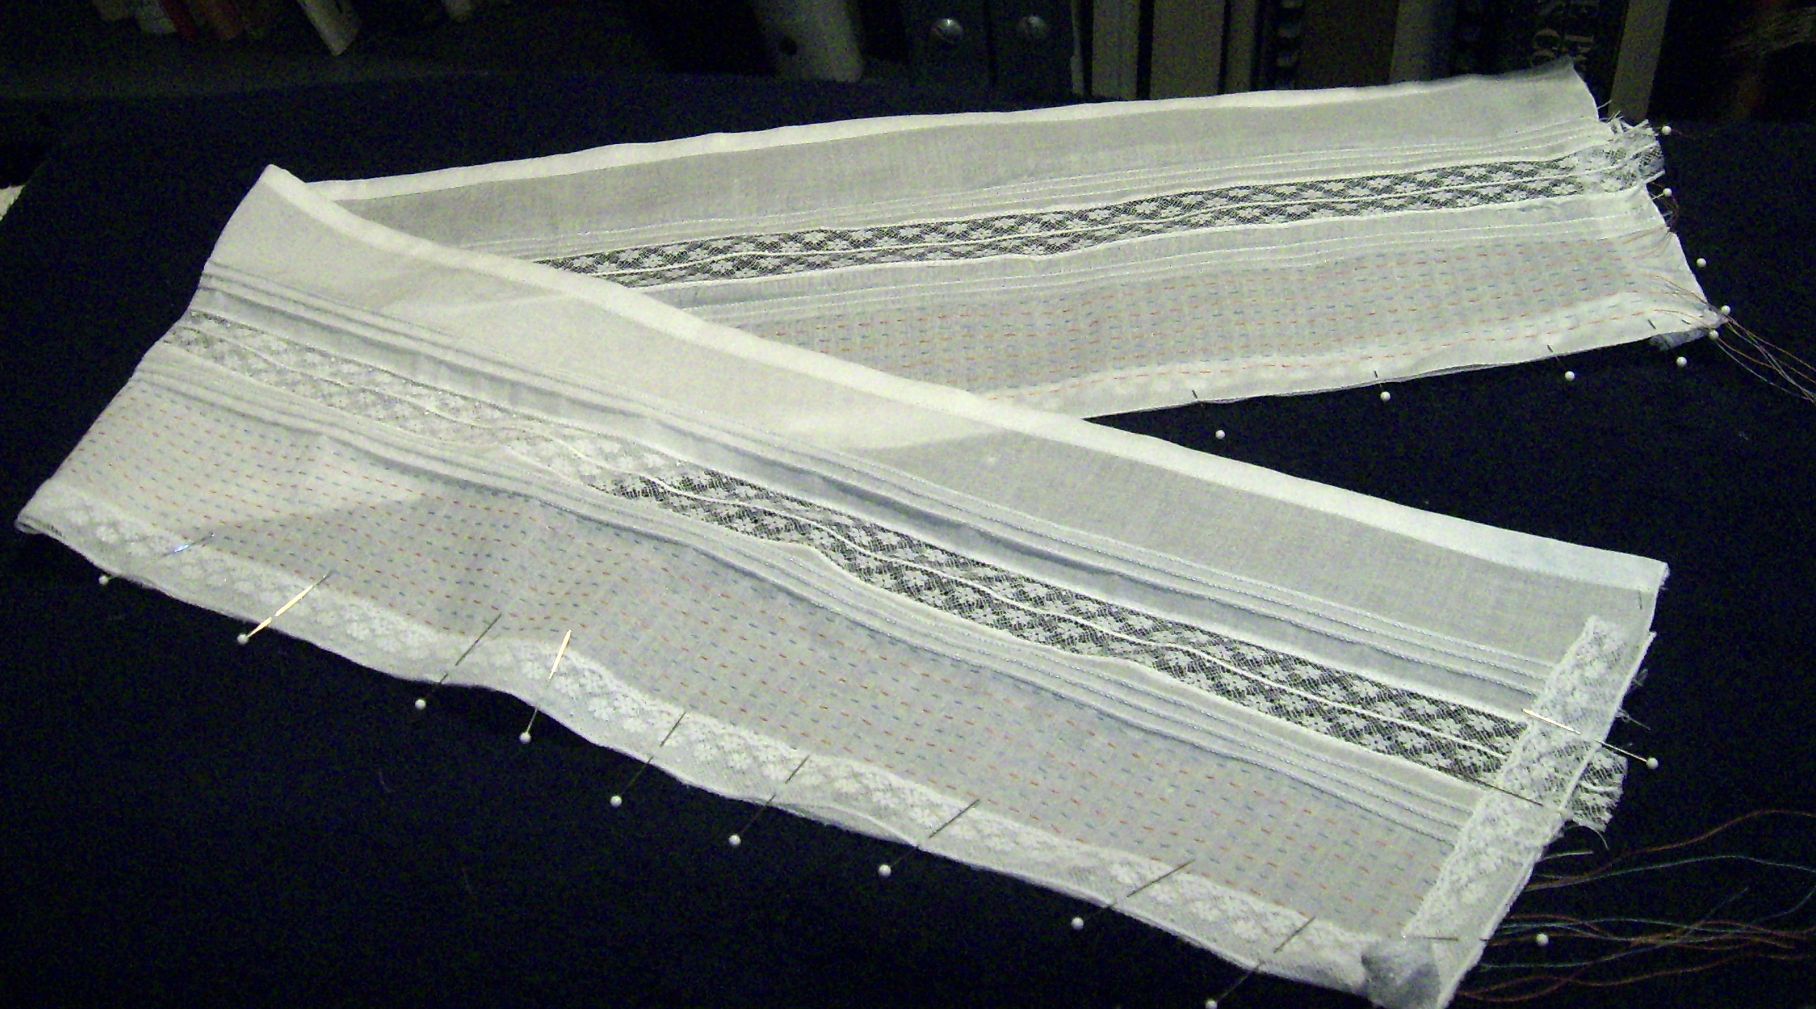
 Cut
a piece of 1” (2.5
cm) wide edging lace of approximately 60” (152 cm). Starch
and press carefully
not to stretch it. Place right sides together, matching the lace edge
and the
whipped edge of the fabric. Starting at one of the short edges and at
about
3.5” (9 cm) from the crown edge seam and leaving a tail of
minimum 1” (2.5 cm)
of edging lace, attach the lace to the fabric. Use zigzag stitch such
that the
sewing machine needle zigs in the lace header and zags just outside the
edge of
the fabric. At each of the corners of the brim edge and the short edge,
pleat
the edging lace to make two (2) ½” (2.5 cm)
pleats. These pleats are done by
folding approximately a total of 1” (2.5 cm) of the lace. One
of these pleats
is to be done just before the corner, that is, on the short edge, and
the
second pleat just after, that is, on the brim edge. End the attachment
approximately 3.5” (9 cm) from the crown edge seam. Leaving a
tail of a minimum
of 1’ (2.5 cm) edging lace.
Cut
a piece of 1” (2.5
cm) wide edging lace of approximately 60” (152 cm). Starch
and press carefully
not to stretch it. Place right sides together, matching the lace edge
and the
whipped edge of the fabric. Starting at one of the short edges and at
about
3.5” (9 cm) from the crown edge seam and leaving a tail of
minimum 1” (2.5 cm)
of edging lace, attach the lace to the fabric. Use zigzag stitch such
that the
sewing machine needle zigs in the lace header and zags just outside the
edge of
the fabric. At each of the corners of the brim edge and the short edge,
pleat
the edging lace to make two (2) ½” (2.5 cm)
pleats. These pleats are done by
folding approximately a total of 1” (2.5 cm) of the lace. One
of these pleats
is to be done just before the corner, that is, on the short edge, and
the
second pleat just after, that is, on the brim edge. End the attachment
approximately 3.5” (9 cm) from the crown edge seam. Leaving a
tail of a minimum
of 1’ (2.5 cm) edging lace.
Preparing for Smocking
 With
wrong side up
and on one of the short edge, tie the pleating threads one (1) by one
(1) or two
(2) by two (2). When using a couple of pleating threads, do this tie
five (5)
times and tie the last thread by itself. On the other short edge gather
the
pleating threads so that the length of the fabric is about
10” (25 cm) from
pleating thread to pleating thread. Tie the 11 (9) threads in one
single knot,
tie each thread individually, or tie these threads two (2) by two (2)
as
desired.
With
wrong side up
and on one of the short edge, tie the pleating threads one (1) by one
(1) or two
(2) by two (2). When using a couple of pleating threads, do this tie
five (5)
times and tie the last thread by itself. On the other short edge gather
the
pleating threads so that the length of the fabric is about
10” (25 cm) from
pleating thread to pleating thread. Tie the 11 (9) threads in one
single knot,
tie each thread individually, or tie these threads two (2) by two (2)
as
desired.
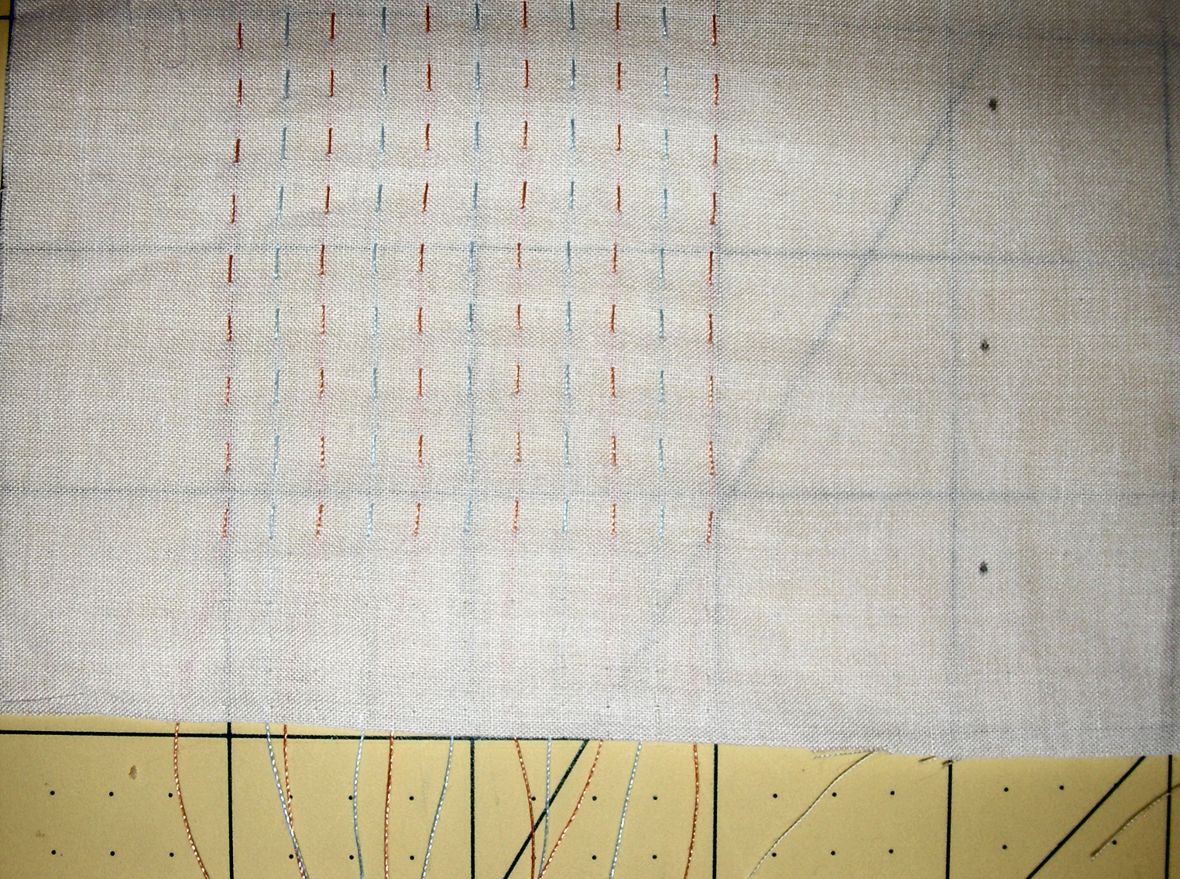
Smocking
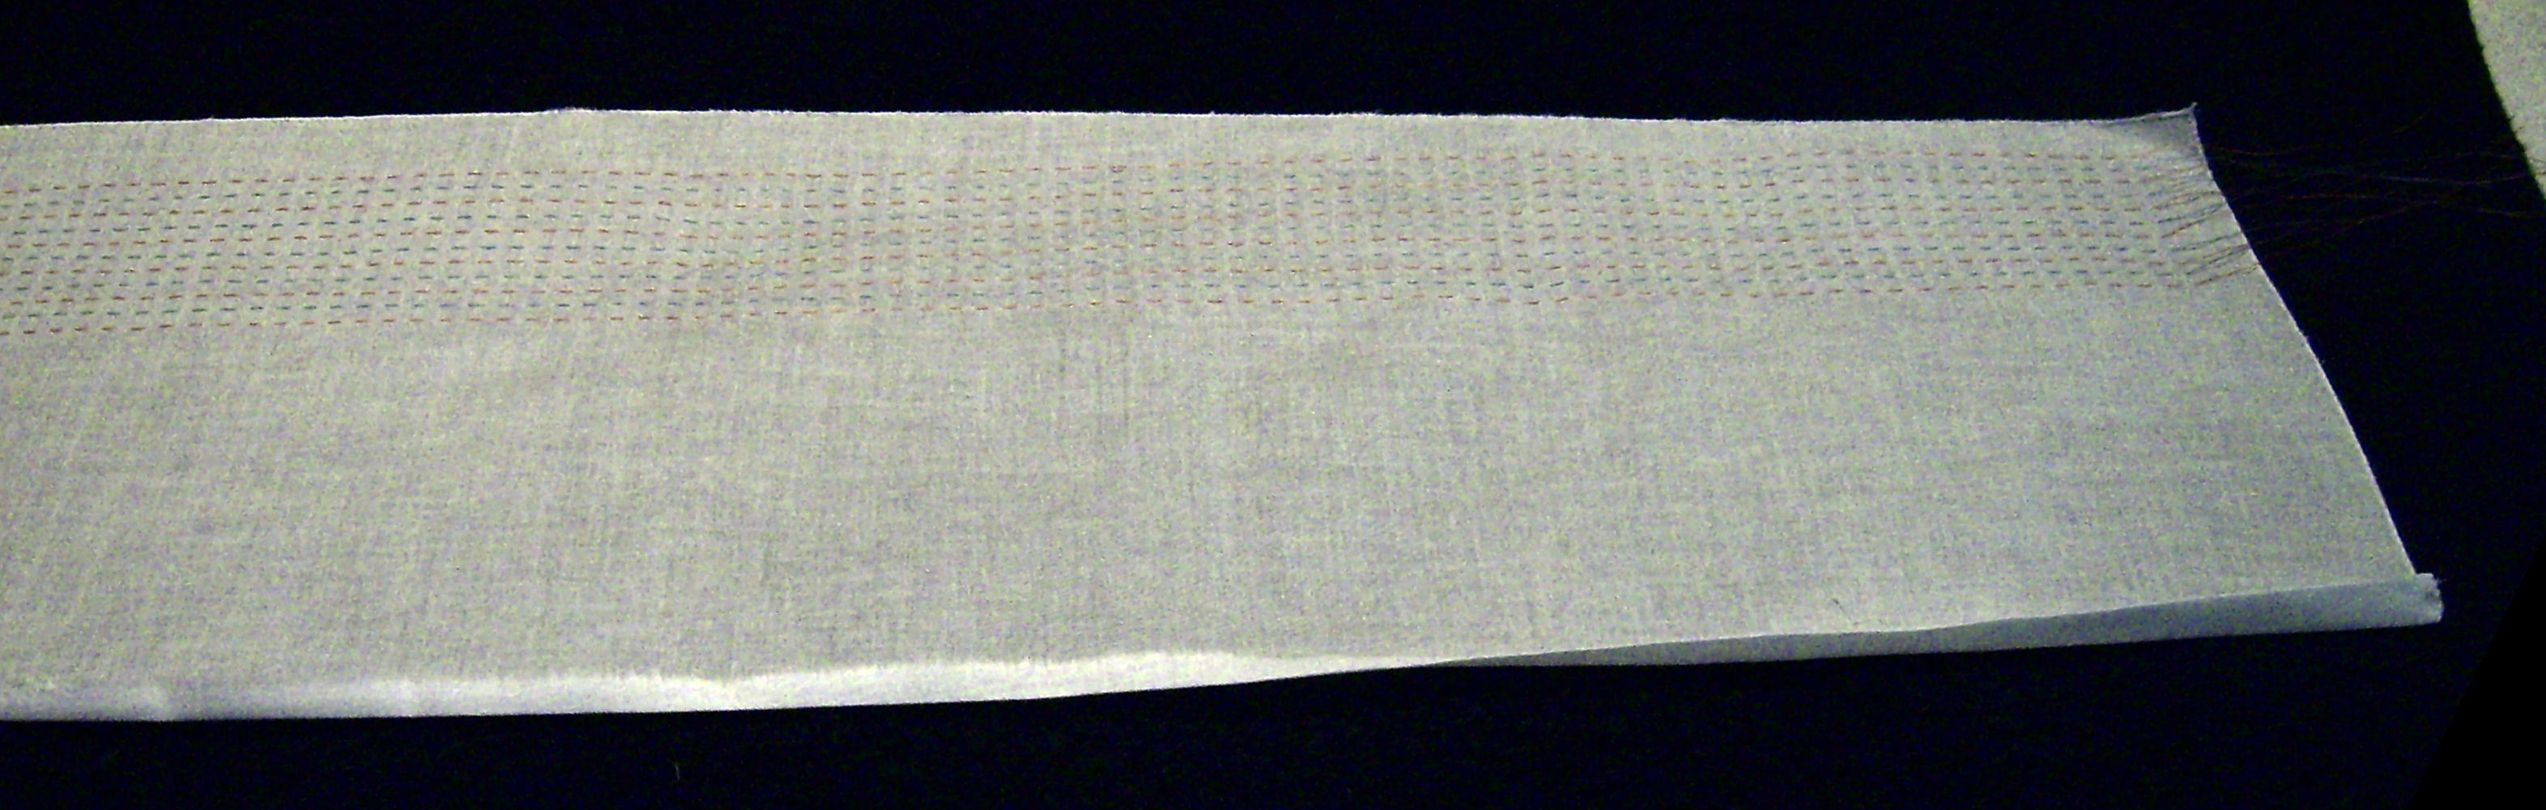
Smock the pattern of choice. Do at least two (2) rows of back smocking to hold the bonnet’s shape.
 Remove
the pleating threads and block the smocked area to a
length (from ear lobe to ear lobe) according to the preceding size
table. Enhance
the smocking by adding bullion knots roses, bullion roses, or cast-on
stitch
flowers, if desired.
Remove
the pleating threads and block the smocked area to a
length (from ear lobe to ear lobe) according to the preceding size
table. Enhance
the smocking by adding bullion knots roses, bullion roses, or cast-on
stitch
flowers, if desired.
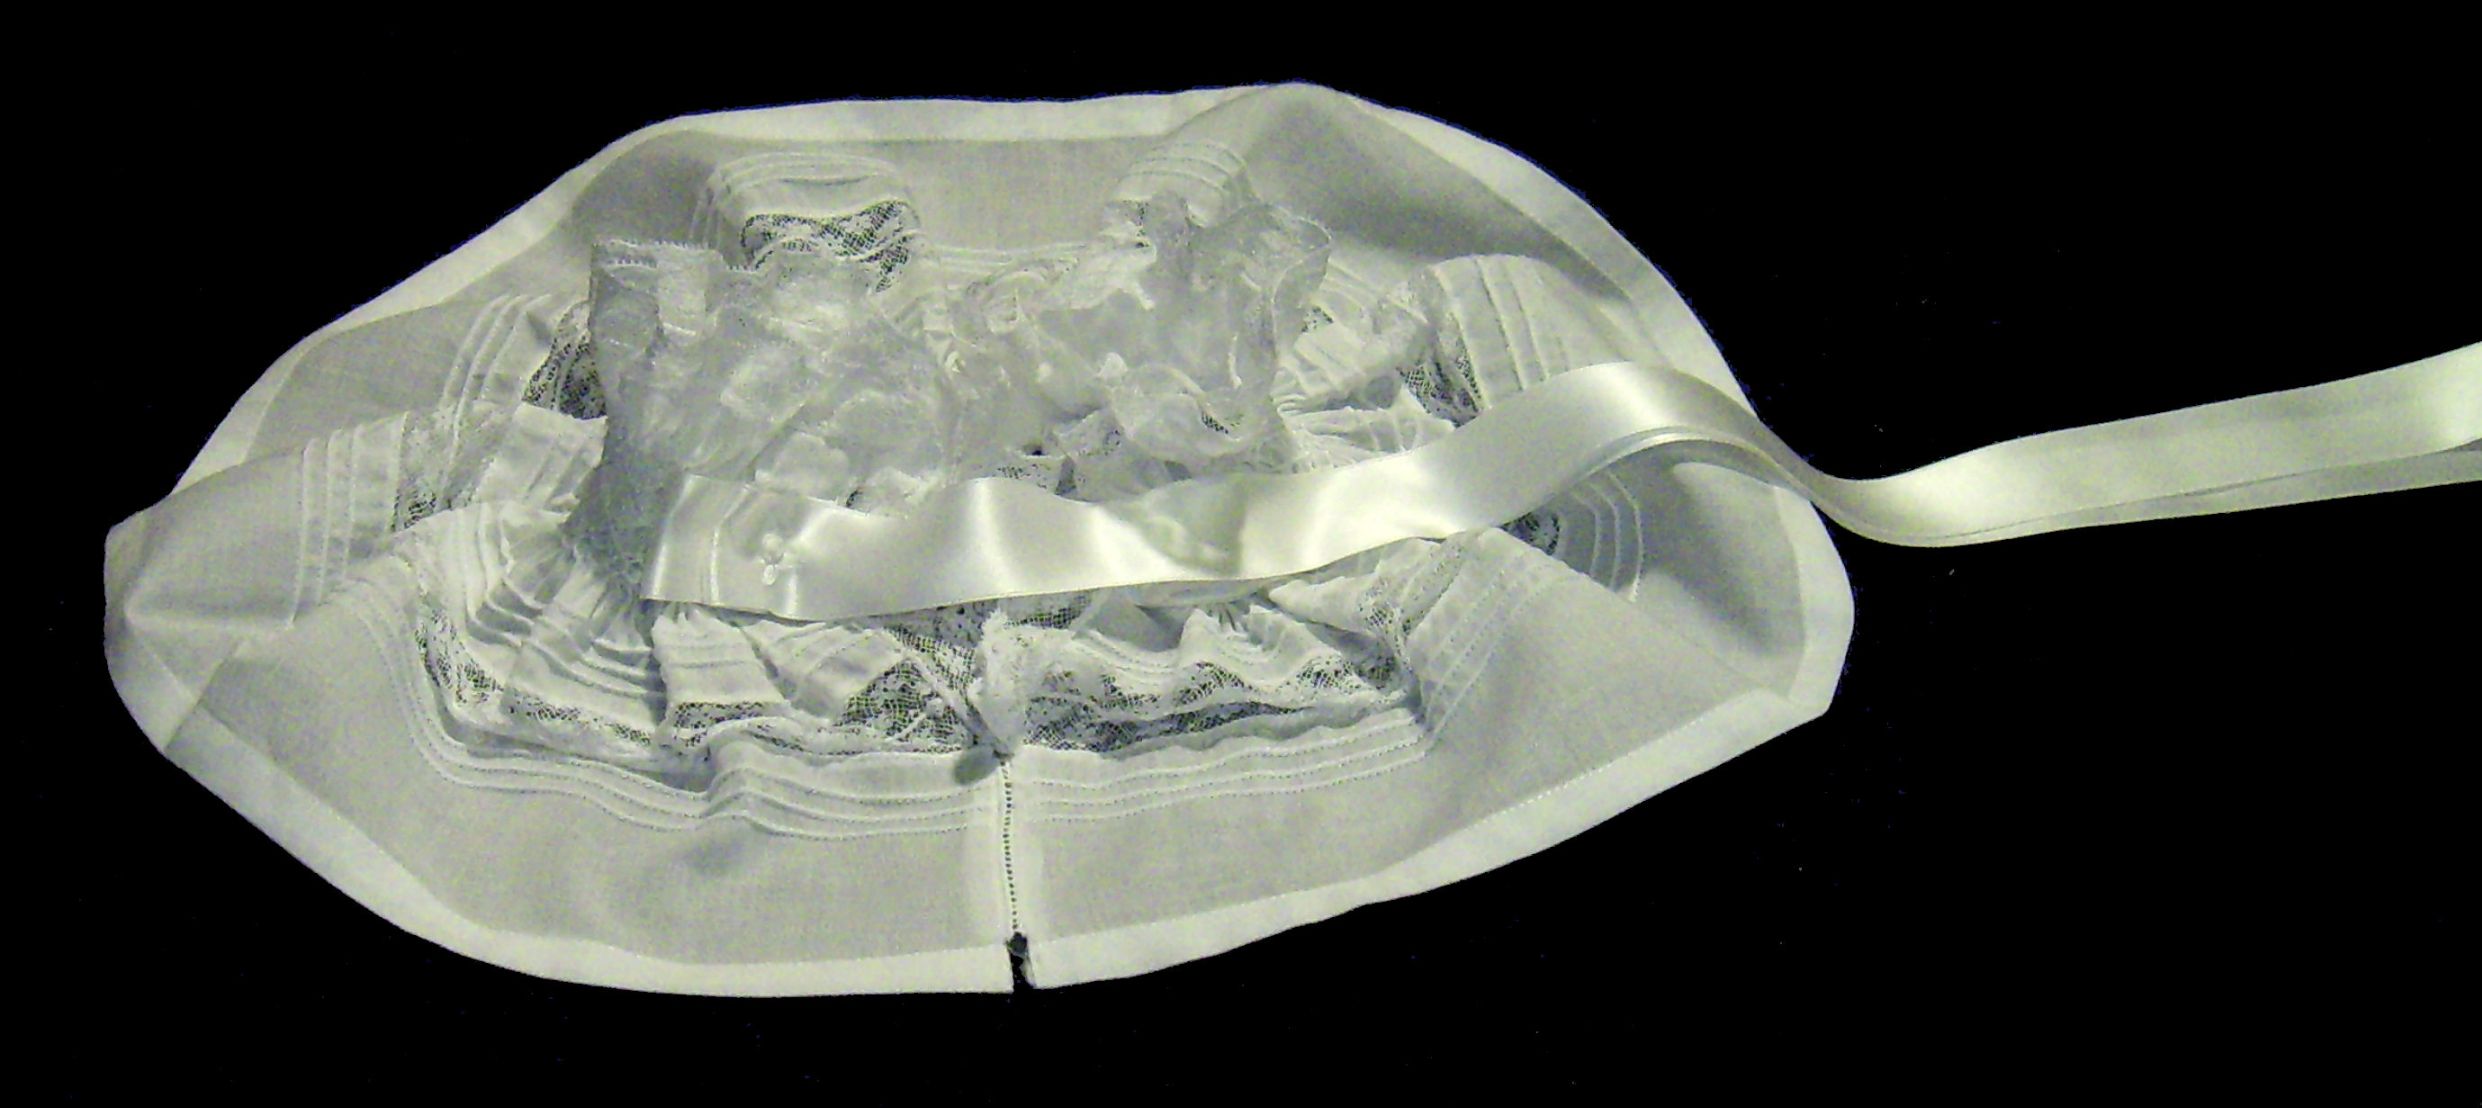
Attaching the under the Chin Ribbon
 On
the right side of
the bonnet, attach each end of a 60” length of 1”
(2.5 cm) wide double sided
pure silk ribbon to each short side of the bonnet.
On
the right side of
the bonnet, attach each end of a 60” length of 1”
(2.5 cm) wide double sided
pure silk ribbon to each short side of the bonnet.
Fold the ends of the ribbon once or twice as desired and place this fold in the center and at the beginning of the smocked stitches.
To attach the under the chin ribbon make three (3) very small stitches to secure the beginning of the seam. Set the machine to the largest stitch. Make one stitch forward. Reverse the stitch and make one stitch. Repeat this procedure two (2) more times to have a total of seven (7) large stitches. Use an even number of large stitches so that the beginning and end of the under the chin ribbon attachment is at opposite sides. End with three (3) very small stitches to secure the end of the seam.
On these stitches, add a ribbon rosette, or a small bullion knot rose on each side of the bonnet as desired.
Note: One advantage of attaching the under the chin ribbon after the bonnet is blocked is that the bullion knot roses on the smocked area and the bullion knot roses on each side of the under the chin ribbon may be done repetitively.
Closing the Back
 With
right sides together and starting just at the end of
the crown case seam, attach a piece of entredeux (approximately
3.5” (9 cm) to
each side of the short edges. Use a short straight stitch to attach the
edge of
the entredeux batiste and the edge of the whipped fabric. Press. This
piece of
entredeux connects the baby’s bonnet at the back neck edge
and should end just
where the edging lace is attached to the rectangle. With right side
together and
matching edges use a zigzag stitch to attach the two (2) tails of
edging lace
and trim the excess. Finish the back of the bonnet by hand stitching
the center
of the entredeux to the lace seam. This finishing seam will take two
(2) or
three (3) hand stitches.
With
right sides together and starting just at the end of
the crown case seam, attach a piece of entredeux (approximately
3.5” (9 cm) to
each side of the short edges. Use a short straight stitch to attach the
edge of
the entredeux batiste and the edge of the whipped fabric. Press. This
piece of
entredeux connects the baby’s bonnet at the back neck edge
and should end just
where the edging lace is attached to the rectangle. With right side
together and
matching edges use a zigzag stitch to attach the two (2) tails of
edging lace
and trim the excess. Finish the back of the bonnet by hand stitching
the center
of the entredeux to the lace seam. This finishing seam will take two
(2) or
three (3) hand stitches.
Closing The Crown
Run approximately 24”
(61 cm) of 1/8" (3 mm) wide double faced pure silk ribbon through the
casing.
Draw up the ribbon to form a circle in back and tie in a bow. The size
of this circle may vary to allow for minor size
adjustments.
Note: These instructions include interchangeable steps. For
instance closing the back and attaching the under the chin ribbon may
be done
in reverse order. For simpler bonnets omit the edging lace, the
insertion lace,
and/or corded pintucks. Further simplification include the omission of
edging
lace from the neckline replacing it with a hem edge. Closing the bonnet
at the
back omitting the entredeux is also a simplification to be considered.
Printing of these instruction for personal use to make and
sell bonnets is allowed. The selling of these instructions or its
inclusion in
any collections for sale is prohibited. When teaching a class, the use
of these
instructions is allowed only when the class is taught 'free of charge'.
These permissions and prohibitions include the individual pictures. (c)
2010. All rights remain with Bumba
Bella Boutique.
Made-to-order custom made dresses

If you like our dresses and have something particular in mind, a different color, a different size or a special request, we will be pleased to make a hand smocked dress for you for our normal price plus any additional fully discussed costs for specialty fabrics or yarns required.
Special orders take approximately three (3) weeks.
Bumba Bella accepts rush orders to be made within seven (7) days [exclusive of shipping delays] for an additional cost of 20%.
Shopping Basket
| Items: | 0 |
| Subtotal: | $0.00 |
Specials
Your Pictures Wanted
of your child wearing an item sold
by Bumba Bella and allow us to use
the picture on our web site, we will
give you a REFUND of 25% credited
on the credit card you used to
purchase the item.
CLICK HERE FOR UPLOAD FORM