Search by Keyword
Product Categories
Site Map
 If you are allergic to cigarette smoke, you need not worry about one of our dresses smelling like cigarette smoke
|

Step by step instructions for making a bishop dress
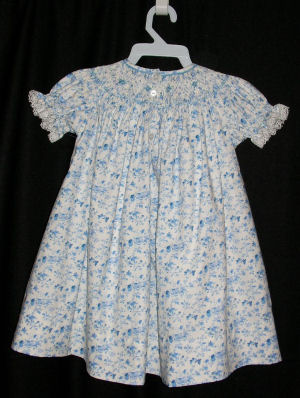
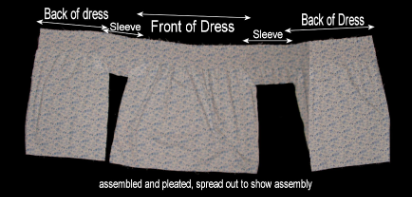
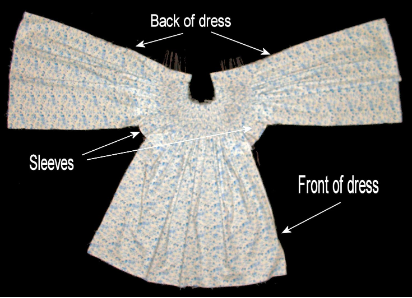
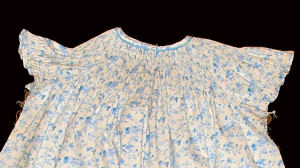
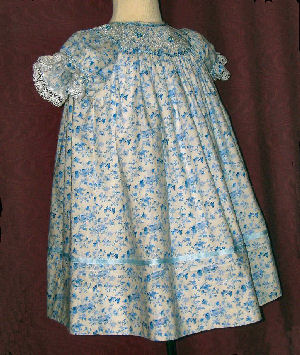
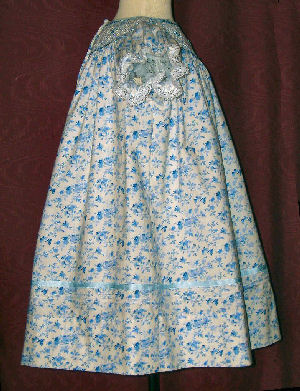
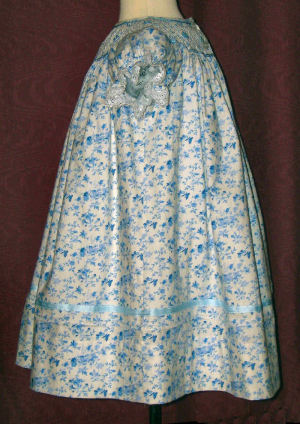
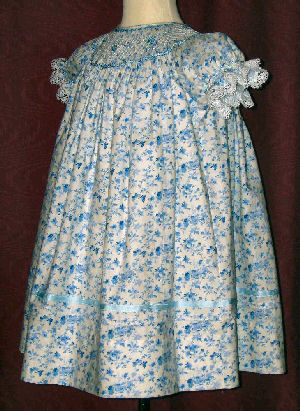
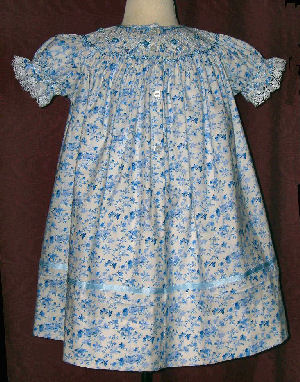
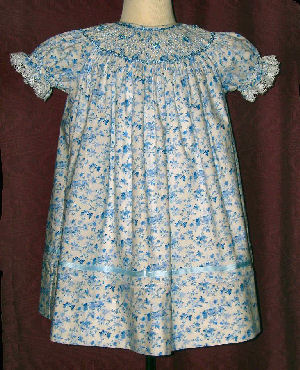
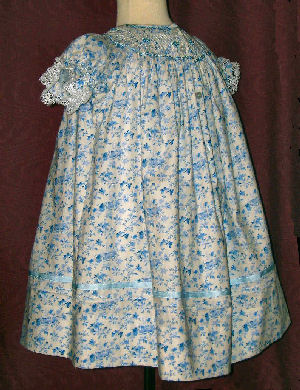
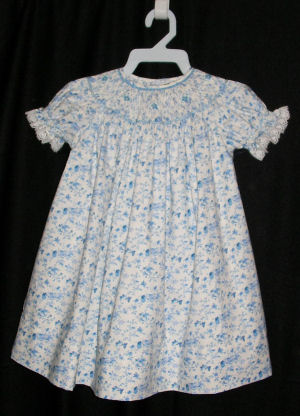 How To Make a Bishop Dress (Click on any picture to see it better.)
Fabric Preparation
Preshrink the fabric before cutting by submerging the fabric in a five (5) gal bucket partially filled with very hot water and a few drops of a mild liquid laundry soap.
Agitate the cloth up and down several times to make sure that all of the layers of cloth are well wetted. Let the fabric soak in the water for about 20 minutes.
Remove the soapy water. Rinse the fabric thoroughly, remove it from the water and place it on a clean white towel to air dry.
Pattern Preparation
Press the paper pattern to remove wrinkles. Use a dry iron to avoid damaging the pattern paper.
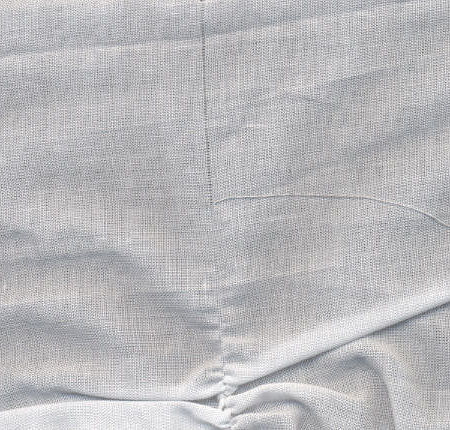 Cutting the cloth
For the finished bishop dress to hang correctly, make sure that the fabric is straight, with the grainline parallel to the salvage.
To determine where to cut crossgrain, pull a crossgrain thread to mark the fabric.
Cut along the pulled thread line. Fold the fabric lengthwise, smoothing the fold and aligning the selvages.
The fabric is 'off grain' if the two (2) layers are not aligned. If the fabric is off grain, adjust by grasping the fabric at opposite diagonal corners and pull gently, making sure to hold and pull in the opposite direction from the distortion. Check the alignment and repeat until the grains line up.
With the right sides of the fabric together aligning the selvages, pin the patterns to the fabric and cut the back, front and sleeves and cut the pieces.
 Prepare the Sleeves
Using pleated threads that are approximatelly two (2) inches longer than the width of the sleeves, pleat the cuf of the sleeves and flaten the pleated edge. Roll and whip the cuff and attach lace if desired. (note: this picture show the lace installed AFTER many other steps, but now is the best time to install the lace.)
Join the back, sleeves, and front of the dress
Do not waste time sewing with cheap, or old dry thread on either conventional machines or sergers (overlock machines). Old thread may be weak thread.
Join the sleeves to the front and back using tiny French seams (1/8”). Use a cloth marking pen to transfer the seam allowance, usually 5/8”, on the right side of the fabric, front and back.
To make the French seams, stay stitch a 5/8” seam with the wrong sides of the fabric together.
Press the seam. Trim the seam so that there is a 1/16” seam allowance.
To trim the seam(if you are right handed), use your left hand to hold the seam and your right hand to hold the scissors. Slip the lower blade of the scissors under the raw edges. With both palms up and the scissors almost parallel to the seam line, trim close to the seam line.
Fold the fabric along the seam line with the right sides of the fabric together. Sew a new 1/8” seam from the folded seam edge. Press the seam.
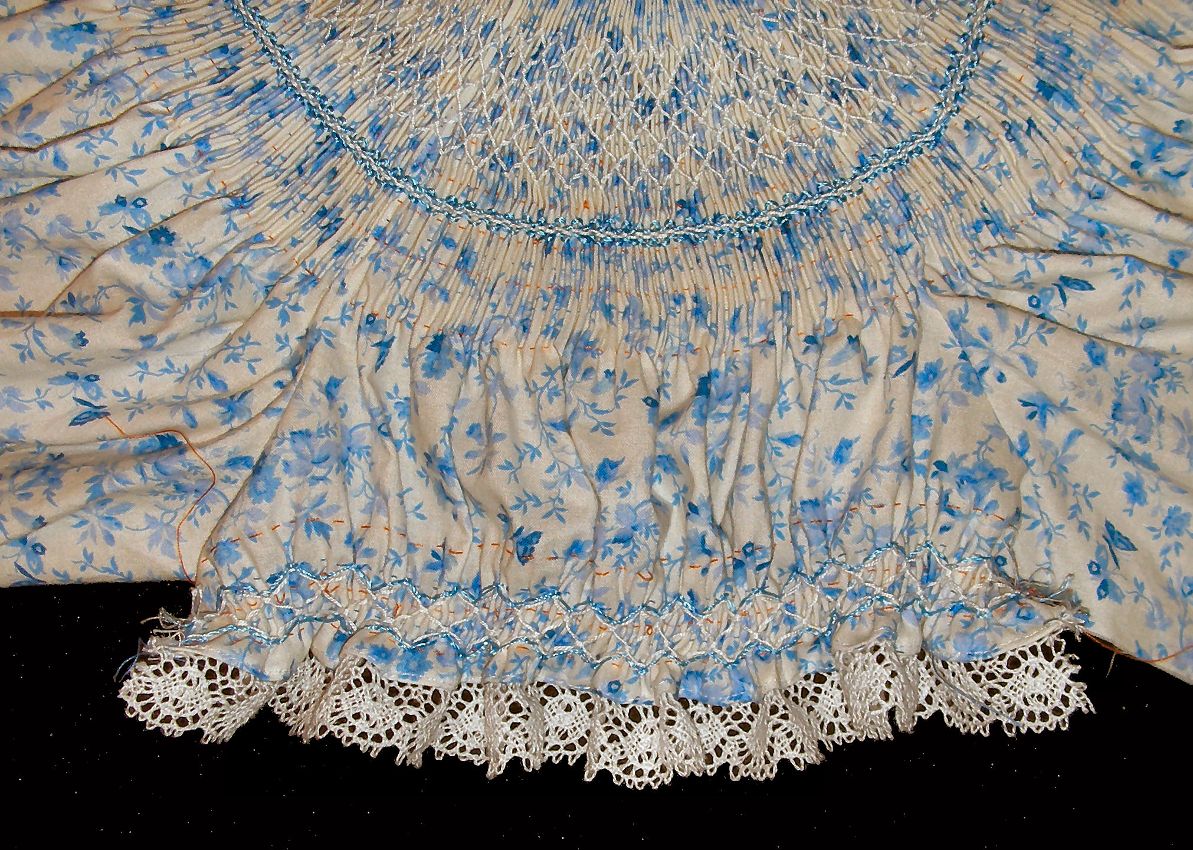
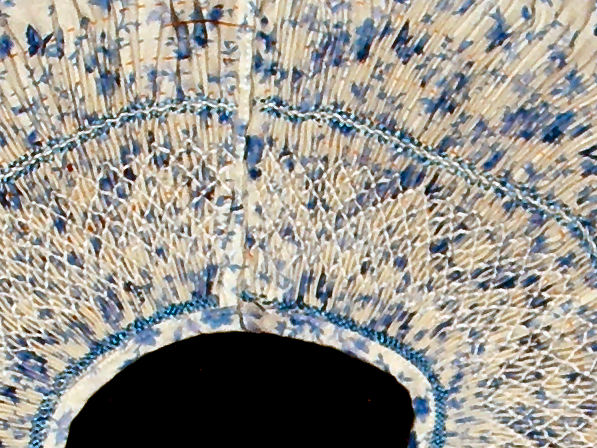
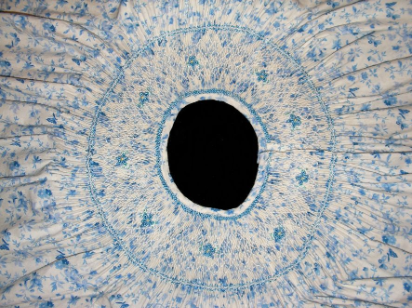
Pleat the fabric around the neckline. (For additional information on how to pleat see How to Make a Hand Smocked Baby's Bonnet)
 When pleating across the French seams, turn the knob of the pleater very slowly, releasing pressure and removing the pleated cloth from the pleating needles often to avoid breaking needles.
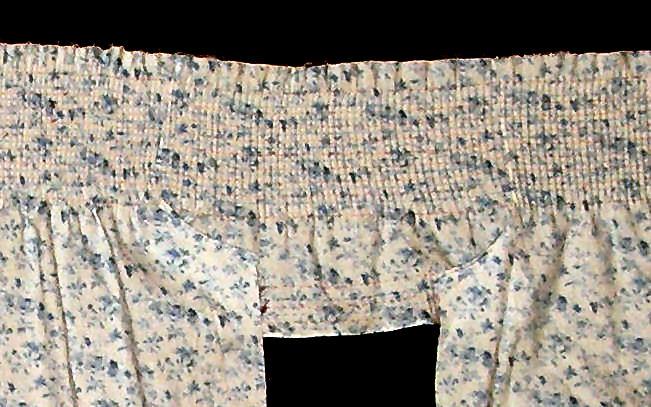 Remove the pleating threads from the back seam allowance. Knot the pleating threads together at each end to avoid accidently loss of pleats.
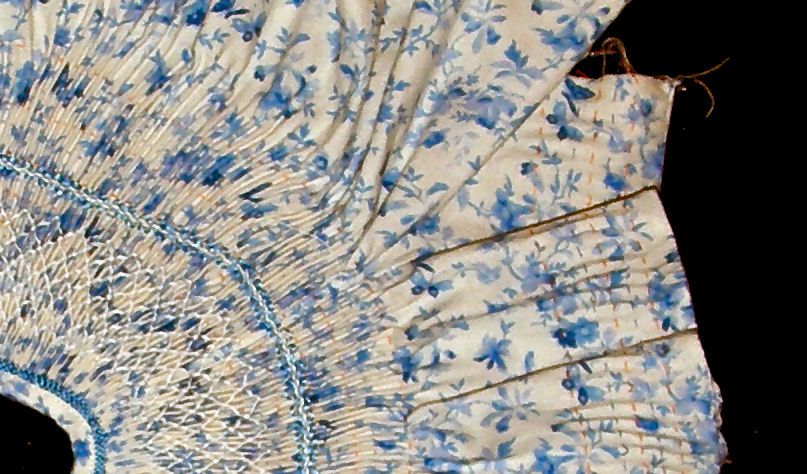
Continuous Placket
In the bishop dress a continuous placket is used.
Before placing the placket, remove the pleating threads in the back of the bishop dress from the seam allowance.
Fit the continuous placket to the bishop dress before joining the bias strip that goes around the neckline. The placket should be long enough so that the bishop dress slips easily over the shoulders. The placket in the bishop dress needs to be approximately 5 ½” long. A firm finish at the lower end of the placket is very necessary as this point will sustain the most stress and wear the greatest. Cut a strip of fabric, twice the length of the placket plus 1”.
For example for a 5 ½” placket, cut a strip of fabric 5 1/2" times 2 plus 1", equals 12” long and twice the width of the finished facing, allowing ¼” on each side for the seams. Fold the placket strip lengthwise, press and mark the middle point.
At the dress back opening, place the right side of the placket strip against the wrong side of the bishop dress and align the placket strip so that the middle point of the placket strip coincided with the back French seam.
With the right side of the bishop dress on top, stitch the placket strip to the edge of the opening, starting at the edge of the smocked round yoke and using a very short stitch.
This seam starts ¼” wide and goes to the point where the French seam starts. Pivot the sewing machine needle at this point, set the sewing machine at a length of zero and stitch two (2) stitches. Set the machine back to a very short stitch and finish attaching the placket by turning on the other side of the opening to finish the seam again at ¼” wide.
Keep the seam width ¼” wide on the placket strip while attaching it to the bishop dress.
Turn the un-sewed edge of the placket strip onto the right side of the dress. Press the seam and a ¼” seam allowance.
Fold the placket over the right side of the dress and stitch-on-the-ditch.
In preparation for the bias strip to be sewn around the neck, fold in and stitch in place, around the neck line, the side of the placket where the buttonholes are going to be made, leaving the other side straight.
How To Cut The Bias Strip That Goes Around The Bishop Dress NecklineWith the right side up, spread and smooth the fabric so that the cross-grain is perpendicular to the lengthwise grain, which rungs parallel to the selvage.
To determine the width of the bias strip, begin with the measurement for the finish binding, add 1”, and double the total.
For example, for the bishop neckline bias, the finished bias will be ¼” wide, the calculation is as follows: ¼” + 1” = 1 ¼”, double this total gives 2 1/8”. Cut a strip of 2 1/8” wide. Avoid having a seam on the bias strip, particularly on the neckline, by cutting the bias strip for the neckline in one piece. With wrong sides together fold the bias strip lengthwise, match the raw edges, and press the folded edge, stretching the strip slightly.
Remember that the bias strips narrow slightly when you press and stretch them. From the folded edge, measure twice the finished width plus 1/8”, for ¼” bias, measure 5/8”. With the right side up chalk-mark the bias width of 5/8” from the fold. Trim the raw edges. To trim with a serger measure and chalk-mark the finished width and run a seam over the marked line. Remove all of the threads from your serger. Place the seam under the serger foot so that the seam aligns with the knife.
Always keep your fingers away from the serger knife and needles. ALSO, be sure to remove all pins before they reach the cutting knife!
Check the relationship of the seam to the serger foot to establish a sight line. Trim away the excess. Fold one raw edge in to meet the fold at the center and press. Repeat to press the other side.
 How To Join The Bias Strip Ends At The Bishop Dress Opening
Use a body form, a template, or the pattern to shape the pleated fabric around the neck and shoulders by separating or gathering the pleats around the neckline and shoulders.
Avoid the turtle neck effect resulting from a neckline too short.
To separate or gather the pleats use the pleating threads. When determining the size of the neckline, take into account the width of the placket on the buttons side, as this side will stay straight and contributes to the length of the bias strip.
Around the neckline, trim the seam allowance to ¼”. Hand baste the bias strip in place before stitching to make sure the bias strip fits smoothly and the neckline is not too tight.
 When close to the bishop dress central back opening, stop hand basting the bias strip in place. Unfold the bias strip at the end of the opening and fold the right sides of the bias strip together. Align the folded edges of the bias strip and stitch a seam in the ends of the bias strip 1/16” from the edge of the bishop dress opening. This little seam may be sewn by hand with a short backstitch. Trim the seam allowance to ¼”
Repeat on the other side of the bishop dress opening. Turn the bias strip right side out. Clip the seam allowance making sure not to cut the seam. Fold the raw edges under, readjust the bias strip, and finish the basting in preparation for ditch-stitching. Hand baste the bias strip before ditch-stitching to prevent the under layers from shifting when they are stitched. When ditch-stitching use the zipper foot and, with the sewing machine needle to the right side, use a very short stitch.
Smocking The Round YokeStarting at the center of the front of the bishop dress stitch the selected smocking design. When smocking the yoke, remember that the turtleneck effect may be caused by tension when smock stitching too tight. When smocking around the round yoke, gradually, change the tension of the stitching as smocking each row away from the neckline so that the last row of the yoke is fairly loose to allow the bottom row to spread out nicely when the yoke is finished. Smock the cuffs also. Remove all the pleating threads. This is specially important when doing any enhancement of the smocking area such as stitching bullion knots roses.
With wrong side together, pin stitch the raw side edges of the bishop dress. Run a stay-stitch seam along the seam line. Press the seam. To trim the seam, use your left hand to hold the seam and your right hand to hold the scissors. Slip the lower blade of the scissors under the raw edges. With both palms up and the scissors almost parallel to the bishop dress seam line, trim close to the stay-stitching. Turn the bishop dress to the wrong side. Pin stitch along the seam and stay stitch. Press the seam.
Do not iron the smocked areas!
ButtonholesThe bishop dress has four (4) buttonholes, two (2) buttonholes on the smocked round yoke and two (2) in the back skirt. The two (2) buttonholes on the smocked round yoke are aligned with the neckline. The two (2) buttonholes on the skirt are parallel to the placket. The buttonholes are for 7/16” buttons.
To cut the buttonholes without clipping the stitches, carefully position one (1) straight pin on each end of the buttonhole and use scissor with very sharp points. Position one of the scissor points exactly where you want the button hole to begin, and close the scissors. Open them and work the point into the opening by repeatedly closing and opening. Once through all the layers of cloth, use the scissors carefully to cut along the button hole. Be sure to NOT cut too far. Test with a button to make sure it fits through the button hole.
Buttons
Use a hand-sewing needle and double strand of thread. Insert a pin between the thread and button to form a shank so that the button is not attached to the bishop dress too tightly. Sew four (4) 7/16” buttons neatly to the placket, hiding the thread knots under the button.
Hem
Use an erasable marking pen to mark the hem line of the bishop dress. Check the hem line to make sure it is straight. With the wrong side of the bishop dress up, fold up and press the hem. Press a ¼” from the raw edge of the bishop dress. With the right side of the bishop dress up, stay stitch this seam. Finish the hem by hand.

Made-to-order custom made dresses

If you like our dresses and have something particular in mind, a different color, a different size or a special request, we will be pleased to make a hand smocked dress for you for our normal price plus any additional fully discussed costs for specialty fabrics or yarns required.
Special orders take approximately three (3) weeks.
Bumba Bella accepts rush orders to be made within seven (7) days [exclusive of shipping delays] for an additional cost of 20%.
Shopping Basket
| Items: | 0 |
| Subtotal: | $0.00 |
Specials
Your Pictures Wanted
of your child wearing an item sold
by Bumba Bella and allow us to use
the picture on our web site, we will
give you a REFUND of 25% credited
on the credit card you used to
purchase the item.
CLICK HERE FOR UPLOAD FORM